
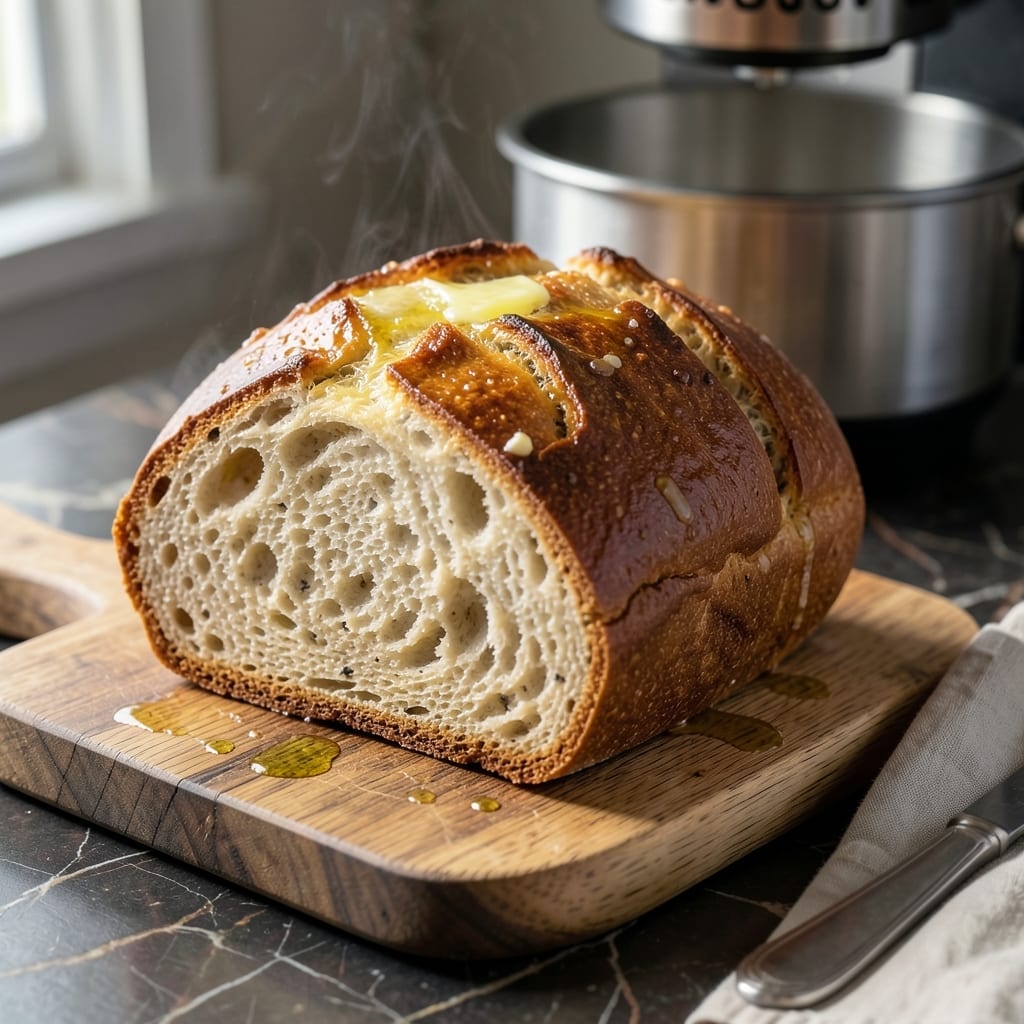
This bread machine recipe delivers a perfect artisan loaf with minimal effort. The process combines precise measurements with the right machine settings to achieve a golden crust and airy texture every time.
I developed this method after testing multiple ratios to ensure consistent results. The key is using the correct water-to-flour ratio and selecting the appropriate cycle for your bread machine model.
The final loaf offers a professional-quality rise with a tender crumb. This approach eliminates guesswork while maintaining the tradition of homemade bread.
Whether you prefer a basic white loaf or want to experiment with whole grains, this technique provides reliable, bakery-style results at home.
Ingredients for Bread Recipe for Bread Machine
Precise measurements and quality ingredients create this artisan loaf with professional results every time.
| Ingredient | Amount | Notes |
|---|---|---|
| Bread Flour 🌾 | 3 ½ cups | High-protein all-purpose works too |
| Warm Water 💧 | 1 ¼ cups | 110-115°F for optimal yeast activation |
| Active Dry Yeast 🍞 | 2 ¼ tsp | Or one 0.25 oz packet |
| Granulated Sugar 🧂 | 2 tbsp | Feeds the yeast for rise |
| Kosher Salt 🧂 | 1 ½ tsp | Diamond Crystal preferred |
| Unsalted Butter 🧈 | 2 tbsp | Softened, or vegetable oil |
| Non-Fat Dry Milk 🥛 | 2 tbsp | Enhances texture and color |
| Large Egg 🥚 | 1 whole | Room temperature preferred |
| Vital Wheat Gluten 🌾 | 1 tbsp | Optional for chewier texture |
| Honey 🍯 | 1 tbsp | Or maple syrup for sweetness |
The flour is foundational—King Arthur Bread Flour is the gold standard for consistent rise and chewy texture. Diamond Crystal kosher salt ensures even distribution without overpowering. For yeast, check the expiration date (old yeast is the #1 cause of failed loaves). Fleet Farm or Costco have reliable bulk options. Warm water temperature is critical: use a thermometer for accuracy (110-115°F is the sweet spot).
No bread flour? All-purpose with 1 tbsp vital wheat gluten per cup mimics the protein content. Instant yeast at equal volume works if that’s what you have. Skip the dry milk? Replace with 1/4 cup liquid milk (reduce water by same amount). For a vegan version, maple syrup instead of honey and neutral oil instead of butter—no other changes needed.
Store flour in an airtight container at room temperature for up to 3 months, or freeze for 6 months. Yeast keeps in the freezer for 1 year—just bring to room temperature before using. The baked loaf stays fresh for 2-3 days wrapped in plastic at room temperature.
Why You’ll Love This Recipe
- Hands-Off Baking: I just dump the flour, water, yeast, sugar, and salt in the machine and let it do the work—no kneading, no mess.
- Warm, Sweet Comfort: The sugar caramelizes just enough to give it that cozy, slightly sweet flavor that’s impossible to resist fresh out of the pan.
- Meal Prep Hero: I slice and freeze half the loaf for sandwiches later in the week, and honestly, it toasts up like new.
- Penny-Pincher’s Dream: Five basic ingredients, most of which I already have, and it costs a fraction of store-bought artisan bread.
Step-by-Step Instructions for Bread Machine Bread
Precise layering and timing ensure this loaf rises beautifully with a golden crust every time.
Step 1: Layer Liquid Ingredients in the Pan
Begin by adding the 1.25 cups warm water to the bread machine pan first. This creates the ideal environment for yeast activation and prevents dry ingredients from sticking to the bottom. The water should be between 110-115°F—too hot will kill the yeast, too cold will slow activation.
Next, add the 1 whole large egg, 2 tablespoons unsalted butter, and 1 tablespoon honey. I place the egg in a corner of the pan to keep it intact until the kneading begins. The butter should be softened but not melted, and the honey helps feed the yeast while adding subtle sweetness to the finished loaf.
Step 2: Add Dry Ingredients in Specific Order
Create a well in the center of the pan with the wet ingredients, then add the dry components in layers. Start with 3.5 cups bread flour, spreading it evenly over the wet ingredients. Then sprinkle 2 tablespoons non-fat dry milk and 1 tablespoon vital wheat gluten over the flour. These enhance texture and rise.
In one corner of the pan, make a small indentation for the yeast. Add 2.25 teaspoons active dry yeast to this indentation, ensuring it stays dry until the machine begins mixing. Finally, sprinkle 2 tablespoons granulated sugar and 1.5 teaspoons kosher salt over the flour, keeping them separate from the yeast.
Step 3: Select the Proper Machine Settings
Insert the pan into the bread machine and secure the lid. Choose the “basic” or “white bread” setting on your machine. For a 1.5-2 pound loaf size, which matches this recipe’s yield, select the medium crust option for the best balance of crispness and softness.
The machine will begin with a brief mixing phase. Listen for the sound of the kneading paddle engaging with the dough—this should happen within the first 2-3 minutes. If the dough appears too dry or too wet during this initial mixing, the machine’s design will compensate as it works through the program.
Step 4: Monitor the Kneading and Rising Process
About 10 minutes into the cycle, check that the dough has formed a smooth, elastic ball. It should pull away from the sides of the pan but still be slightly tacky to the touch. If the dough seems too stiff, add water 1 teaspoon at a time. If it’s too sticky, add bread flour 1 tablespoon at a time.
The first rise should take approximately 45-60 minutes, during which the dough will nearly double in size. The machine will then punch down the dough and begin the second rise. Resist the urge to open the lid during these phases—maintaining consistent temperature and humidity is crucial for proper rising.
Step 5: Bake and Cool for Optimal Texture
The baking cycle typically lasts 30-40 minutes. As it nears completion, you’ll notice the loaf developing a golden-brown crust and the aroma of fresh-baked bread filling your kitchen. The machine will automatically enter a keep-warm cycle when baking is complete, but I recommend removing the pan immediately for best results.
Turn the loaf out onto a wire rack and let it cool for at least 20 minutes before slicing. This cooling period allows the internal structure to set, preventing a gummy texture. The finished loaf should have a crisp crust, soft interior, and perfect rise with a slightly rounded top.
Pro Tips For Making Bread Recipe For Bread Machine
- Test Your Yeast: Mix the yeast with warm water and a pinch of sugar first—if it doesn’t bubble within 5 minutes, your yeast is dead and the loaf won’t rise. I learned this the hard way after wasting a whole bag of flour.
- Measure Flour Right: Spoon flour into your measuring cup and level it off—don’t scoop directly from the bag, or you’ll pack it down and end up with a dense brick instead of bread.
- Skip Tap Water: Use filtered or bottled warm water for the yeast, as chlorine in tap water can inhibit activation. Sounds weird, but it works.
- Cool Before Slicing: Let the bread sit in the machine for 10 minutes after baking finishes—slicing too soon makes it gummy. My grandmother swore by this, and she was right.
Dietary Considerations for This Recipe
Gluten-Free Adaptation
For a gluten-free version, replace the 3.5 cups bread flour with a high-quality gluten-free bread flour blend like King Arthur Measure for Measure. Add 1 extra egg and 1 tbsp xanthan gum to improve structure and rise. 💡
Reduced Sugar Option
Cut the sweetness by using just 1 tbsp granulated sugar or skip it entirely. The yeast will still activate, though the crust may be slightly paler. I often omit sugar when making sandwich bread for savory uses.
Dairy-Free Swaps
Replace 2 tbsp unsalted butter with 2 tbsp coconut oil or a neutral oil like avocado. Use unsweetened almond milk powder instead of dry milk. The texture remains nearly identical, with a subtle coconut note if using oil.
Vegan Modifications
Omit the egg entirely or use 1 tbsp ground flaxseed mixed with 3 tbsp water as a binder. Replace honey with maple syrup or agave. The loaf will be slightly denser but still delicious.
Whole Grain Version
Substitute up to 50% whole wheat flour for bread flour. Add 1 extra tbsp vital wheat gluten to compensate for the heavier flour. The result is a heartier, nuttier loaf with more fiber.
Lower Sodium
Reduce kosher salt to 1 tsp or use a salt-free seasoning blend. The flavor will be milder, so consider adding 1 tsp garlic powder or herbs for depth. 🌟
Nutrition Facts
Frequently Asked Questions
What happens if I use all-purpose flour instead?
Your loaf will still bake but may be slightly denser. For best results, add 1 tbsp vital wheat gluten per cup of all-purpose flour to match the protein content.
Can I add mix-ins like nuts or dried fruit?
Yes! Add up to 1/2 cup of mix-ins when the machine beeps during the kneading cycle. Distribute evenly to prevent clumping.
How do I know when the dough needs more water?
Check after 10 minutes of kneading. If it looks dry and crumbly, add water 1 tsp at a time. The dough should be smooth but slightly tacky.
Why did my bread collapse in the middle?
This usually means the yeast was old or the dough over-proofed. Always check yeast expiration and avoid opening the lid during rising.

- Bread Recipe For Bread Machine: Hands-Off Artisan Loaf With Perfect Rise - September 30, 2026
- BBQ Chicken Drumsticks Recipe Air Fryer: Smoky Char in Half the Time - September 30, 2026
- Korean BBQ Sauce Recipe Homemade: Sweet and Spicy Umami Glaze - September 30, 2026