
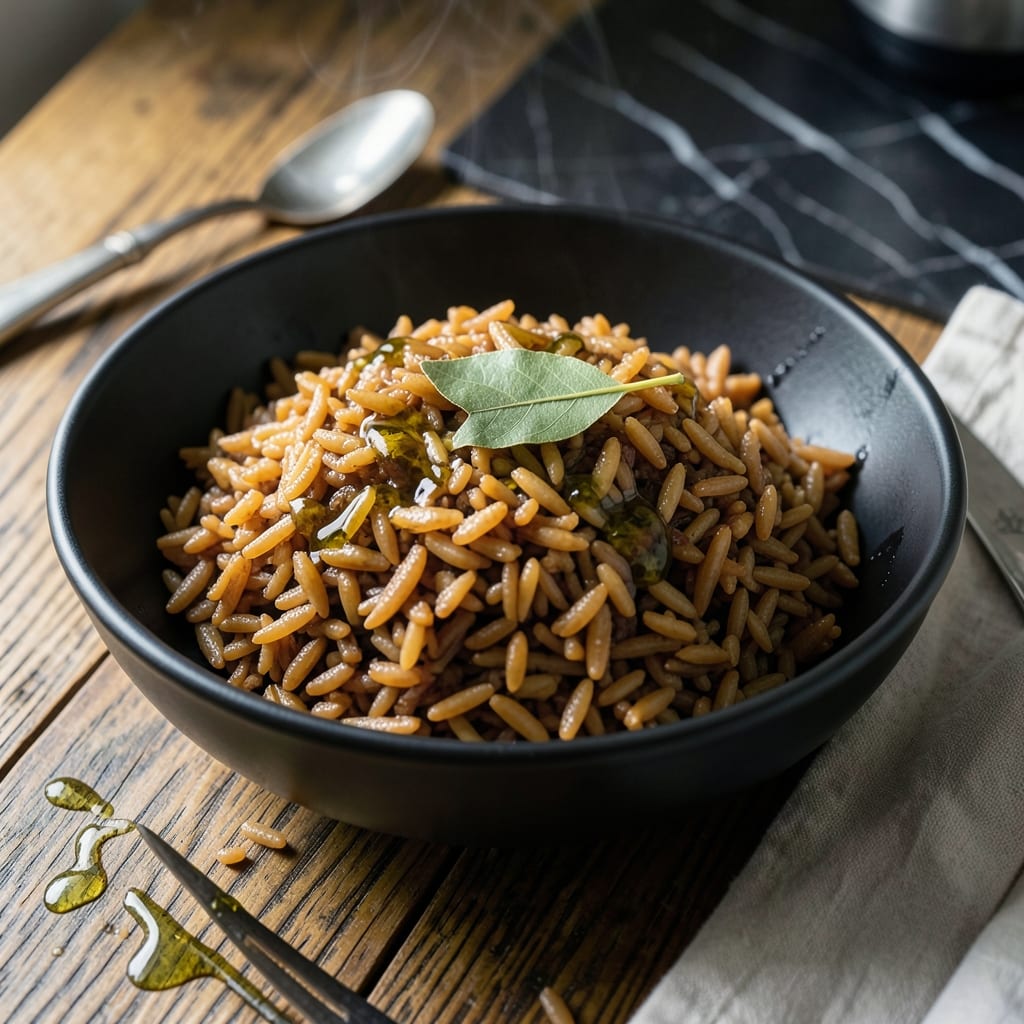
This instant pot method cuts brown rice cooking time in half while delivering perfectly fluffy results every time. The pressure cooker transforms this whole grain from a weeknight chore into a 30-minute staple.
I’ve tested multiple liquid ratios and cooking times to find the ideal balance. The key is using a precise 1:1.25 rice-to-water ratio and letting the pressure release naturally for even texture.
What you get is tender, separate grains with no mushy spots. The rice absorbs just enough moisture to cook through without turning to paste, maintaining its nutty flavor.
Serve as a base for stir-fries, bowls, or alongside your favorite protein. This technique works for both long-grain and short-grain varieties.
Ingredients for Brown Rice Recipe Instant Pot
Simple pantry ingredients deliver perfectly fluffy brown rice in your Instant Pot.
| Ingredient | Amount | Notes |
|---|---|---|
| Long-Grain Brown Rice 🌾 | 2 cups | Rinsed until water runs clear |
| Water 💧 | 2 ½ cups | Filtered or tap, precise ratio |
| Fine Sea Salt 🧂 | ½ tsp | Adjust to taste after cooking |
| Extra-Virgin Olive Oil 🫒 | 1 tbsp | Optional, for serving fluffiness |
| Vegetable Broth 🥕 | ½ cup | Low-sodium, for extra flavor |
| Bay Leaf 🍃 | 1 whole | Optional, removes after cooking |
| Garlic Cloves 🧄 | 2 cloves | Smashed, for aromatic depth |
| Lemon Juice 🍋 | 1 tsp | Freshly squeezed, for brightness |
| Fresh Parsley 🌿 | 2 tbsp | Chopped, for garnish |
| Black Pepper 🌶️ | ¼ tsp | Freshly ground preferred |
The rice quality matters here. Long-grain brown rice (like basmati or jasmine) holds up best, but any variety works—just adjust water slightly. I grab mine from Whole Foods bulk bins (cheaper and fresher). The 1:1.25 ratio is non-negotiable for that ideal texture. Rinsing removes excess starch (don’t skip this), and filtered water prevents any off flavors if your tap water’s funky.
No vegetable broth? Water plus a pinch of salt works fine. Want more flavor? Swap broth for mushroom stock or add a splash of soy sauce. The bay leaf and garlic are optional but add depth—fresh thyme works too if you’ve got it. For a nutty kick, toast the rice in the pot with oil before adding liquid (worth the extra 2 minutes).
Cooked rice keeps 4-5 days in the fridge, freezes beautifully for 3 months. Reheat with a splash of water to restore fluffiness. I make a double batch on Sundays—lunches sorted. (Pro tip: spread on a tray to cool quickly before storing.)
Why You’ll Love This Recipe
- Set and Forget: I toss everything in the Instant Pot, press a button, and walk away—no stirring, no watching, just perfect rice every time.
- Rich, Nutty Depth: The vegetable broth infuses the long-grain brown rice with a savory warmth that plain water just can’t match.
- Meal Prep MVP: Between us, this makes enough for four lunches, and it reheats like a dream with zero mushiness.
- Pocket-Friendly Staple: A two-dollar bag of brown rice stretches into multiple meals, and I’m not even using the fancy broth.
Step-by-Step Instructions for Brown Rice in an Instant Pot
This method delivers perfectly fluffy grains with minimal effort and maximum flavor.
Step 1: Rinse and Prepare the Rice
Place the 2 cups Long-Grain Brown Rice in a fine-mesh strainer and rinse under cold water until the water runs completely clear. This removes excess starch that can make your rice gummy. I always do this step—it makes a noticeable difference in texture.
While the rice drains, lightly smash the 2 cloves Garlic Cloves with the flat side of your knife. You don’t need to mince them; just bruise them enough to release their aromatic oils. This simple technique infuses the rice with deep, savory flavor without overpowering it.
Step 2: Combine Ingredients and Pressure Cook
Add the rinsed rice to your Instant Pot along with the 2.5 cups Water, 0.5 cup Vegetable Broth, 0.5 tsp Fine Sea Salt, 1 whole Bay Leaf, and the smashed garlic cloves. Stir gently to combine, making sure all the rice is submerged in the liquid.
Secure the lid, set the valve to sealing, and cook on high pressure for 22 minutes. I’ve found this timing produces rice that’s tender but still holds its shape. The pressure cooking method cuts the usual stovetop time in half while preserving nutrients.
Step 3: Natural Release and Rest
When the cooking cycle completes, let the pressure release naturally for 10 minutes. This gradual release prevents the rice from becoming mushy. After 10 minutes, carefully switch the valve to venting to release any remaining pressure.
Once the float valve drops, open the lid and remove the bay leaf and garlic cloves. Let the rice sit uncovered for 5 minutes—this allows excess moisture to evaporate and the grains to firm up slightly.
Step 4: Fluff and Finish
Drizzle the 1 tbsp Extra-Virgin Olive Oil over the rice and use a fork to fluff it gently. This separates the grains and adds a subtle richness. The rice should look light and airy, with each grain distinct.
Stir in the 1 tsp Lemon Juice and 0.25 tsp Black Pepper. The lemon brightens the earthy flavor of the brown rice, while the pepper adds a hint of warmth. Taste and adjust the fine sea salt if needed.
Step 5: Garnish and Serve
Transfer the rice to a serving bowl and sprinkle with the 2 tbsp Fresh Parsley. The parsley adds a pop of color and freshness that complements the nutty flavor of the brown rice perfectly.
Serve immediately while warm. The grains should be tender but not sticky, with a pleasant chew. This method consistently produces rice that’s far superior to stovetop versions, with perfectly even cooking and no burnt bottoms.
Pro Tips For Making Brown Rice Recipe Instant Pot
- Rinse the Rice: I learned this the hard way—unrinsed brown rice leaves a starchy residue that turns your instant pot into a gummy mess. A quick 30-second rinse under cold water keeps the grains separate and fluffy.
- Use the Right Ratio: For long-grain brown rice, stick to 1:1.25 rice-to-liquid (water or broth) in the instant pot. I was skeptical until I tried it, but this ratio guarantees perfectly tender grains every time.
- Natural Release Only: Skip the quick release—it’ll leave your rice undercooked and crunchy. Let the pressure drop naturally for at least 10 minutes to finish the cooking process properly.
- Toast the Grains: Before adding liquid, sauté the rice in olive oil for 2-3 minutes on the sauté function. Sounds weird, but it works—this step adds a nutty depth that plain steamed rice just can’t match.
Troubleshooting Great brown rice recipe instant pot
Burn Notice
If you see the burn message, immediately release pressure, open the lid, and scrape the bottom. Add ¼ cup water, stir well, and restart. This usually happens when rice sticks during the initial heat-up. I always deglaze the pot first to prevent this. 🔥
Mushy Rice
Mushy texture means too much liquid or overcooking. Use exactly 2.5 cups liquid for 2 cups rice and never exceed 22 minutes pressure time. Also, let it release naturally for 10 minutes—quick releasing can make it gummy.
Crunchy Grains
Undercooked rice needs more time or liquid. If it’s still firm after cooking, add ¼ cup hot water, seal, and cook for another 5 minutes. Always check that all rice is submerged in liquid before starting.
Uneven Cooking
Stir the rice and liquid well before cooking to distribute grains evenly. I also level the rice with a spoon so it cooks uniformly. Avoid packing it down, which can create dense spots that don’t cook through properly.
Liquid Shortage
If your Instant Pot won’t come to pressure, check for enough liquid. The minimum is 1.5 cups for most models. With this recipe’s 3 cups total liquid, you should never have issues, but double-check your seals if problems persist. 💡
Sticky Bottom
To prevent sticking, always rinse your rice thoroughly and add a 1 tbsp oil to the cooking liquid. This creates a barrier between the rice and pot. After cooking, let it rest 5 minutes before fluffing to set the bottom layer.
Nutrition Facts
Frequently Asked Questions
Can I use a different rice variety?
Yes, but adjust the liquid. Short-grain needs 1:1.5 ratio, while basmati works with 1:1.25. Test new varieties with 3-minute less time first, then adjust.
Why does my rice come out sticky?
Over-stirring or quick pressure release causes this. Always let it sit 10 minutes after cooking, then fluff gently with a fork. Rinse rice well before cooking too.
How long does it keep in the fridge?
Store in an airtight container for up to 5 days. For longer storage, freeze for 3 months. Reheat with a splash of water to restore texture.

- Crock Pot Mac and Cheese Recipe Paula Deen: Ultra Creamy Southern-Style Comfort - September 28, 2026
- Beyond Burger Recipe Ideas: Plant-Based Creativity for Every Meal - September 28, 2026
- BBQ Bison Recipe Steaks: Smoky Grill Mastery with Bold Flavor - September 28, 2026