
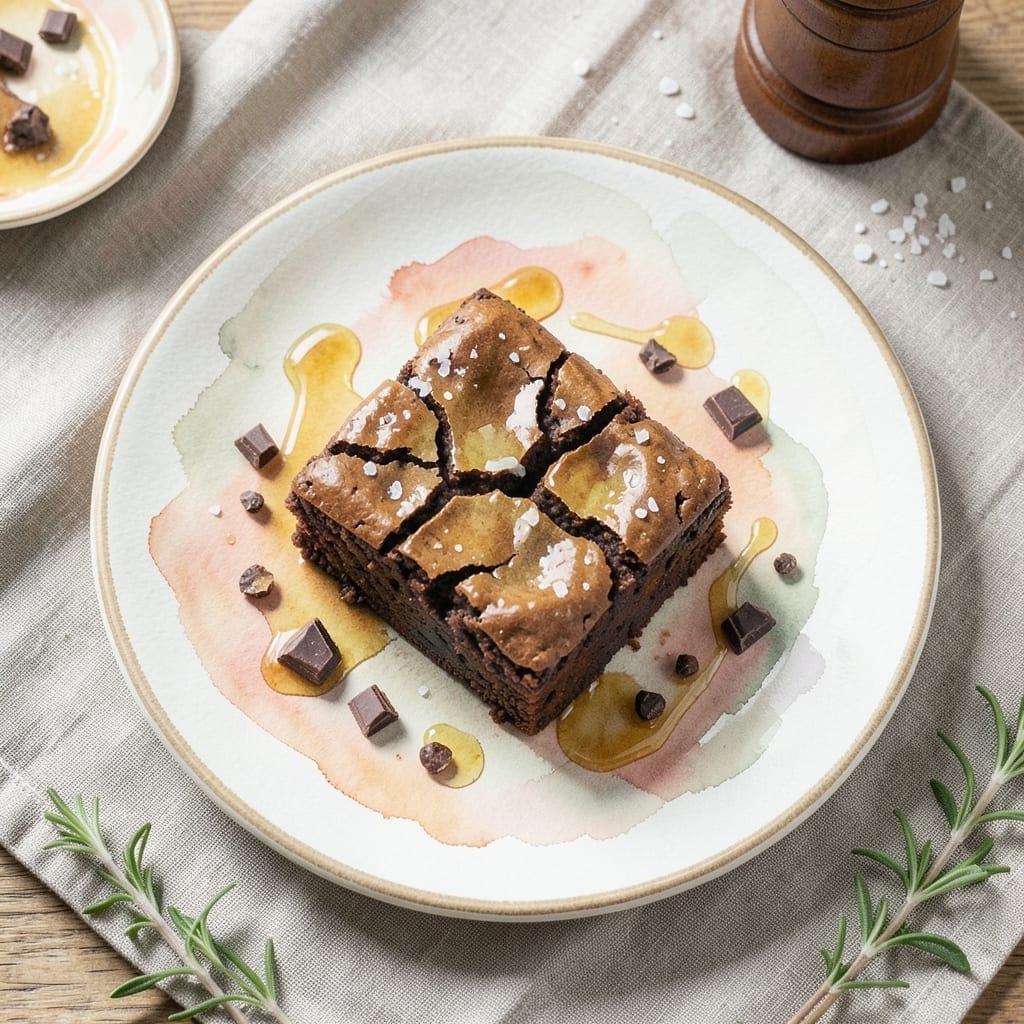
This honey-sweetened brownie recipe delivers a fudgy texture with natural sweetness that enhances the chocolate flavor beautifully.
The honey adds moisture and depth, creating a dense, rich brownie that’s both indulgent and subtly complex. A few simple ingredients come together with precise timing for perfect results.
You’ll achieve a crackly top, chewy edges, and a center so tender it melts in your mouth. The honey’s floral notes elevate the chocolate without overpowering it.
Bake at the right temperature for the ideal balance of gooey and firm. This method ensures consistent excellence every time.
Ingredients for Brownie Recipe with Honey
High-quality chocolate and honey create a fudgy, rich brownie with natural sweetness.
| Ingredient | Amount | Notes |
|---|---|---|
| Bittersweet Chocolate 🍫 | 8 oz | High-quality, 70% cacao |
| Unsalted Butter 🧈 | ½ cup | Melted, cooled slightly |
| Honey 🍯 | ¾ cup | Raw or pure, room temperature |
| Granulated Sugar 🥄 | ½ cup | Fine grain for even mixing |
| Large Eggs 🥚 | 2 whole | Room temperature for even incorporation |
| Vanilla Extract 🌿 | 1 tsp | Pure extract for depth of flavor |
| All-Purpose Flour 🌾 | ½ cup | Sifted for lightness |
| Cocoa Powder 🍫 | ¼ cup | Unsweetened, Dutch-process preferred |
| Baking Powder 🧂 | ¼ tsp | Ensures proper rise |
| Salt 🧂 | ¼ tsp | Fine sea salt for balance |
| Chopped Walnuts 🌰 | ½ cup | Optional for texture, lightly toasted |
The chocolate quality defines the final product. Ghirardelli or Guittard bittersweet bars melt smoothly and offer consistent results. For honey, local raw varieties from farmers markets provide the most complex floral notes. Ensure your butter is unsalted to control the dish’s overall sodium content. These items are available at most Whole Foods or well-stocked grocery stores.
Need to swap the honey? Maple syrup or agave nectar work at a 1:1 ratio, though the flavor profile will shift slightly. For a nut-free version, omit the walnuts or replace with chocolate chunks. The flour can be swapped for gluten-free 1:1 baking blend if needed. Cocoa powder can be natural if Dutch-process isn’t available, but expect a slightly different texture.
Store leftovers in an airtight container at room temperature for up to 3 days or refrigerate for 5 days. These brownies also freeze beautifully for up to 3 months (wrap tightly in plastic and foil). Bring to room temperature before serving for the best texture.
Why You’ll Love This Recipe
- One Bowl Wonder: I melt the chocolate and butter together, then just stir in the rest—no mixer, no fuss.
- Rich Honey Depth: The honey adds this warm, caramel-like note that pairs ridicously well with the bittersweet chocolate.
- Crowd Pleaser: I’ve served these at book club, potlucks, even my kid’s birthday—always the first thing to disappear.
- Keeps Like a Champ: Honestly, they taste even better the next day, and they stay moist for days in an airtight container.
Step-by-Step Instructions for Brownie Recipe With Honey
Master the technique for dense, fudgy brownies with the perfect crackly top every time.
Step 1: Melt Chocolate and Butter
In a heatproof bowl set over a saucepan of barely simmering water, melt the 8 oz bittersweet chocolate and 0.5 cup unsalted butter together. Stir occasionally with a silicone spatula until completely smooth and no chocolate pieces remain visible.
Remove from heat and let cool for 5 minutes. The mixture should feel warm but not hot to the touch. This cooling step is crucial—adding eggs to hot chocolate will scramble them. I always test by dipping my finger in; if it feels comfortable, it’s ready.
Step 2: Whisk Wet Ingredients Until Smooth
To the cooled chocolate mixture, add the 0.75 cup honey, 0.5 cup granulated sugar, 2 whole large eggs, and 1 tsp vanilla extract. Whisk vigorously for 1-2 minutes until the mixture is glossy and completely homogeneous.
The honey adds natural sweetness and moisture that makes these brownies exceptionally fudgy. You’ll notice the mixture thickens slightly as you whisk—the eggs are doing their emulsifying work. This step develops the structure that gives brownies their characteristic dense texture.
Step 3: Incorporate Dry Ingredients
Add the 0.5 cup all-purpose flour, 0.25 cup cocoa powder, 0.25 tsp baking powder, and 0.25 tsp salt to the wet mixture. Using a silicone spatula, fold gently just until no dry streaks remain visible. Overmixing at this stage develops gluten, which would make the brownies cakey rather than fudgy.
The cocoa powder intensifies the chocolate flavor without adding sweetness, while the small amount of baking powder provides just enough lift for that coveted crackly top. I sift my dry ingredients first to prevent lumps in the final batter.
Step 4: Fold in Nuts and Bake
Gently fold in the 0.5 cup chopped walnuts until evenly distributed throughout the batter. Pour the mixture into a prepared 8×8-inch baking pan lined with parchment paper, spreading it evenly with the spatula.
Bake at 350°F for 25-30 minutes until the edges are set but the center still looks slightly underdone. The top should have a shiny, crackly crust when it’s ready. A toothpick inserted in the center should come out with a few moist crumbs clinging to it, not wet batter.
Step 5: Cool Completely Before Slicing
Remove from the oven and let cool completely in the pan on a wire rack for at least 1 hour. This cooling period allows the brownies to set properly—cutting them too soon will result in a gooey, undercooked texture.
Once cooled, lift the brownies from the pan using the parchment paper and transfer to a cutting board. Slice into 16 squares using a sharp knife, wiping the blade clean between cuts for neat edges. The interior should be dense and fudgy with a rich chocolate flavor balanced by the natural sweetness of the honey.
Pro Tips For Making Brownie Recipe With Honey
- Melt Chocolate Slowly: Use a double boiler or microwave in 20-second bursts to melt the bittersweet chocolate and butter together—high heat can seize the chocolate, and I learned this the hard way after ruining a batch.
- Balance Honey’s Sweetness: Since honey is sweeter than sugar, cut the granulated sugar by 25% or the brownies will taste cloying; I was skeptical until I tried it.
- Pull Early From Oven: Take them out when the edges are set but the center still looks slightly underdone—residual heat finishes the job, and overbaking turns them dry.
- Room-Temp Eggs Only: Crack the eggs into a warm bowl for 5 minutes if they’re cold; cold eggs can cause the butter-chocolate mixture to clump, and that’s a mess to fix.
Essential Equipment for Perfect Results
Baking Pan
An 8×8-inch square pan with straight sides is essential for even baking and clean edges. I use a light-colored metal pan from USA Pan—it distributes heat evenly and prevents over-browning. Avoid glass or dark pans, which can cause the edges to burn before the center cooks through. 💡
Parchment Paper
Line your pan with pre-cut parchment paper for easy removal and cleanup. I prefer unbleached parchment from If You Care—it’s sturdy and doesn’t curl. The paper should overhang the sides by 2 inches to create handles for lifting the brownies out of the pan. This also prevents sticking.
Mixing Bowls
A set of nested stainless steel bowls in varying sizes makes melting and mixing seamless. I use bowls from Cuisinox—they’re durable, non-reactive, and conduct heat evenly for the double-boiler step. A medium bowl (about 3 quarts) is perfect for this recipe’s volume.
Whisk and Spatula
A balloon whisk is ideal for blending the wet ingredients until glossy. I swear by my OXO Good Grips whisk—it’s comfortable and won’t scratch your bowls. A silicone spatula with a flexible head, like the one from GIR, ensures you scrape every bit of chocolate from the bowl. 🔥
Cooling Rack
Proper cooling is non-negotiable for fudgy texture. A wire rack allows air to circulate underneath the pan, preventing steam from making the bottom soggy. I use a heavy-duty rack from Wilton—it’s sturdy enough to hold the pan without wobbling.
Sharp Knife
For clean slices, use a long, thin-bladed knife like a chef’s knife or slicing knife. I recommend an 8-inch or 10-inch knife from Wüsthof. Wipe the blade between cuts for neat edges. Warm the knife under hot water for even smoother cuts.
Nutrition Facts
Frequently Asked Questions
Can I substitute maple syrup for honey?
Yes! Use the same amount of maple syrup as honey. The flavor will be slightly different, with a more caramel-like taste.
Why do my brownies turn out cakey instead of fudgy?
Overmixing the batter develops gluten in the flour, creating a cakey texture. Fold dry ingredients just until combined.
How do I know when they’re done baking?
Look for a shiny, crackly top and edges pulling away from the pan. A toothpick should come out with moist crumbs, not wet batter.
Can I make these brownies gluten-free?
Replace the all-purpose flour with a gluten-free 1:1 baking blend. The texture will be nearly identical.

- BBQ Sausage Recipe Oven: Smoky Depth Without the Grill - September 28, 2026
- BBQ Chicken Bowl Recipe Rice: Smoky Sweetness Over Fluffy Grains - September 28, 2026
- Beef Cutlet Recipe Ideas: Crispy Breaded Patties With Bold Seasonings - September 28, 2026