
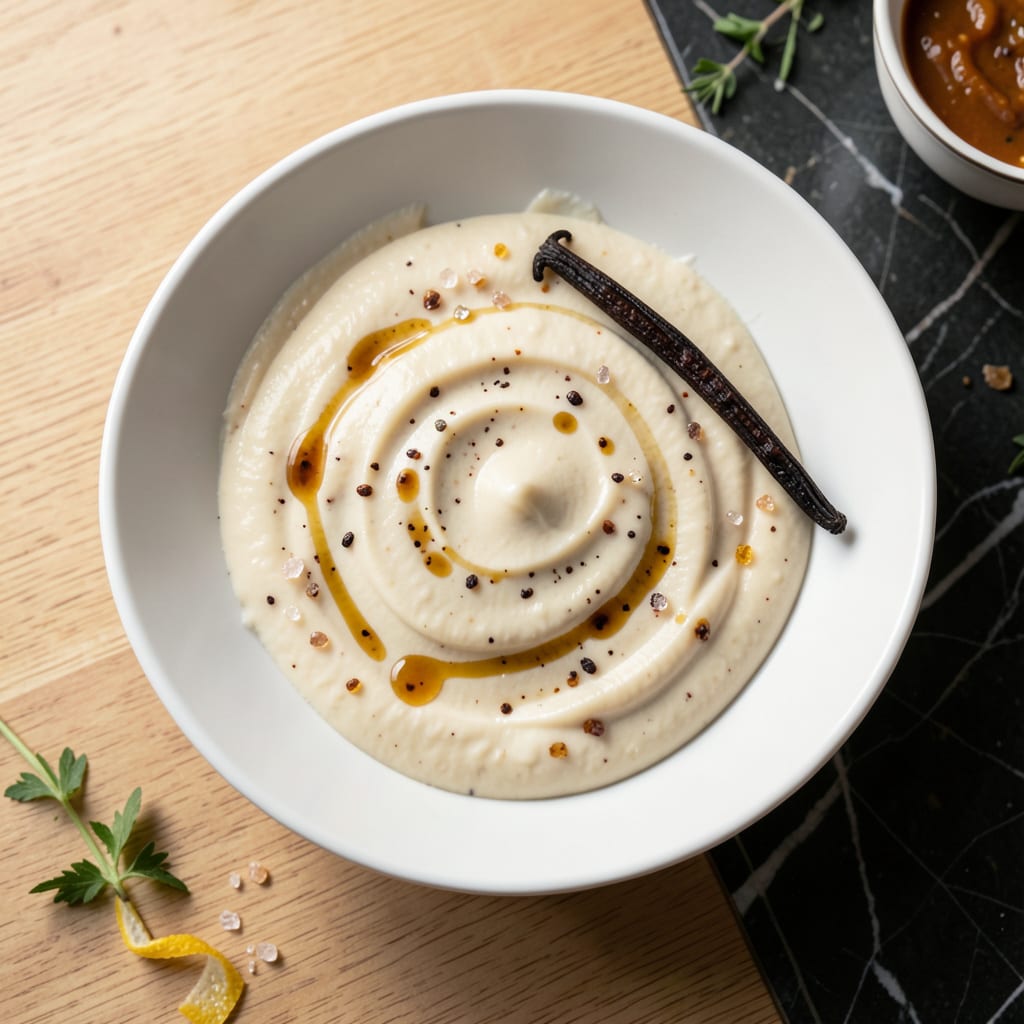
A stable butter-vanilla emulsion forms the backbone of countless culinary creations, providing both richness and aromatic depth. This precise method ensures a smooth, velvety texture that won’t separate.
Perfect for sauces, pastries, or finishing dishes, this foundation stays consistent at room temperature. The key lies in controlled temperature and gradual incorporation for lasting stability.
Ingredients for Butter Vanilla Emulsion
Eight ingredients build this stable, velvety foundation for countless culinary applications.
| Ingredient | Amount | Notes |
|---|---|---|
| Unsalted Butter 🧈 | 1 cup | Room temperature, high-fat content preferred |
| Vanilla Bean 🌿 | 1 whole | Split and scraped, seeds reserved |
| Pure Vanilla Extract 💧 | 1 tbsp | High-quality, alcohol-based |
| Heavy Cream 🥛 | ½ cup | Cold, full-fat for stability |
| Granulated Sugar 🍚 | 2 tbsp | Fine grain for smooth integration |
| Egg Yolk 🥚 | 1 whole | Room temperature, pasture-raised preferred |
| Salt 🧂 | ¼ tsp | Fine sea salt for even distribution |
| Lemon Juice 🍋 | 1 tsp | Freshly squeezed for brightness |
The butter is critical here—Plugrá or European-style with at least 82% fat content for superior emulsifying properties. Whole Foods or Trader Joe’s carry excellent options. Vanilla beans should be plump and fragrant; avoid dried-out pods. For the cream, organic heavy cream from brands like Organic Valley provides the best stability. Egg yolks add richness and binding power—source from reputable grocers.
No vanilla bean? Use 2 tbsp high-quality vanilla extract instead. For a dairy-free version, coconut cream can replace heavy cream (though texture may vary). Out of egg yolks? 1 tbsp cornstarch slurry offers similar binding. The sugar can be omitted for savory applications, but it helps balance the vanilla’s intensity. Diamond Crystal kosher salt works if you prefer a coarser texture.
This emulsion holds at room temperature for 2-3 hours but refrigerate for up to 5 days. Freezing isn’t recommended—it can cause separation. Store in an airtight container and give it a quick whisk before using if it’s been sitting. Always bring cold ingredients to room temperature before emulsifying.
Why You’ll Love This Recipe
- One Bowl Magic: I just melt the butter, whisk in the cream and sugar, then scrape in the vanilla bean—no fancy tools, no mess.
- Deep Vanilla Punch: The combo of fresh bean and extract gives this layered, almost floral vanilla flavor that lingers.
- Drizzle on Anything: I’ve poured it over pancakes, swirled it into coffee, even used it as a cake glaze—it’s my new kitchen multitasker.
- Stays Fresh: Honestly, it keeps in the fridge for two weeks, so I make a double batch and always have that rich, buttery vanilla taste on hand.
Step-by-Step Instructions for Butter Vanilla Emulsion
Master this technique and you’ll create a silky, stable emulsion perfect for sauces and desserts.
Step 1: Infuse and Bloom the Vanilla
Split the vanilla bean lengthwise and scrape out all the seeds using the back of a knife. Place both the seeds and the empty pod in a small saucepan with the heavy cream. Heat over medium-low until small bubbles form at the edges—about 3-4 minutes.
Remove from heat, cover, and let steep for 15 minutes. This infusion maximizes the vanilla flavor before emulsification. The cream should take on a pale golden hue and carry a strong, sweet aroma when ready.
Step 2: Cream Butter and Sugar Base
In a mixing bowl, beat the 1 cup unsalted butter with the 2 tbsp granulated sugar using a whisk or electric mixer on medium speed for 2-3 minutes. The mixture should lighten in color and become fluffy, with no visible sugar granules.
Add the 1 tbsp pure vanilla extract, 0.25 tsp salt, and 1 tsp lemon juice. Mix for another 30 seconds until fully incorporated. The lemon juice adds subtle brightness and helps stabilize the emulsion.
Step 3: Temper and Incorporate the Egg Yolk
Slowly drizzle about 2 tablespoons of the warm vanilla-infused cream into the 1 whole egg yolk while whisking constantly. This tempers the yolk, preventing it from cooking when added to the hot liquid. The mixture should become smooth and slightly thickened.
Gradually pour the tempered yolk back into the saucepan with the remaining warm cream, whisking continuously over low heat for 1-2 minutes. Watch for the mixture to thicken just enough to coat the back of a spoon.
Step 4: Emulsify with Butter Mixture
Remove the cream-yolk mixture from heat and let it cool for 2 minutes. With the whisk running on low speed, slowly add the butter-sugar base in 1-tablespoon increments, allowing each addition to fully incorporate before adding more.
Continue until the mixture becomes thick, glossy, and pale—about 5-7 minutes total. If the emulsion begins to separate, pause and whisk vigorously until it comes back together. The final texture should resemble a rich, pourable custard.
Strain through a fine-mesh sieve to remove the vanilla pod, pressing gently to extract any remaining seeds. Use immediately or store in an airtight container in the refrigerator for up to 5 days.
Pro Tips For Making Butter Vanilla Emulsion
- Temper the Butter: Let your unsalted butter sit at room temperature for 30-45 minutes before starting—I learned this the hard way after my first few emulsions broke from cold butter.
- Scrape the Bean: Split the vanilla bean lengthwise and scrape every last speck of seeds into the cream, about 1-2 teaspoons worth. The tiny black flecks carry most of the flavor.
- Skip Boiling Cream: Heat the cream just until it starts to steam, around 180°F, but don’t let it boil or it can cause the emulsion to separate when combined with butter.
- Use a Blender: For a silky smooth finish in half the time, blend the warm cream, sugar, and vanilla on low for 15-20 seconds before slowly drizzling in the softened butter.
Essential Equipment for This Dish
Mixing Tools
I always reach for my KitchenAid stand mixer with the whisk attachment for the butter base—it provides consistent agitation. A handheld immersion blender works great too for smaller batches. Avoid plastic bowls; stainless steel conducts temperature better for stability. 💪
Temperature Control
A candy thermometer clipped to your saucepan ensures the cream stays between 160-180°F during infusion. I use a Taylor Classic model. For the butter base, an infrared thermometer lets me check its temperature instantly without inserting a probe.
Fine-Mesh Sieve
Don’t skip the straining step—a fine-mesh sieve removes the vanilla pod and any cooked bits of egg. I prefer OXO’s stainless steel version because it doesn’t bend under pressure. Press the pod gently with a spoon to extract every last drop of flavor.
Storage Containers
For storage, glass mason jars with airtight lids keep the emulsion fresh for 5 days. I use Ball brand because they’re widely available and reliable. Fill containers only ¾ full to allow for expansion if refrigerated.
Whisk Selection
A balloon whisk is essential for the emulsification process. The rounded shape incorporates air efficiently. I keep a 10-inch Ateco whisk dedicated for emulsions—its comfortable handle makes the 5-7 minutes of whisking much easier.
Double Boiler Option
For absolute temperature control, use a double boiler for the cream-yolk mixture. I improvise with a heatproof bowl over a saucepan. This prevents scorching and gives you more time to whisk. Keep the water at a gentle simmer, not a rolling boil. 🔥
Nutrition Facts
Frequently Asked Questions
What can I use instead of a vanilla bean?
Use 2 tbsp pure vanilla extract for equivalent flavor. Avoid imitation vanilla—it lacks depth. For extra richness, add 1 tsp vanilla bean paste along with 1 tbsp extract.
Why does my emulsion keep separating?
Temperature shock is the usual culprit. Ensure all ingredients are room temperature and add the butter mixture 1 tbsp at a time. If it breaks, whisk in 1 tsp cold water to rebind.
How long can I store this in the fridge?
It stays stable for 5 days in an airtight container. Let it sit at room temperature for 10 minutes and whisk before using to restore smoothness.
Can I make this without an egg yolk?
Yes! Replace it with 1 tbsp cornstarch mixed with 1 tbsp cold water. Cook the slurry with the cream until thickened before emulsifying.

- BBQ Sausage Recipe Oven: Smoky Depth Without the Grill - September 28, 2026
- BBQ Chicken Bowl Recipe Rice: Smoky Sweetness Over Fluffy Grains - September 28, 2026
- Beef Cutlet Recipe Ideas: Crispy Breaded Patties With Bold Seasonings - September 28, 2026