
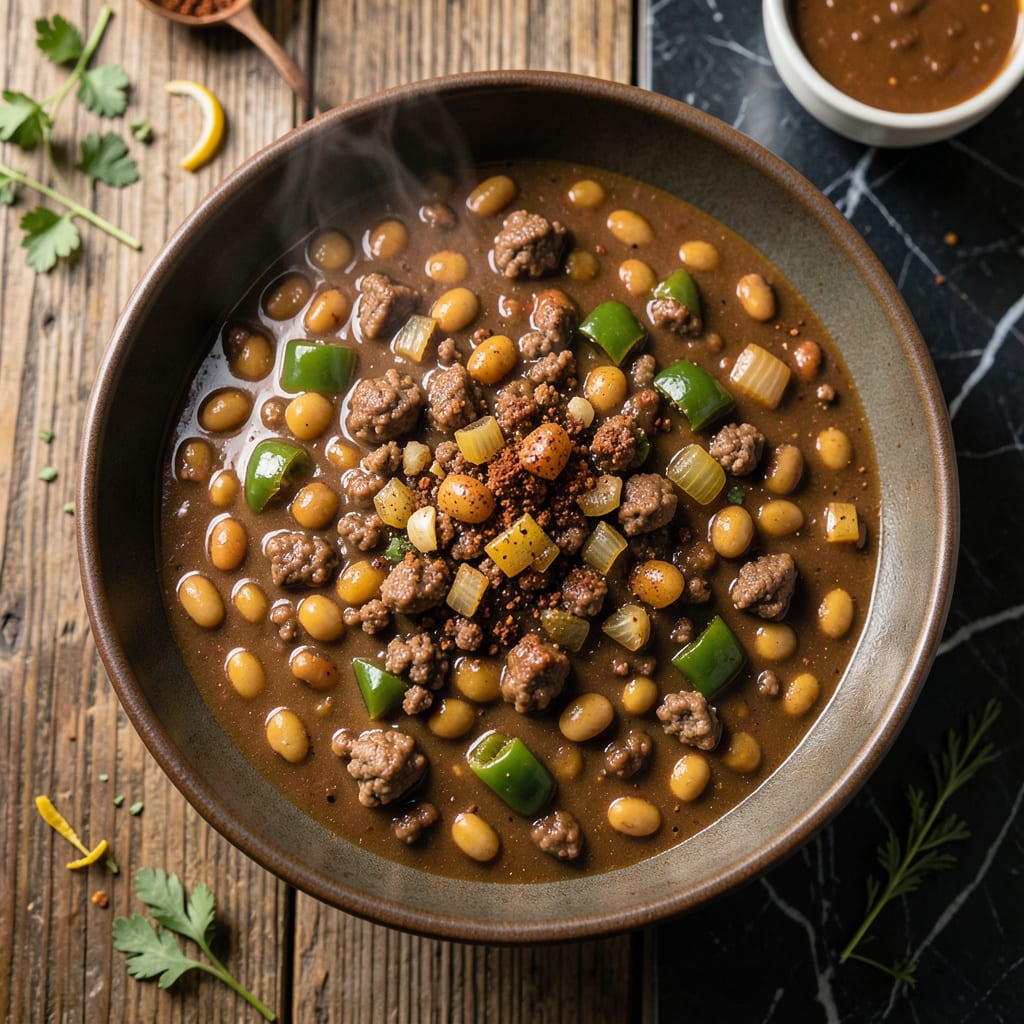
This hearty chili transforms a simple can of pork and beans into a one-pot meal that’s both satisfying and easy to prepare. The combination of tender beans, savory pork, and rich spices creates a comforting dish perfect for any night of the week.
With minimal prep and straightforward instructions, this recipe delivers a balanced, flavorful chili that’s ready to serve in under an hour. No complicated techniques—just great taste.
Ingredients for Campbell’s Pork and Beans Chili
Transform canned pork and beans into a rich, hearty chili with these pantry staples.
| Ingredient | Amount | Notes |
|---|---|---|
| Campbell's Pork and Beans 🫘 | 2 cans | 28 oz cans, undrained |
| Ground Pork 🥩 | 1 lb | Or substitute ground beef |
| Yellow Onion 🧅 | 1 whole | Medium, finely diced |
| Green Bell Pepper 🌶️ | 1 whole | Medium, finely diced |
| Garlic Cloves 🧄 | 3 cloves | Minced for depth |
| Chili Powder 🌶️ | 2 tbsp | Mild or hot variety |
| Ground Cumin 🌿 | 1 tbsp | Toasted for warmth |
| Smoked Paprika 🌶️ | 1 tsp | For smoky depth |
| Dried Oregano 🍃 | 1 tsp | Mediterranean variety |
| Crushed Tomatoes 🍅 | 1 can | 28 oz can, undrained |
| Tomato Paste 🍅 | 2 tbsp | For richness and thickness |
| Chicken Broth 🥣 | 1 cup | Low-sodium preferred |
| Olive Oil 🫒 | 2 tbsp | For sautéing vegetables |
| Salt 🧂 | 1 tsp | Adjust to taste |
| Black Pepper 🌶️ | ½ tsp | Freshly ground preferred |
The pork and beans are non-negotiable here—Campbell’s offers the right balance of flavor and texture. For the ground pork, look for 80/20 lean-to-fat ratio at your local butcher or Whole Foods for the best marbling. Fresh vegetables like onion and bell pepper should be firm and vibrant (skip the pre-cut kind—they lose moisture too quickly). The spices? Penzeys or bulk bins at natural food stores ensure freshness.
No ground pork? Ground beef or turkey work seamlessly. Swap smoked paprika for regular if you prefer milder heat. Out of tomato paste? One-third the amount of ketchup in a pinch, though the flavor profile shifts slightly. For extra richness, use fire-roasted crushed tomatoes instead of plain. The broth can be vegetable if that’s what you have on hand.
This chili tastes even better the next day. Store in an airtight container for up to 4 days in the fridge or freeze for 3 months. Reheat gently on the stove, adding a splash of broth if needed to thin it out.
Why You’ll Love This Recipe
- One Pot Magic: I dump the pork and beans, ground pork, and veggies in one pot and let it simmer while I set the table.
- Deep Smoky Flavor: The garlic and pork mingle with the beans’ rich sauce—honestly, it tastes like it’s been cooking all day.
- Feeds Everyone: Between us, this stretches to feed six with leftovers for lunch the next day.
- Budget Hero: Ground pork and canned beans keep costs low without skimping on hearty satisfaction.
Step-by-Step Instructions for Campbell’s Pork and Beans Chili
This streamlined one-pot method delivers rich, hearty chili with minimal cleanup and maximum flavor.
Step 1: Sauté the Aromatic Base
Heat the 2 tbsp Olive Oil in a large Dutch oven or heavy pot over medium heat. Add the finely diced Yellow Onion and Green Bell Pepper, cooking for 5-6 minutes until softened and just beginning to caramelize at the edges.
Add the minced 3 cloves Garlic Cloves and sauté for 30 seconds until fragrant. This base builds the flavor foundation for your chili—don’t rush it. The vegetables should be tender but not browned.
Step 2: Brown the Ground Pork and Build Spice Profile
Increase heat to medium-high and add the 1 lb Ground Pork, breaking it up with a wooden spoon. Cook for 6-8 minutes until fully browned and no pink remains. Drain excess fat if needed, leaving about 1 tbsp for flavor.
Stir in the 2 tbsp Chili Powder, 1 tbsp Ground Cumin, 1 tsp Smoked Paprika, 1 tsp Dried Oregano, 1 tsp Salt, and 0.5 tsp Black Pepper. Toast the spices with the meat for 1-2 minutes until deeply aromatic—this step intensifies their flavors.
Step 3: Incorporate Tomatoes and Beans
Add the 2 tbsp Tomato Paste and cook for 1 minute, stirring constantly to prevent burning. This creates a rich, concentrated base. Pour in the 1 can Crushed Tomatoes (undrained) and 2 cans Campbell’s Pork and Beans (undrained), stirring to combine.
The tomato paste should darken slightly in color when ready. The liquid from the beans and tomatoes will deglaze the pot, lifting all the browned bits from the bottom—this is where the depth of flavor develops.
Step 4: Simmer to Perfection
Pour in the 1 cup Chicken Broth and stir well. Bring the mixture to a boil, then reduce heat to low and let it simmer uncovered for 25-30 minutes, stirring occasionally.
You want the chili to thicken slightly, with the flavors melding together. The surface should have a gentle bubble, not a rolling boil. Taste and adjust seasoning if needed, though the beans and broth may already provide enough salt.
Step 5: Rest and Serve
Remove from heat and let the chili rest for 10 minutes before serving. This allows the flavors to fully marry and the liquid to thicken slightly. The texture should coat the back of a spoon with a hearty, chunky consistency.
Ladle into bowls and serve immediately. The chili will continue to thicken as it cools, so if storing for later, you may need to add a splash of broth when reheating to restore the desired consistency.
Pro Tips For Making Campbell’S Pork And Beans Chili
- Brown the Pork Well: Cook the ground pork until deeply browned, not just gray—this builds flavor that the beans and veggies will soak up. I learned this the hard way after making pale, bland batches.
- Drain the Beans: Rinse and drain the Campbell’s Pork and Beans to cut excess sodium and thicken the chili faster. Sounds weird, but it works.
- Sauté Veggies First: Cook the onion, bell pepper, and garlic until soft before adding the pork—this sweetens them and prevents crunchy bits in the final dish.
- Simmer Uncovered: Let the chili bubble uncovered for the last 10 minutes to thicken it up. I skip this when I’m lazy, but the dish is noticeably better when I don’t.
Serving Suggestions for This Dish
Garnish and Top
Fresh toppings bring this chili to life. I love adding ½ cup shredded cheddar cheese and ¼ cup chopped green onions for color. A dollop of sour cream adds a creamy contrast to the hearty beans and pork. 💛
Side Dish Pairings
Cornbread is my go-to side—its sweetness balances the savory chili perfectly. I also serve with tortilla chips for scooping or a simple green salad with a tangy vinaigrette to cut through the richness.
Bread Options
For a rustic touch, try crusty sourdough or garlic bread. These soak up the flavorful broth beautifully. If you’re feeding a crowd, jalapeño cornbread adds a nice kick that complements the smoky spices.
Beverage Pairings
A cold lager beer like Budweiser or Coors works wonderfully. For non-alcoholic options, iced tea or sparkling water with lime refreshes the palate between bites. 🍺
Serving Style
This chili shines in a cast-iron skillet served family-style at the table. For individual portions, use deep bowls to contain the hearty mixture. Always have extra toppings on the side so everyone can customize their serving.
Nutrition Facts
Frequently Asked Questions
Can I use ground beef instead of pork?
Yes, 1 lb ground beef works perfectly as a swap. For best results, choose 80/20 lean-to-fat ratio to maintain moisture and flavor during cooking.
How long can I store leftovers?
Store in an airtight container in the fridge for up to 4 days or freeze for 3 months. Reheat gently on the stove with a splash of broth if needed.
What if my chili is too thick?
Thin it with 1/4 cup chicken broth or water while reheating. Stir well and add more liquid as needed to reach your desired consistency.

- BBQ Sausage Recipe Oven: Smoky Depth Without the Grill - September 28, 2026
- BBQ Chicken Bowl Recipe Rice: Smoky Sweetness Over Fluffy Grains - September 28, 2026
- Beef Cutlet Recipe Ideas: Crispy Breaded Patties With Bold Seasonings - September 28, 2026