
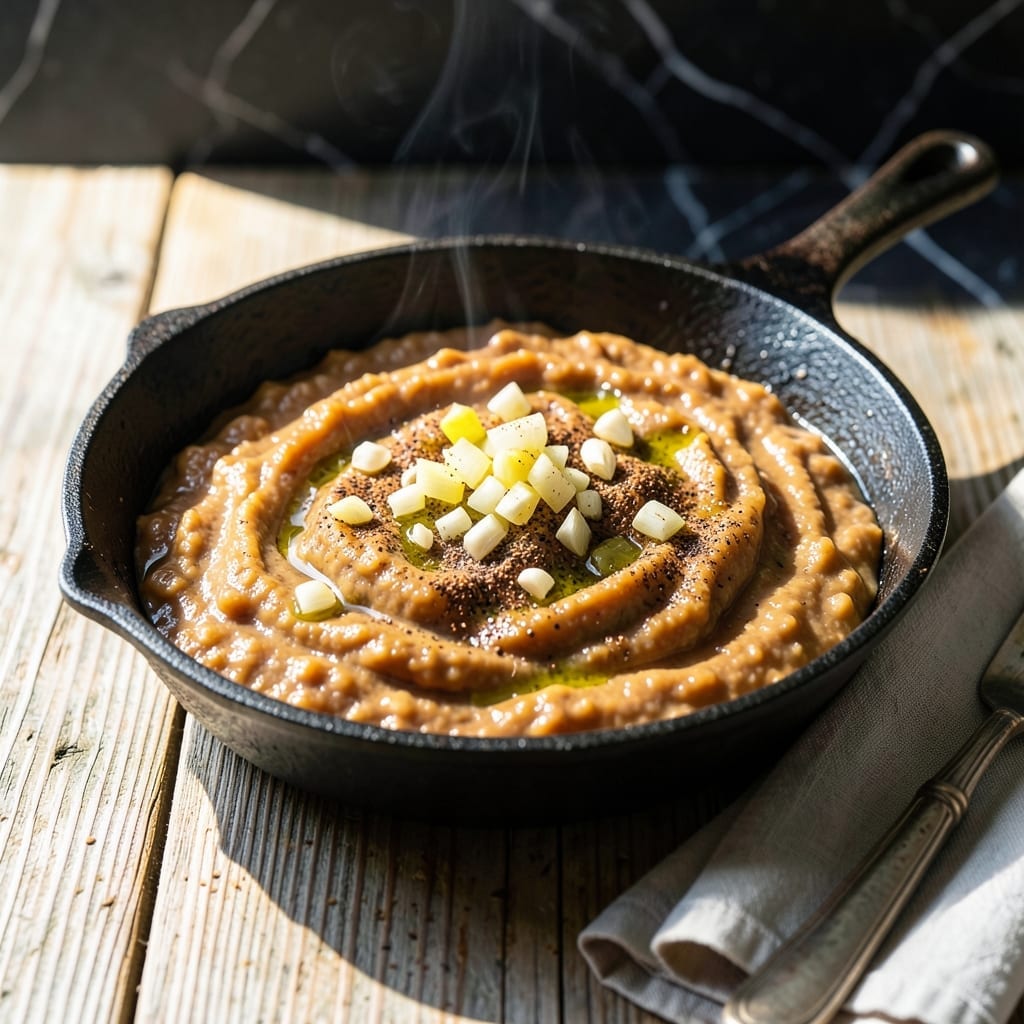
I’ve perfected a method for preserving refried beans that maintains their creamy texture while extending shelf life. This canning process ensures you always have a ready-to-use spread on hand for quick meals.
The key is cooking the beans until ultra-tender before mashing, then canning them in clean jars with proper headspace. A pressure canner guarantees safety for low-acid foods like beans.
You’ll end up with smooth, flavorful beans that stay fresh for months. Each jar opens to reveal a rich, spreadable consistency perfect for tacos, dips, or burritos.
This technique streamlines meal prep while delivering homemade quality every time. No preservatives, just simple ingredients and reliable results.
Ingredients for Canning Refried Beans
Simple pantry staples transform into a smooth, shelf-stable spread perfect for every meal.
| Ingredient | Amount | Notes |
|---|---|---|
| Dried Pinto Beans 🌱 | 2 lb | Rinsed and picked over |
| Yellow Onion 🧅 | 1 whole | Medium-sized, finely diced |
| Garlic Cloves 🧄 | 6 cloves | Peeled and minced |
| Vegetable Oil 🫒 | ¼ cup | Neutral flavor, for sautéing |
| Ground Cumin 🌿 | 1 ½ tsp | Toasted for depth |
| Smoked Paprika 🌶️ | 1 tsp | Adds smoky richness |
| Sea Salt 🧂 | 1 ½ tsp | Adjust to taste after cooking |
| Fresh Lime Juice 🍋 | 2 tbsp | Brightens flavor at finish |
| Water 💧 | 8 cups | For soaking and cooking |
| Bay Leaves 🍃 | 2 pieces | Removed before mashing |
| Jalapeño Pepper 🌶️ | 1 whole | Seeded and finely chopped |
The beans are the foundation here. Dried pinto beans from bulk bins often have better turnover than pre-packaged, ensuring freshness. Look for beans that are uniform in size and color, without cracks or holes. Organic options from Whole Foods or Sprouts are reliable. Soaking overnight reduces cooking time and helps achieve that ultra-tender texture essential for creamy results.
No pinto beans? Black beans work too, though they’ll have a slightly denser texture. For a milder flavor, substitute half with white beans. Missing smoked paprika? Regular paprika plus a pinch of liquid smoke gets you close. The jalapeño can be omitted for heat-sensitive palates, but it adds a subtle brightness. Frozen corn or roasted bell peppers can be stirred in after cooking for extra dimension.
Canned beans keep for 12-18 months in a cool, dark place. Once opened, transfer to the fridge and use within 5 days. For best texture, store jars upright and avoid stacking. The cooked beans can also be frozen for 3 months if you skip the canning step.
Why You’ll Love This Recipe
- Set and Forget: I love that I can pressure can these beans in bulk, then just grab a jar when needed—no last-minute soaking or cooking.
- Garlic-Cumin Magic: The aroma of garlic and cumin toasting in oil before mixing with the beans is intoxicating, and the taste is even better.
- Meal Prep Hero: These canned refried beans are ready for tacos, burritos, or nachos anytime, making weeknight dinners a breeze.
- Pantry Savior: Dried pintos are so affordable, and canning them myself means I always have a cheap, protein-packed staple on hand. Honestly, it’s a game-saver.
Step-by-Step Instructions for Canning Refried Beans
This method ensures a shelf-stable spread with perfect texture and depth of flavor.
Step 1: Soak and Cook the Pinto Beans
Rinse the 2 lb Dried Pinto Beans thoroughly and pick over to remove any stones or debris. Place them in a large pot with the 8 cups Water and soak overnight, or use the quick-soak method: cover with water, bring to a boil for 2 minutes, then let sit for 1 hour.
Drain and rinse the soaked beans, then return them to the pot with fresh 8 cups Water. Add the 1 whole Yellow Onion (finely diced), 6 cloves Garlic Cloves (minced), 2 pieces Bay Leaves, and 1 whole Jalapeño Pepper (seeded and finely chopped).
Bring to a boil, reduce heat to medium-low, and simmer for 1.5 to 2 hours until the beans are tender and easily mashed with a fork. Skim off any foam that rises to the surface during cooking and discard the bay leaves before mashing.
Step 2: Sauté Aromatics and Seasonings
While the beans cook, heat the 0.25 cup Vegetable Oil in a large skillet over medium heat. Add the 1 whole Yellow Onion (finely diced) and cook for 5 minutes until translucent.
Stir in the 6 cloves Garlic Cloves (minced), 1.5 tsp Ground Cumin, and 1 tsp Smoked Paprika. Cook for 1-2 minutes until the spices are fragrant. This step builds the flavor foundation for a rich, aromatic result.
Step 3: Mash and Combine the Beans
Drain the cooked beans, reserving 1 cup of the cooking liquid. Remove the bay leaves and discard. Using a potato masher or the back of a wooden spoon, mash the beans directly in the pot until smooth but still slightly textured.
Add the sautéed onion and spice mixture to the mashed beans, along with the reserved cooking liquid. Stir in the 1.5 tsp Sea Salt. Cook over medium heat for 5-7 minutes, stirring frequently, until the mixture thickens to your desired consistency.
Step 4: Finish with Lime Juice and Prepare for Canning
Remove from heat and stir in the 2 tbsp Fresh Lime Juice. This final touch brightens the flavor and balances the richness of the beans. Taste and adjust the sea salt if needed.
Ladle the refried beans into sterilized pint jars, leaving 1-inch headspace. Wipe the rims, apply lids, and process in a pressure canner at 10 pounds of pressure for 75 minutes for pints. Allow the canner to cool naturally before removing the jars.
Pro Tips For Making Canning Refried Beans
- Soak Overnight: I learned this the hard way—dried pinto beans need at least 8 hours in water to soften properly, or they’ll stay tough no matter how long you cook them.
- Sauté Onions Longer: Cook the yellow onion in vegetable oil until it’s deep golden, about 8-10 minutes—this builds the sweet, rich base that makes refried beans taste authentic.
- Skip the Salt Early: Resist the urge to salt the beans while soaking or simmering; it hardens the skins and slows cooking. Wait until after they’re tender.
- Use Bean Liquid: Sounds weird, but it works: mash the beans with some of their cooking liquid instead of just oil—it gives the refried texture a creamier, more traditional consistency.
Troubleshooting This Recipe
Beans Not Soft Enough
If your beans are still firm after 2 hours of simmering, they likely need more time or water. Add 1-2 cups hot water and continue cooking for 30-minute intervals until tender. Old beans may take longer, so soak them overnight for the best results.
Watery Mixture
A watery consistency usually means you didn’t cook off enough liquid. Return the mashed beans to the pot and simmer on medium-low heat for an additional 5-10 minutes, stirring frequently. For a quicker fix, mash in 1-2 tbsp cornstarch mixed with water.
Lumps in Beans
For ultra-smooth beans, use a potato masher or immersion blender instead of a fork. If you prefer some texture, pulse briefly and leave a few lumps. I find that soaked beans mash more easily than unsoaked ones. 💡
Jars Not Sealing
Check that your lids are new and the rims are clean before processing. Ensure you left the proper 1-inch headspace in each jar. If jars still don’t seal, reprocess them with new lids within 24 hours, or refrigerate and use within 1 week.
Flat Taste
If your beans taste bland, you may have under-seasoned them. Stir in additional sea salt or lime juice to taste before canning. For more depth, add a pinch of cumin or smoked paprika—these spices bring warmth and complexity.
Burnt Bottom
To prevent burning, use a heavy-bottomed pot and stir frequently, especially during mashing. If you notice sticking, lower the heat to medium-low and add a splash of water or reserved bean liquid. This keeps the mixture creamy without scorching.
Nutrition Facts
Frequently Asked Questions
Do I need a pressure canner for this?
Yes, beans are low-acid and require a pressure canner for safe preservation. A water bath canner won’t reach the necessary 240°F to eliminate bacteria.
How long will canned refried beans last?
Properly canned beans stay fresh for 12-18 months in a cool, dark place. Once opened, use within 5 days from the fridge.
Can I use canned pinto beans instead?
No, the recipe requires dried beans for proper texture and safety. Canned beans may become mushy during the canning process.
What if my jars don’t seal properly?
Check lids are new and rims are clean. Reprocess with new lids within 24 hours, or refrigerate and use within 1 week.

- Beef Cutlet Recipe Ideas: Crispy Breaded Patties With Bold Seasonings - September 28, 2026
- Bluefin Tuna Recipe Ideas: Sushi-Grade Seared and Sesame-Crusted - September 28, 2026
- Blue Zone Recipe Ideas: Longevity-Boosting Meals for Vibrant Living - September 28, 2026