
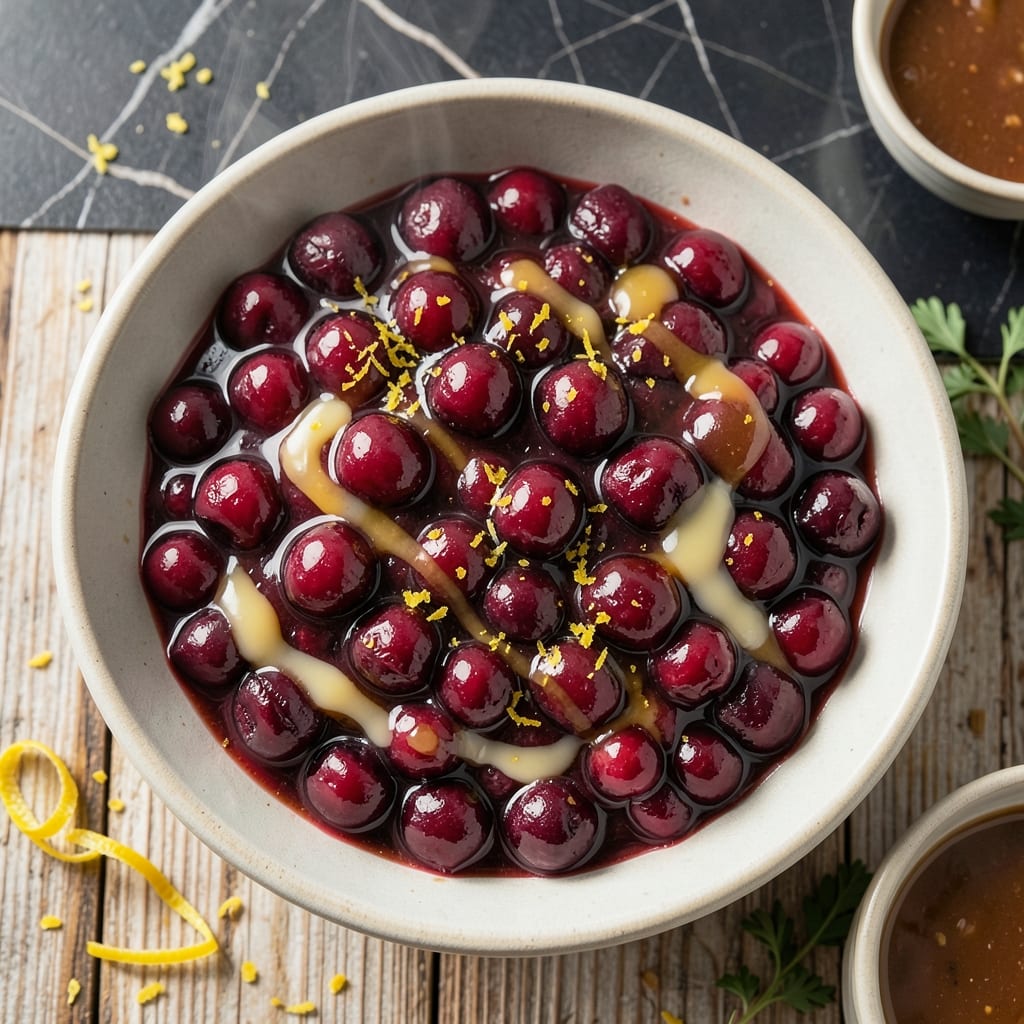
This homemade pie filling transforms frozen cherries into a thick, glossy masterpiece that rivals any bakery version. The secret lies in proper thickening and just the right balance of sweet and tart flavors.
I developed this method after years of runny fillings and under-seasoned attempts. The key is cooking the cherries just until they release their juices, then thickening with cornstarch for that perfect consistency.
You’ll end up with a vibrant filling that holds its shape when sliced yet pours beautifully from the jar. It captures that classic cherry pie flavor without the fuss of pitting fresh fruit.
Perfect for pies, pastries, or spooning over ice cream. Here’s how to make it right every time.
Ingredients for Cherry Pie Filling Recipe Frozen Cherries
Eight simple ingredients craft that bakery-worthy cherry pie filling you crave all year.
| Ingredient | Amount | Notes |
|---|---|---|
| Frozen Sweet Cherries 🍒 | 4 cups | Thawed, undrained, pitted |
| Granulated Sugar 🍚 | 1 cup | Adjust to taste if cherries are tart |
| Cornstarch 🌾 | ¼ cup | For thickening consistency |
| Lemon Juice 🍋 | 2 tbsp | Freshly squeezed preferred |
| Vanilla Extract 💧 | 1 tsp | Pure extract for best flavor |
| Almond Extract 🌰 | ¼ tsp | Optional for depth of flavor |
| Salt 🧂 | ¼ tsp | Balances sweetness perfectly |
| Ground Cinnamon 🌿 | 0.125 tsp | Adds warm spice undertones |
Frozen cherries are a lifesaver here—Trader Joe’s or Costco have great options. Look for unsweetened pitted cherries to control the sugar yourself. The cornstarch is what gives you that glossy, sliceable thickness, so don’t swap it for flour (trust me, it gets gummy). Diamond Crystal is my go-to for the sugar, but any granulated works fine.
No almond extract? Skip it—vanilla alone still tastes great. Out of cornstarch? Arrowroot powder works at the same ratio. If your cherries are super tart (like Montmorency), bump the sugar up to 1.25 cups. The lemon juice brightens everything up, but bottled works in a pinch (fresh is better though).
This keeps in the fridge for 1 week or freezes beautifully for 6 months. I like to portion it into pint jars—perfect for pies or spooning over vanilla ice cream. Just thaw in the fridge overnight before using.
Why You’ll Love This Recipe
- No-Thaw Needed: I just dump the frozen cherries straight into the pot—no waiting around for them to soften.
- Bright & Balanced: The lemon juice cuts the sweetness just enough, and that vanilla finish? Pure comfort.
- Endless Uses: I’ve spooned this over ice cream, swirled it into yogurt, and of course, baked it into pies.
- Budget Stretch: A bag of frozen cherries costs half what fresh ones do, and it makes just as much filling.
Step-by-Step Instructions for Cherry Pie Filling
This method delivers that perfect glossy, thick consistency every time.
Step 1: Thaw and Prep the Frozen Sweet Cherries
Start by thawing the 4 cups Frozen Sweet Cherries completely. I leave them in the fridge overnight, but you can also use the defrost setting on your microwave if you’re short on time. Don’t drain them—those juices are packed with flavor.
Once thawed, give them a quick taste. If they’re particularly tart, you might want to adjust the granulated sugar later. I’ve found that frozen cherries often release more liquid than fresh, which actually works to our advantage for a luscious filling.
Step 2: Create the Thickening Slurry
In a small bowl, whisk together the 0.25 cup Cornstarch with just enough of the cherry juices to make a smooth paste. This slurry is your insurance against a runny filling. The cornstarch needs to be fully dissolved to prevent lumps in your final product.
I always use a fork for this—it breaks up any stubborn clumps better than a spoon. The mixture should look like thick cream when it’s ready. This step is crucial for that perfect pie filling consistency we’re after.
Step 3: Cook the Cherry Mixture
In a large saucepan, combine the thawed Frozen Sweet Cherries with their juices, the 1 cup Granulated Sugar, 2 tbsp Lemon Juice, 0.25 tsp Salt, and 0.125 tsp Ground Cinnamon. Stir well and bring to a gentle boil over medium-high heat.
Once boiling, stir in the cornstarch slurry. The mixture will start to thicken almost immediately. Keep stirring constantly for 2-3 minutes until it reaches your desired consistency—it should coat the back of a spoon and look glossy.
Step 4: Finish with Extracts and Cool
Remove the saucepan from heat and stir in the 1 tsp Vanilla Extract and 0.25 tsp Almond Extract. The almond extract adds that subtle depth of flavor that makes people wonder what your secret is. Be careful—these extracts are potent, so a little goes a long way.
Let the filling cool completely at room temperature. It will thicken further as it cools. I like to give it at least 2 hours before using. You’ll notice the color deepens and the texture becomes perfectly spreadable—exactly what you want for that ideal pie filling.
Pro Tips For Making Cherry Pie Filling Recipe Frozen Cherries
- Thaw and Drain: Let the frozen cherries thaw in a colander for 30 minutes to avoid a watery filling—I learned this the hard way after my first pie turned into soup.
- Bloom the Cornstarch: Mix cornstarch with a little cold water before adding it to the hot cherries, or you’ll end up with clumps that just won’t dissolve, no matter how hard you stir.
- Simmer Long Enough: After adding the cornstarch slurry, let the filling bubble for a full 2-3 minutes—this guarantees it thickens properly and doesn’t turn runny once it cools.
- Add Vanilla Last: Stir in the vanilla extract only after removing from heat; adding it earlier can make the flavor bitter and less vibrant, and nobody wants that in a cherry pie.
Pro Cooking Tips for This Dish
Perfect Cornstarch Ratio
I’ve tested this ratio extensively—¼ cup cornstarch to 4 cups cherries gives that ideal glossy thickness that holds its shape when sliced yet pours beautifully. Use Clabber Girl or Argo for consistent results. 🌡️
Preventing Lumps
Always whisk your cornstarch with cold cherry juice first to create a smooth slurry. Adding dry cornstarch directly to hot liquid creates impossible-to-remove lumps. I use a fork and whisk for at least 30 seconds until completely smooth.
Controlled Boiling
Bring your mixture to a full rolling boil before adding the slurry. This activates the cornstarch properly. Keep the heat at medium-high and stir constantly with a wooden spoon to prevent scorching on the bottom of your 3-quart saucepan.
Testing Doneness
The filling is ready when it coats the back of a spoon and leaves a clear path when you run your finger through it. This takes about 2-3 minutes of boiling after adding the slurry. Undercooking means a runny filling.
Extract Timing
Add your extracts off the heat to preserve their delicate flavors. The almond extract especially can become bitter if boiled. I stir for 15 seconds then let it rest. This preserves all those beautiful aromatic compounds.
Cooling Process
Spread the filling in a shallow container to cool faster. The filling will thicken as it cools to room temperature over about 2 hours. Resist the urge to refrigerate it immediately—this can create a skin on top. 💡
Nutrition Facts
Frequently Asked Questions
Do I need to thaw the cherries first?
Yes, always thaw them completely. This ensures even cooking and proper thickening. You can leave them in the fridge overnight or use your microwave’s defrost setting for 5-10 minutes.
Why did my filling turn out runny?
This usually happens if the cornstarch wasn’t fully activated.
Can I use fresh cherries instead? but you’ll need to pit them first. Fresh cherries may require slightly less sugar since they’re often sweeter than frozen. The cooking process remains the same.
How long will the filling stay fresh?
It keeps in the fridge for up to 1 week or in the freezer for 6 months. Store in airtight containers to maintain quality. Thaw overnight in the fridge before using.

- BBQ Sausage Recipe Oven: Smoky Depth Without the Grill - September 28, 2026
- BBQ Chicken Bowl Recipe Rice: Smoky Sweetness Over Fluffy Grains - September 28, 2026
- Beef Cutlet Recipe Ideas: Crispy Breaded Patties With Bold Seasonings - September 28, 2026