
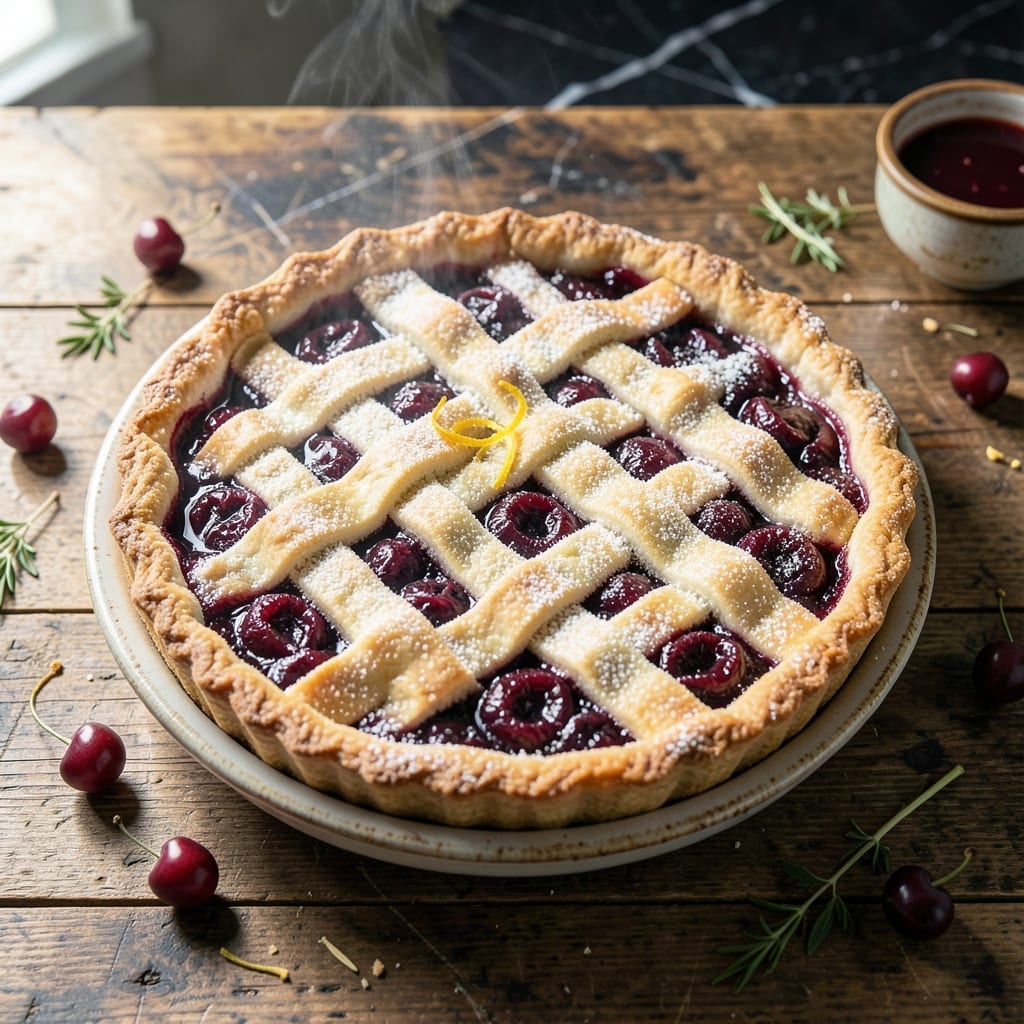
I’ve perfected a method for achieving a flaky crust with frozen cherries that rivals any fresh version. The key is proper thawing and draining to prevent a soggy bottom.
This pie delivers a tart-sweet filling and golden, layered pastry without complicated steps. The result is a classic dessert worth the effort.
Ingredients for Cherry Pie Recipe Using Frozen Cherries
Classic ingredients transform into a dessert with flaky layers and perfect tart-sweet balance. Nothing complicated here.
| Ingredient | Amount | Notes |
|---|---|---|
| Frozen Tart Cherries 🍒 | 4 cups | Thawed and drained thoroughly |
| Granulated Sugar 🍚 | 1 cup | Plus extra for sprinkling |
| Cornstarch 🌾 | ¼ cup | For thickening filling |
| Lemon Juice 🍋 | 1 tbsp | Freshly squeezed preferred |
| Almond Extract 🌰 | ½ tsp | Pure extract for best flavor |
| All-Purpose Flour 🌾 | 2 ½ cups | Plus extra for dusting |
| Unsalted Butter 🧈 | 1 cup | Cold, cubed for flaky crust |
| Ice Water 💧 | ½ cup | Approximately, as needed |
| Salt 🧂 | ½ tsp | Divided between crust and filling |
| Egg 🥚 | 1 whole | For egg wash finish |
| Vanilla Extract 🌿 | 1 tsp | Pure extract recommended |
The cherries are the star. Oregon Fruit Products or Woodstock frozen tart cherries work beautifully—they hold shape better than sweet varieties. Proper thawing is critical: drain them in a colander for at least 30 minutes, then pat completely dry. The cornstarch thickens the filling, but if you prefer a clearer glaze, tapioca starch is an excellent alternative. For the crust, King Arthur Flour gives consistent results, but any all-purpose works.
No almond extract? Vanilla extract at double the amount works, though the flavor profile shifts slightly. Out of cornstarch? Instant tapioca at half the quantity or all-purpose flour at the same amount can substitute. For a richer crust, replace 1/4 cup of the water with cold vodka—it creates extra flakiness. The egg wash can be swapped for heavy cream if that’s what you have on hand (it’s a vegetarian recipe, so dairy is fine).
The unopened bag of cherries keeps in the freezer for up to 12 months—no need to thaw before storing. The assembled pie can be frozen before baking for up to 2 months. Baked pie stays fresh at room temperature for 2 days, or refrigerate for 5 days (reheat in a 300°F oven for 10 minutes).
Why You’ll Love This Recipe
- No Thaw Needed: I just dump the frozen cherries straight into the filling—no waiting, no fuss.
- Almond-Kissed Magic: That splash of almond extract with the tart cherries? Ridiculously good.
- Holiday or Tuesday: Honestly, I make this for summer picnics and random weeknights with equal success.
- Budget-Friendly Bake: Frozen tart cherries cost half what fresh do in July, and nobody notices the difference.
Step-by-Step Instructions for Cherry Pie Using Frozen Cherries
Follow this method precisely for a flaky crust and perfectly set tart-sweet filling every time.
Step 1: Prepare the Filling
In a large bowl, combine the 4 cups Frozen Tart Cherries (thawed and drained thoroughly), 1 cup Granulated Sugar, 0.25 cup Cornstarch, 1 tbsp Lemon Juice, and 0.5 tsp Almond Extract. Stir gently until the cherries are evenly coated and no dry spots of cornstarch remain.
The cornstarch will thicken the juices released by the cherries as they bake, creating that classic pie filling consistency. Let the mixture sit for 10-15 minutes while you prepare the crust—this gives the cherries time to release some liquid and the cornstarch time to begin hydrating.
Step 2: Make the Pie Crust
In a food processor, pulse the 2.5 cups All-Purpose Flour and 0.25 tsp Salt to combine. Add the 1 cup Unsalted Butter (cold and cubed) and pulse until the mixture resembles coarse crumbs with some pea-sized butter pieces visible. This visible butter is what creates the flaky layers in your crust.
With the processor running, gradually add the 0.5 cup Ice Water and 1 tsp Vanilla Extract through the feed tube, processing just until the dough begins to come together. The dough should hold when pressed but not be sticky. If it seems too dry, add ice water 1 tablespoon at a time until it reaches the proper consistency.
Step 3: Assemble the Pie
Divide the dough into two equal portions. On a lightly floured surface, roll one portion into a 12-inch circle about ⅛-inch thick. Carefully transfer it to a 9-inch pie dish, pressing it gently into the bottom and up the sides. Trim the edges, leaving a ½-inch overhang.
Pour the cherry filling into the crust-lined pie dish, spreading it evenly. Roll out the second dough portion the same way and place it over the filling. Trim the top crust to match the bottom, then crimp the edges together to seal. Cut 4-5 slits in the top crust to allow steam to escape during baking.
Step 4: Bake to Golden Perfection
Preheat your oven to 375°F. In a small bowl, beat the 1 whole Egg with 1 tablespoon water to create an egg wash. Brush the top crust lightly with the egg wash and sprinkle with a little extra granulated sugar for added crunch and shine.
Bake for 50-60 minutes on the lower oven rack until the crust is deep golden brown and the filling is bubbling through the vents. If the edges begin to brown too quickly, cover them with a pie shield or foil for the remaining baking time. The pie is done when the juices are bubbling thickly, not thin and watery.
Step 5: Cool and Serve
Transfer the pie to a wire rack and let it cool for at least 2 hours before slicing. This cooling time allows the filling to set completely—cutting too soon will result in a runny filling. The crust should remain crisp and flaky, not soggy.
Serve at room temperature for the best texture. Each slice will showcase the balance between the tart cherries and sweet filling, all encased in that promised flaky crust. Store any leftovers covered at room temperature for up to 2 days.
Pro Tips For Making Cherry Pie Recipe Using Frozen Cherries
- Thaw and Drain: Let the frozen cherries sit at room temperature for 30 minutes, then drain well—excess liquid will turn your filling into soup. I learned this the hard way after my first pie came out more like cherry stew.
- Thicken First: Mix the cornstarch with a little sugar before adding it to the cherries, then cook the filling on the stove for 2-3 minutes until it thickens. This prevents that dreaded runny filling when you cut into the pie.
- Boost the Flavor: Use 1/2 teaspoon of almond extract—it sounds like a lot, but it cuts through the tartness of the cherries and makes the filling taste richer. My grandmother swore by this, and she was right.
- Vent the Top: Cut a few large slits or use a lattice crust to let steam escape. After burning three batches, I finally figured out that trapped steam is the enemy of a flaky top crust.
Best Sauces and Condiments for These Flavors
Whipped Cream
Classic homemade whipped cream with 1 cup heavy cream, 2 tbsp powdered sugar, and ½ tsp vanilla pairs perfectly. Whip until soft peaks form—it adds a light, airy contrast that complements the pie’s richness. 💫
Vanilla Ice Cream
Serve warm slices with a scoop of quality vanilla ice cream. The cold creaminess against the warm tart filling creates an irresistible texture contrast. I prefer Ben & Jerry’s or Häagen-Dazs for their dense, creamy texture.
Cherry Sauce
For extra cherry intensity, make a quick cherry sauce by simmering 1 cup reserved cherry juice with 2 tbsp sugar and 1 tsp cornstarch until thickened. Drizzle over slices for added glaze and flavor depth.
Lemon Curd
A dollop of tangy lemon curd cuts through the sweetness beautifully. The bright citrus note elevates each bite. Look for Stonewall Kitchen or make your own with 3 egg yolks, ½ cup sugar, and ⅓ cup lemon juice.
Spiced Nuts
Add crunch with candied pecans or spiced almonds. Toast ½ cup chopped nuts with 1 tbsp brown sugar and ¼ tsp cinnamon at 350°F for 8-10 minutes. Sprinkle on top for texture and warmth.
Chocolate Drizzle
Melt ½ cup dark chocolate with 1 tbsp coconut oil for a glossy drizzle. The bittersweet contrast enhances the cherries’ natural tartness. Use Ghirardelli 60% for the perfect balance. 🍫
Frequently Asked Questions
Do I need to thaw the cherries first?
Yes, thaw them completely and drain thoroughly. This prevents excess liquid from making your crust soggy.
Why does my filling turn out runny?
Likely not enough cornstarch or insufficient cooling time. Let the pie rest for 2 hours after baking to allow filling to set properly.
Can I use a store-bought crust?
Use 1 refrigerated pie crust for the bottom and top. Blind-bake the bottom crust for 10 minutes to prevent sogginess.
How do I prevent the crust from burning?
Cover the edges with foil or a pie shield after 30 minutes of baking. Bake on the lower oven rack for even browning.
Nutrition Facts

- BBQ Sausage Recipe Oven: Smoky Depth Without the Grill - September 28, 2026
- BBQ Chicken Bowl Recipe Rice: Smoky Sweetness Over Fluffy Grains - September 28, 2026
- Beef Cutlet Recipe Ideas: Crispy Breaded Patties With Bold Seasonings - September 28, 2026