
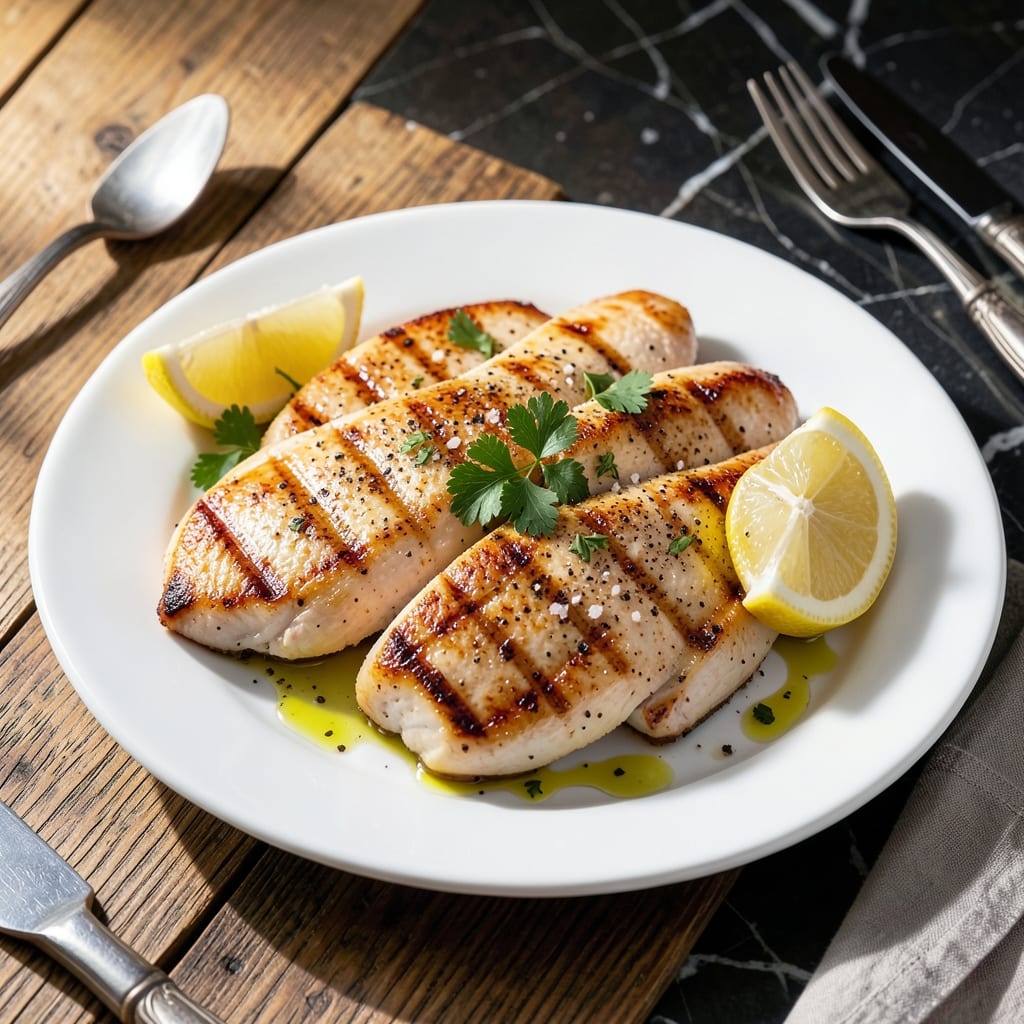
I’ve tested countless methods for cooking chicken breast, and pounding it thin is the simplest way to guarantee tender results every time. This technique eliminates the dreaded dry, chewy texture that plagues thicker cuts.
The process takes just minutes: place chicken between plastic wrap and gently pound to an even thickness. This ensures quick, uniform cooking while maintaining moisture that would otherwise escape from thicker portions.
What emerges is juicy, evenly cooked chicken with a delicate texture that works in any dish. The thin cut also means faster cooking times, making it perfect for busy weeknights.
Whether grilled, pan-seared, or baked, this method transforms ordinary chicken into something special. Here’s how to master it.
Ingredients for Chicken Breast Recipe Pounded
Simple ingredients for juicy, evenly cooked chicken every time with this method.
| Ingredient | Amount | Notes |
|---|---|---|
| Boneless, Skinless Chicken Breast 🍗 | 1 ½ lb | Pounded to 1/2-inch thickness |
| Kosher Salt 🧂 | 1 tsp | Diamond Crystal preferred |
| Black Pepper 🌶️ | ½ tsp | Freshly ground |
| Garlic Powder 🧄 | 1 tsp | Not garlic salt |
| Onion Powder 🧅 | 1 tsp | Fresh ground preferred |
| Paprika 🌶️ | 1 tsp | Sweet or smoked variety |
| Olive Oil 🫒 | 2 tbsp | Divided for cooking |
| Unsalted Butter 🧈 | 2 tbsp | Optional for richness |
| Fresh Lemon Juice 🍋 | 1 tbsp | Brightens flavor |
| Fresh Parsley 🌿 | 2 tbsp | Chopped for garnish |
| Plastic Wrap 📄 | 1 sheet | For pounding chicken |
The chicken quality matters most here. Boneless, skinless breasts from Whole Foods or Costco work best—avoid pre-brined versions as they can get mushy when pounded. Look for uniform thickness in the raw meat (around 6-8 oz per breast) to make pounding easier. A meat mallet is ideal, but a heavy skillet works in a pinch (just be gentle).
No garlic powder? Fresh minced garlic at half the amount works, but the powder distributes better in the seasoning. Swap onion powder for grated fresh onion if you prefer texture. Paprika can be omitted entirely if you don’t like the earthy note. For extra flavor, add dried thyme or rosemary—just a pinch.
Pounded chicken cooks fast—use within 2 days of prepping. Store raw in an airtight container. Cooked leftovers keep 4-5 days in the fridge or freeze for 3 months. Reheat gently to avoid drying out.
Why You’ll Love This Recipe
- 20-Minute Dinner: I can pound the chicken and season it with salt, pepper, garlic and onion powder faster than the oven preheats.
- Crispy Outside, Tender Inside: Pounding ensures every bite is juicy, while the dry rub gives it that crave-worthy crust.
- Meal Prep Hero: Cooks up a batch on Sunday and I’m set for salads, sandwiches, or quick stir-fries all week.
- Budget Stretch: One pound of chicken breasts, a few pantry spices, and I’ve fed four for less than ten bucks.
Step-by-Step Instructions for Pounded Chicken Breast
This method ensures even cooking and maximum tenderness with every thin-cut piece.
Step 1: Pound the Chicken Breast to Uniform Thickness
Place each boneless, skinless chicken breast between the sheet of plastic wrap. Using a meat mallet or rolling pin, pound the chicken to an even ½-inch thickness across the entire surface. I start in the center and work outward to prevent tearing.
This step is crucial for even cooking—thin, uniform pieces cook through at the same rate, eliminating dry spots. You’ll notice the chicken becomes more pliable as you work, which helps it absorb seasonings better.
Step 2: Season Both Sides Generously
Pat the pounded chicken dry with paper towels to remove any moisture. In a small bowl, combine the 1 tsp kosher salt, 0.5 tsp black pepper, 1 tsp garlic powder, 1 tsp onion powder, and 1 tsp paprika. Rub this mixture evenly over both sides of the chicken.
Press the seasoning into the meat so it adheres well. The spices should form a visible, even coating. This dry rub creates a flavorful crust and enhances the natural taste of the chicken without overpowering it.
Step 3: Sear in Hot Olive Oil
Heat 1 tbsp olive oil in a large skillet over medium-high heat until it shimmers. Add the seasoned chicken breasts and cook undisturbed for 3-4 minutes per side. You’ll see the edges turn opaque white and the surface develop a light golden crust.
Resist the urge to move the chicken too soon—it needs time to develop a proper sear. When it releases easily from the pan, that’s your signal to flip. For extra richness, add 2 tbsp unsalted butter during the last minute of cooking and baste the chicken with the melted butter.
Step 4: Rest and Finish with Fresh Elements
Transfer the cooked chicken to a clean plate and let it rest for 5 minutes. This allows the juices to redistribute throughout the meat, ensuring every bite stays moist. Tent loosely with foil if needed to keep warm.
Just before serving, drizzle with 1 tbsp fresh lemon juice and sprinkle with 2 tbsp chopped fresh parsley. The acidity from the lemon brightens the flavors, while the parsley adds a pop of color and freshness.
Pro Tips For Making Chicken Breast Recipe Pounded
- Pound Evenly: Use a rolling pin or meat mallet to pound the chicken to an even 1/2-inch thickness—this guarantees even cooking and prevents dry, overdone edges while the center finishes.
- Season Before Pounding: Sprinkle the chicken with kosher salt, garlic powder, and onion powder before pounding; the seasoning sticks better to the moist surface and penetrates deeper as you work.
- Skip the Overcrowding: I learned this the hard way—cook the pounded breasts in batches if needed, because crowding the pan steams them instead of browning, and you’ll lose that crisp, flavorful crust.
- Rest 5 Minutes: Let the cooked chicken rest under foil for at least 5 minutes before slicing—sounds simple, but it keeps the juices from pooling on your cutting board instead of in the meat.
Essential Equipment for Perfect Results
Meat Mallet Essentials
For pounding chicken, I swear by a flat-faced meat mallet with a comfortable grip. The OXO Good Grips version is my go-to—it’s $15 at most grocery stores and lasts forever. The flat side gives even pressure without tearing the meat. 💪
Plastic Wrap Alternative
If you’re avoiding plastic, use parchment paper or a large resealable bag instead. Both create a barrier between the mallet and chicken while preventing sticking. I keep a roll of Reynolds parchment in my pantry for this exact purpose.
Heavy Skillet Backup
No mallet? Use a cast iron skillet or heavy saucepan. The weight does the work, but go gentle to avoid crushing the chicken. My Lodge 12-inch doubles as both cooking vessel and pounding tool in a pinch.
Tongs for Flipping
12-inch locking tongs are perfect for handling thin chicken. I prefer the OXO silicone-tipped ones—they grip without piercing. Never use forks, which pierce the meat and let juices escape.
Instant-Read Thermometer
Even thin chicken needs temp checking. My ThermoWorks Thermopop ($35) gives accurate reads in 3 seconds. Aim for 165°F in the thickest part. This one tool prevents overcooking better than any timer. 🌡️
Paper Towels
Keep heavy-duty paper towels nearby for drying chicken before seasoning and cleaning up. I buy Brawny in bulk—they don’t tear when patting down wet chicken. Dry meat sears better and prevents steaming in the pan.
Nutrition Facts
Frequently Asked Questions
Why do I need to pound the chicken?
Pounding creates uniform thickness so the meat cooks evenly. Thinner pieces prevent dry spots while maximizing tenderness. It also helps the chicken absorb seasonings better.
What can I use instead of a meat mallet?
A heavy skillet or rolling pin works in a pinch. Place chicken between parchment paper first to prevent sticking. Just use gentle, even pressure to avoid tearing.
How do I know when it’s done?
Use an instant-read thermometer—165°F in the thickest part means it’s safe. The meat should be opaque white with clear juices. Never cut into it to check, as that releases moisture.
Can I prep this in advance?
Pound and season the chicken up to 1 day ahead. Store it in an airtight container in the fridge. Cook just before serving for best texture and flavor.

- BBQ Bison Recipe Steaks: Smoky Grill Mastery with Bold Flavor - September 28, 2026
- Chicken Breast Recipe Tender: Brine-Soaked Juiciness Without Overcooking - September 28, 2026
- Baked Chicken Recipe for Acid Reflux: Gentle Flavors for Sensitive Stomachs - September 28, 2026