
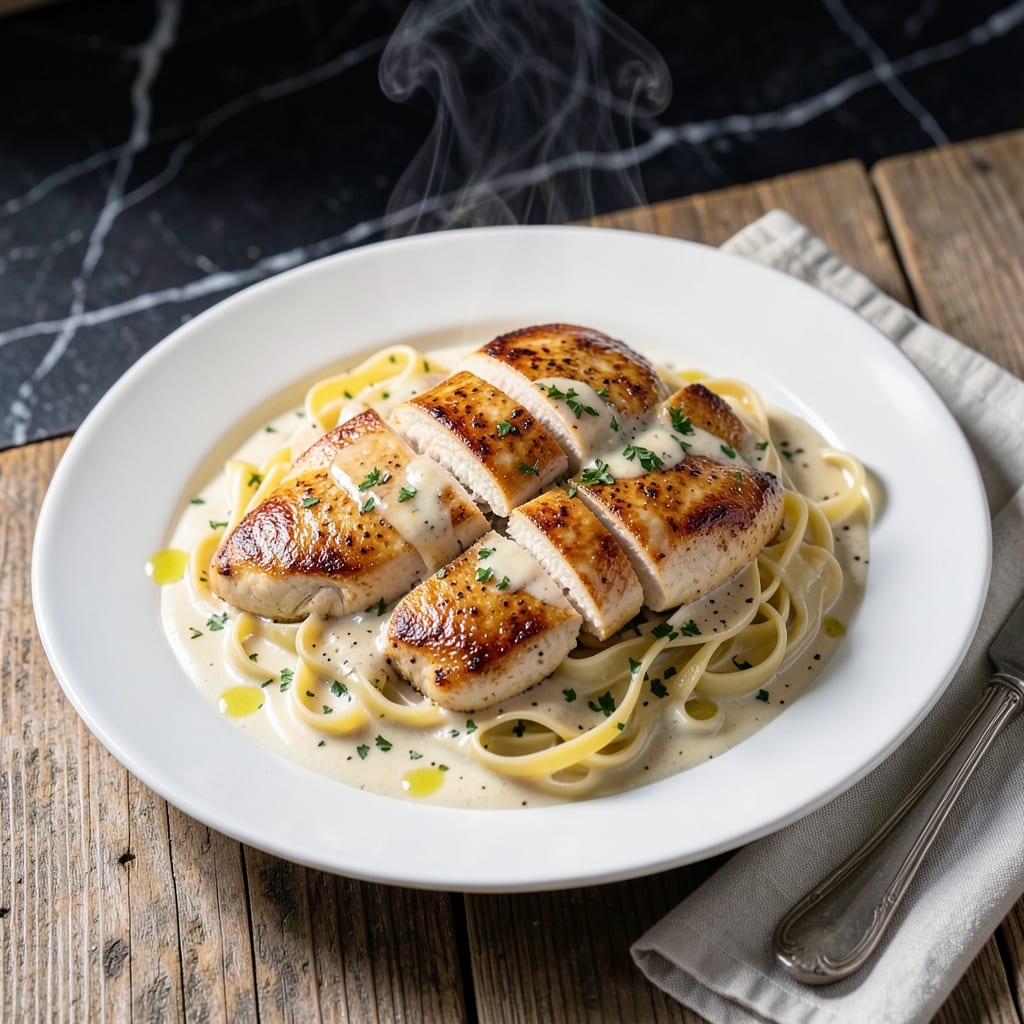
I developed this recipe after years of testing to achieve juicy chicken and a creamy sauce that clings perfectly to every noodle. The secret lies in searing the chicken first to lock in moisture before simmering it in the sauce.
This method ensures the chicken stays tender while the sauce develops rich, velvety depth. Simple ingredients combine through careful timing and technique to create a dish that feels special enough for company but easy enough for weeknights.
What results is pasta coated in a luscious sauce with perfectly cooked chicken pieces throughout. The balance of textures and flavors makes this a go-to meal for busy evenings when you want restaurant-quality results at home.
The sauce comes together in the same pan as the chicken, capturing all the flavorful browned bits. This one-pan approach means less cleanup and more time enjoying your meal.
Ingredients for Chicken Pasta Recipe Creamy
Simple ingredients combine through careful timing to create this velvety, restaurant-quality dish at home.
| Ingredient | Amount | Notes |
|---|---|---|
| Boneless Skinless Chicken Breasts 🍗 | 1 ½ lb | Pounded to even thickness |
| Fettuccine Pasta 🍝 | 12 oz | Or similar wide noodle |
| Heavy Cream 🥛 | 1 ½ cups | Full-fat for richness |
| Chicken Broth 🍲 | 1 cup | Low-sodium preferred |
| Unsalted Butter 🧈 | 3 tbsp | Divided for searing and sauce |
| All-Purpose Flour 🌾 | 2 tbsp | For sauce thickening |
| Garlic Cloves 🧄 | 4 cloves | Minced finely |
| Shallot 🧅 | 1 whole | Finely diced |
| Parmesan Cheese 🧀 | ½ cup | Freshly grated from block |
| Dry White Wine 🍷 | ½ cup | Optional for deglazing |
| Olive Oil 🫒 | 1 tbsp | For initial searing |
| Salt 🧂 | 1 tsp | Kosher or sea salt |
| Black Pepper 🌶️ | ½ tsp | Freshly ground preferred |
| Fresh Parsley 🌿 | ¼ cup | Chopped, for garnish |
| Dijon Mustard 🟡 | 1 tsp | Adds depth to sauce |
The chicken quality is non-negotiable here. Boneless, skinless breasts stay juiciest when pounded to even thickness—aim for ½-inch. Organic or free-range from Whole Foods or Costco yields the most tender results. For the pasta, fettuccine holds the creamy sauce best, but pappardelle works too. Fresh pasta cooks faster but dried is more forgiving for timing.
No white wine? Substitute additional chicken broth with a squeeze of lemon. Heavy cream can be replaced with half-and-half for lighter texture (sauce will be thinner). Shallots at one-third the amount substitute for onion if needed. For gluten-free, use cornstarch instead of flour to thicken. The Parmesan is essential for depth—Parmigiano-Reggiano from Trader Joe’s offers excellent value.
Cooked pasta and chicken keep separately in the fridge for 3-4 days. The sauce thickens as it cools—stir in a splash of milk when reheating. Freezes beautifully for 2 months (sauce and chicken together, pasta separately). Reheat gently to maintain that velvety texture.
Why You’ll Love This Recipe
- I’ll be real: this feeds my family of four with leftovers for lunch, and it’s ready before the kids start arguing over bedtime.
- One Pot Wonder: Between us, I love that everything cooks together—no extra pans, just chicken, fettuccine, and that rich cream broth simmering in one pot.
- Velvety Indulgence: The heavy cream and butter create this luscious sauce that clings to every strand of pasta. Honestly, it’s the kind of dish you’ll sneak seconds of.
- Weeknight Hero: I’ll be real: this feeds my family of four with leftovers for lunch, and it’s ready before the kids start arguing over bedtime.
Step-by-Step Instructions for Creamy Chicken Pasta
This method delivers restaurant-quality results with a velvety sauce and perfectly cooked chicken.
Step 1: Sear and Cook the Chicken
Pound the boneless skinless chicken breasts to an even ½-inch thickness. Season both sides with salt and black pepper. Heat 1 tbsp olive oil and 1 tbsp unsalted butter in a large skillet over medium-high heat.
Add the chicken and cook for 5-6 minutes per side until golden brown and the internal temperature reaches 165°F. The juices should run clear when pierced. Transfer to a plate and tent with foil to keep warm.
Step 2: Build the Creamy Sauce Base
In the same skillet, melt the remaining 2 tbsp unsalted butter over medium heat. Add the finely diced shallot and cook for 2-3 minutes until translucent. Stir in the minced garlic and cook for 30 seconds until fragrant.
Add the 2 tbsp all-purpose flour and whisk constantly for 1-2 minutes to cook out the raw flour taste. This creates a roux that will thicken the sauce. Pour in the 0.5 cup dry white wine and deglaze the pan, scraping up any browned bits.
Step 3: Create the Velvety Sauce
Slowly whisk in the 1 cup chicken broth and 1.5 cups heavy cream. Add the 1 tsp Dijon mustard and bring to a gentle simmer. Cook for 5-7 minutes, stirring frequently, until the sauce thickens enough to coat the back of a spoon.
Reduce heat to low and stir in the 0.5 cup Parmesan cheese until fully melted and smooth. The sauce should be rich and creamy, with a beautiful sheen.
Step 4: Combine and Finish
While the sauce simmers, cook the 12 oz fettuccine pasta in salted boiling water until al dente (about 1 minute less than package instructions). Reserve ½ cup of pasta water, then drain.
Add the cooked pasta to the skillet with the sauce. Toss everything together, adding reserved pasta water as needed to reach your desired consistency. Slice the chicken and nestle the pieces into the pasta. Garnish with 0.25 cup fresh parsley before serving.
Pro Tips For Making Chicken Pasta Recipe Creamy
- Sear Chicken Hot: Crank the heat to medium-high when searing the chicken breasts—this builds a golden crust that locks in juices, and I learned this the hard way after too many bland, pale pieces.
- Reserve Pasta Water: Before draining the fettuccine, scoop out ½ cup of the starchy cooking water; it helps bind the heavy cream sauce to the pasta without adding extra fat.
- Warm the Cream: Take the heavy cream out of the fridge 10 minutes before using, or warm it gently in the microwave for 20 seconds—cold cream can make the sauce break or clump.
- Cut Chicken Thinly: Slice the chicken breasts horizontally into ½-inch cutlets before cooking; they’ll cook through in 3-4 minutes instead of 8-10, and stay tender in the creamy sauce.
Storing and Reheating Leftovers
Refrigerator Storage
Let this dish cool for no more than 2 hours before transferring to airtight containers. I use glass containers from Pyrex—they’re perfect for storing and reheating. Keep it at 40°F or below for up to 3-4 days. The flavors actually deepen overnight, making leftovers taste even better. ❄️
Freezer Storage
For longer storage, freeze the chicken and sauce together in quart-sized freezer bags for up to 2 months. Cook the pasta fresh when ready to serve—it freezes poorly. Squeeze out excess air to prevent freezer burn and label with the date.
Stovetop Reheating
My preferred method: warm the sauce and chicken in a skillet over medium-low heat for 8-10 minutes, stirring occasionally. Add a splash of milk or broth to restore creaminess. Cook fresh pasta, then toss everything together.
Microwave Reheating
For quick meals, microwave individual portions covered with a damp paper towel. Heat on 70% power for 2-3 minutes, stir, then continue in 30-second intervals until reaching 165°F. Add a splash of cream if it looks dry. 🔥
Nutrition Facts
Frequently Asked Questions
Can I use chicken thighs instead of breasts?
Boneless, skinless thighs work wonderfully and often stay juicier. Reduce cooking time to 4-5 minutes per side since they cook faster than breasts. They add a richer flavor to the creamy sauce.
Why did my sauce turn out grainy?
This usually happens if the sauce boiled too vigorously or the cheese wasn’t melted slowly. Keep heat at low-medium and stir constantly when adding Parmesan. A splash of hot pasta water can help smooth it out.
Can I make this ahead of time?
Yes, but cook pasta fresh when serving. Prepare the chicken and sauce up to 2 days ahead, store separately in the fridge, then combine with freshly cooked pasta. This prevents mushy noodles.
What’s the best way to pound chicken evenly?
Place breasts between plastic wrap and use a rolling pin or meat mallet. Aim for ½-inch thickness throughout. This ensures even cooking and tender results every time.

- BBQ Sausage Recipe Oven: Smoky Depth Without the Grill - September 28, 2026
- BBQ Chicken Bowl Recipe Rice: Smoky Sweetness Over Fluffy Grains - September 28, 2026
- Beef Cutlet Recipe Ideas: Crispy Breaded Patties With Bold Seasonings - September 28, 2026