
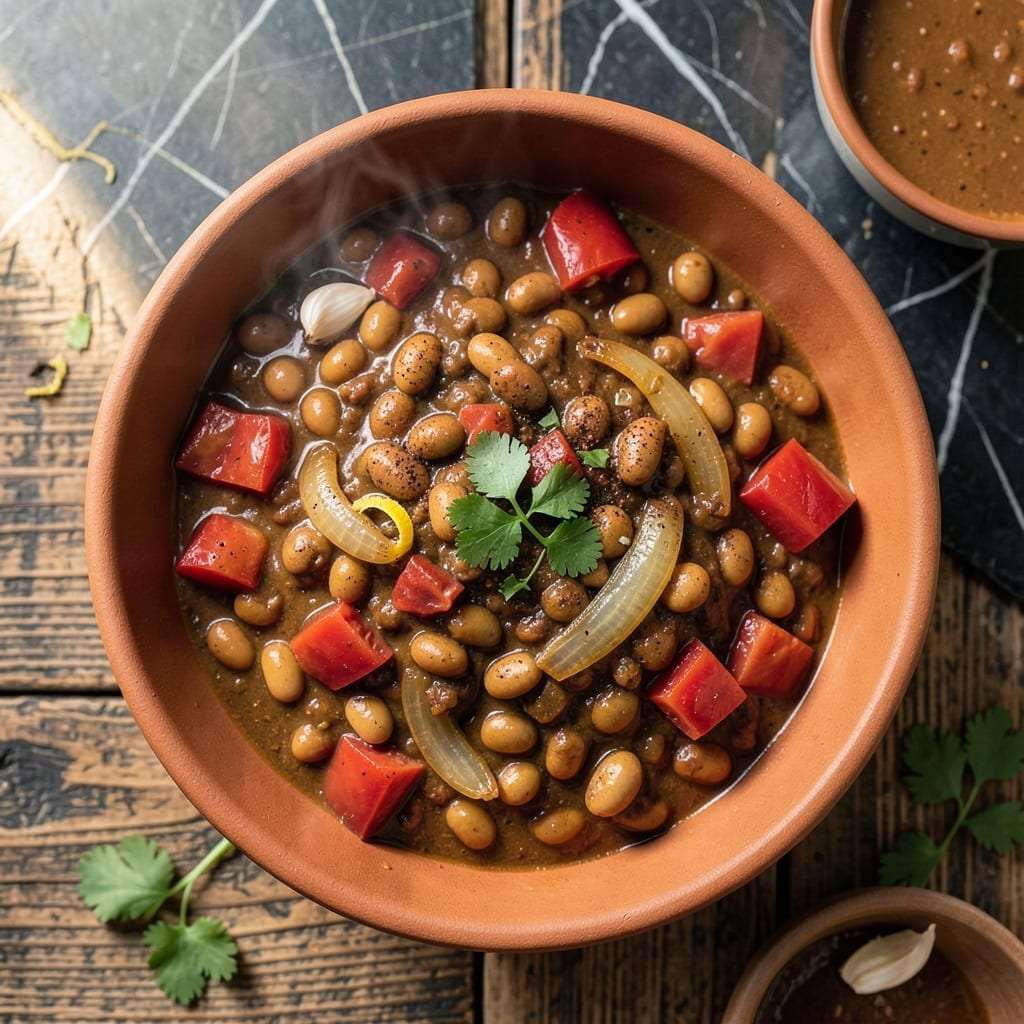
There’s nothing like a slow-simmered bowl of chili made with dry beans for a truly hearty meal. This method transforms simple ingredients into a rich, deeply flavorful dish that’s worth the wait.
The dry beans absorb the spices and liquid, becoming tender and creamy while thicken the chili naturally. It’s a foolproof way to achieve that perfect texture and taste every time.
Ingredients for Chili Recipe with Dry Beans
Pantry staples plus fresh vegetables create this rich, slow-cooked dish with ease.
| Ingredient | Amount | Notes |
|---|---|---|
| Dry Pinto Beans 🌱 | 1 lb | Rinsed and picked over |
| Yellow Onion 🧅 | 1 whole | Medium, finely diced |
| Red Bell Pepper 🌶️ | 1 whole | Cored and diced |
| Garlic Cloves 🧄 | 4 cloves | Minced for depth |
| Vegetable Broth 🥣 | 4 cups | Low-sodium preferred |
| Canned Diced Tomatoes 🍅 | 2 cans | 14.5 oz each, undrained |
| Tomato Paste 🍅 | 2 tbsp | For rich umami base |
| Chili Powder 🌶️ | 2 tbsp | Mild or hot variety |
| Ground Cumin 🌿 | 1 tbsp | Toasted for warmth |
| Smoked Paprika 🌶️ | 1 tsp | For smoky depth |
| Dried Oregano 🍃 | 1 tsp | Mediterranean variety |
| Bay Leaf 🍃 | 1 whole | Removed before serving |
| Salt 🧂 | 1 tsp | Adjust to taste |
| Black Pepper 🌶️ | ½ tsp | Freshly ground preferred |
| Olive Oil 🫒 | 2 tbsp | For sautéing vegetables |
The dry beans are key here. Buy from a store with high turnover like Whole Foods or Trader Joe’s to ensure freshness—they should look uniform and unblemished. Pinto beans are classic, but black beans or kidney beans work too (adjust soaking time slightly). The vegetable broth matters—low-sodium lets you control the seasoning. I prefer Imagine or Pacific Foods brands for consistent quality.
No fresh bell pepper? Frozen works fine—just thaw and drain first. Short on spices? One tablespoon of taco seasoning can replace the chili powder, cumin, and paprika combo. Canned tomatoes can be fire-roasted for extra smokiness. The olive oil can be any neutral oil if that’s what’s on hand. Need it faster? Pre-soak the beans overnight to cut cooking time.
The chili tastes even better the next day once flavors meld. Stores 4-5 days refrigerated, freezes for 3 months. Portion leftovers for easy lunches—this one reheats like a dream (the beans thicken it perfectly).
Why You’ll Love This Recipe
- Set and Forget: I toss everything in the pot and let the dry pinto beans soak up the garlic and broth while I do other things.
- Deep, Earthy Flavor: The red bell pepper and onion caramelize just enough to give this chili a rich, savory depth that canned beans can’t touch.
- Meal Prep Gold: Honestly, it tastes even better the next day—so I always make a double batch for lunches all week.
- Penny-Pincher’s Dream: Dry pinto beans cost almost nothing, and this pot feeds my family for days without breaking the bank.
Step-by-Step Instructions for Chili With Dry Beans
Here’s the method. Straightforward, tested, works every time.
Step 1: Soak and Prepare the Beans
Rinse the 1 lb Dry Pinto Beans under cold water and pick over to remove any debris or broken beans. Place them in a large bowl and cover with enough water to submerge by 2 inches. Let soak overnight or for at least 8 hours.
This soaking step reduces cooking time significantly and helps achieve a creamy texture. Drain and rinse the beans thoroughly before using—this removes excess starch and prevents a gummy final texture. I always check for any remaining floaters or discolored beans during this rinse.
Step 2: Sauté the Aromatics and Spices
Heat the 2 tbsp Olive Oil in a large, heavy pot over medium heat. Add the finely diced 1 whole Yellow Onion and 1 whole Red Bell Pepper. Cook, stirring occasionally, for 5-7 minutes until the vegetables soften and the onion becomes translucent.
Add the 4 cloves Garlic Cloves and cook for 30 seconds until fragrant. Stir in the 2 tbsp Tomato Paste, 2 tbsp Chili Powder, 1 tbsp Ground Cumin, 1 tsp Smoked Paprika, and 1 tsp Dried Oregano. Cook for 1 minute, stirring constantly, until the spices are deeply fragrant and the tomato paste darkens slightly.
Step 3: Combine and Simmer
Add the soaked, drained Dry Pinto Beans, 2 cans Canned Diced Tomatoes with their juices, 4 cups Vegetable Broth, and the 1 whole Bay Leaf. Stir well to combine. Bring the mixture to a boil over high heat.
Once boiling, reduce the heat to low to maintain a gentle simmer. Cover the pot and let it cook for 1 to 1.5 hours, stirring occasionally, until the beans are tender. Check by tasting a bean—it should be creamy inside with no chalky texture.
Step 4: Season and Finish
Once the beans are tender, stir in the 1 tsp Salt and 0.5 tsp Black Pepper. Taste and adjust seasoning if needed. The chili should be thick and hearty at this point, with beans that hold their shape but are fully cooked through.
Remove the Bay Leaf and discard. If the chili is too thick, thin it with a small amount of water or additional broth. Let it sit for 10 minutes before serving to allow the flavors to meld together. This resting period ensures every bite is rich and well-seasoned.
Pro Tips For Making Chili Recipe With Dry Beans
- Soak Overnight: I learned this the hard way—dry pinto beans need at least 8 hours in water to soften properly, or you’ll be chewing tough beans for hours.
- Sauté the Aromatics: Cook the yellow onion, red bell pepper, and garlic in the pot first until soft, about 5-7 minutes—this builds the flavor base before adding broth.
- Skip the Salt Early: Sounds weird, but it works: adding salt before the beans are fully tender can make them stay hard, so wait until they’re almost done.
- Simmer Low and Slow: After boiling, drop to a gentle simmer and cover—this keeps the beans from bursting and turns the broth rich and thick.
Dietary Considerations for These Flavors
Vegan and Vegetarian
This dish is naturally 100% plant-based, making it perfect for vegan and vegetarian diets. The dry pinto beans provide all the protein and fiber without any animal products. I love how satisfying it is while being completely meat-free.
Gluten-Free Friendly
All ingredients in this creation are inherently gluten-free. Just double-check your vegetable broth label—some brands add wheat. I always use Imagine or Pacific Foods for guaranteed gluten-free results. 💪
Low-Sodium Option
To reduce sodium, use low-sodium vegetable broth and no-salt-added canned tomatoes. Then season to taste with salt at the end. This way, you control the sodium content while keeping all the rich flavors.
Allergen Information
This is free from the top 9 allergens (milk, eggs, fish, etc.). However, always check spice blend labels for potential cross-contamination. The olive oil and beans are typically safe, but brands like Whole Foods offer dedicated allergen-free options.
High-Protein Adaptation
For extra protein, add 1 cup quinoa or 1 diced tofu block along with the beans. Both absorb the flavors beautifully and boost protein content significantly. I often add tofu for a heartier texture.
Bean Variety Notes
If using kidney or black beans instead of pinto, they may take 15-30 minutes longer to cook. The method remains the same, but test for doneness at the 1.5-hour mark. All these varieties work beautifully in this dish. 🌱
Frequently Asked Questions
Do I have to soak the beans overnight?
Soaking is recommended for even cooking, but you can use the quick-soak method: Boil beans in water for 2 minutes, then let sit for 1 hour. This cuts soaking time significantly while ensuring tender results.
Why do my beans stay hard?
Old beans or insufficient cooking time are common culprits. Always use fresh beans and simmer until fully tender, which may take up to 2 hours. Adding salt too early can also toughen the skins.
Can I use canned beans instead?
Yes, but the texture and flavor won’t be the same. Drain and rinse 3 cans (15 oz each) of pinto beans, then add during the last 30 minutes of cooking. Fresh beans are preferred for this recipe.
Nutrition Facts

- BBQ Sausage Recipe Oven: Smoky Depth Without the Grill - September 28, 2026
- BBQ Chicken Bowl Recipe Rice: Smoky Sweetness Over Fluffy Grains - September 28, 2026
- Beef Cutlet Recipe Ideas: Crispy Breaded Patties With Bold Seasonings - September 28, 2026