
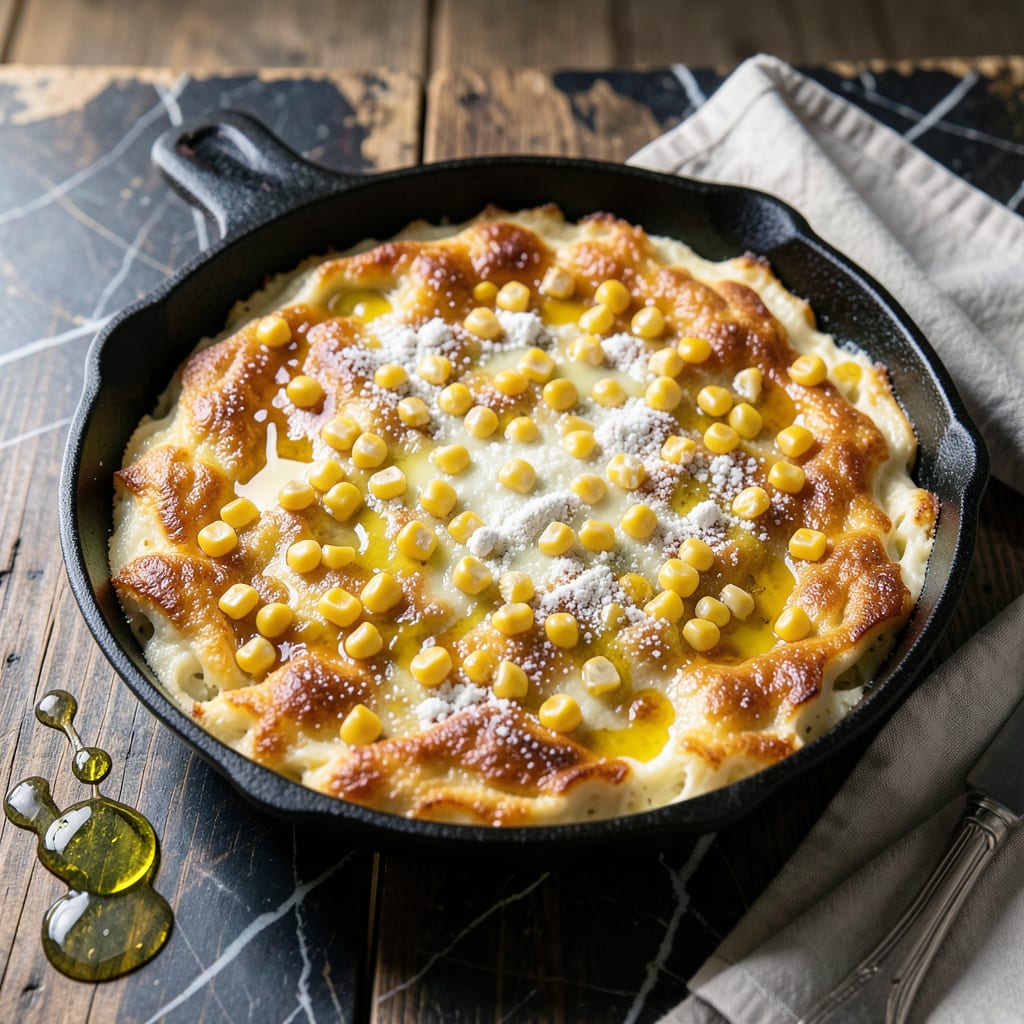
This southern-style dish delivers a creamy texture that perfectly complements any BBQ spread. The combination of sweet corn and rich custard creates a comforting side everyone will love.
Simple ingredients come together through careful baking to produce a golden, slightly jiggly result. The balance of sweetness and savory notes makes this a standout addition to your meal.
Ingredients for City Bbq Corn Pudding
Fresh corn, rich custard, and a handful of pantry staples make this dish sing.
| Ingredient | Amount | Notes |
|---|---|---|
| Sweet Corn Kernels 🌽 | 4 cups | Fresh, canned, or frozen thawed |
| Whole Milk 🥛 | 1 ½ cups | Full-fat for creaminess |
| Large Eggs 🥚 | 4 whole | Room temperature preferred |
| All-Purpose Flour 🌾 | ¼ cup | For thickening custard |
| Granulated Sugar 🍚 | ⅓ cup | Adjust to taste preference |
| Unsalted Butter 🧈 | 4 tbsp | Melted and cooled slightly |
| Vanilla Extract 💧 | 1 tsp | Pure extract for best flavor |
| Salt 🧂 | 1 tsp | Kosher or sea salt preferred |
| Black Pepper 🌶️ | ¼ tsp | Freshly ground for best taste |
| Baking Powder 🧁 | 1 tsp | Ensures light, fluffy texture |
| Sharp Cheddar Cheese 🧀 | 1 cup | Shredded from block |
| Green Onions 🧅 | ½ cup | Thinly sliced for garnish |
The corn is everything here. Fresh summer corn (cut straight off the cob) gives the best texture, but Trader Joe’s frozen works in a pinch. For custard this creamy, whole milk is non-negotiable—skip the skim. I grab my dairy from Kroger since they’ve got the freshest local stuff. The cheddar should be sharp and block-cut (pre-shredded has anti-caking agents that mess with the melt).
No fresh corn? Canned sweet corn (drained well) or frozen both work. Out of whole milk? Half-and-half mixed with a splash of water gets you close. Need to make it gluten-free? Cornstarch at half the amount replaces the flour. The sugar can be reduced if you like less sweetness, but don’t skip it entirely—the corn needs that balance.
Bake it the day you’re serving—this one doesn’t reheat as well. Leftovers? They’ll keep 3-4 days in the fridge, but the texture changes. Best fresh out of the oven, golden and just set. Worth the effort every time.
Why You’ll Love This Recipe
- One Bowl Wonder: I dump everything—corn, milk, eggs, flour—in one bowl, mix, and pour. Honestly, cleanup’s almost nonexistent.
- Sweet & Creamy: The corn kernels burst with natural sweetness while the milk and eggs bake into this ridiculously rich, custardy bite.
- Potluck MVP: I bring it to gatherings and it’s always the first dish gone—serves warm or room temp with zero stress.
- Doubles Easily: Between us, leftovers taste even better the next day, and the ingredients cost pennies compared to store-bought sides.
Step-by-Step Instructions for City BBQ Corn Pudding
Here’s the method I use for a custard so creamy it’ll make you swoon.
Step 1: Prep the Corn and Wet Ingredients
Start by preheating your oven to 350°F. I like to pulse the 4 cups Sweet Corn Kernels in a food processor a few times—just enough to break up some kernels while leaving others whole for texture. You want a mix of creamy and slightly chunky.
In a large bowl, whisk together the 1.5 cups Whole Milk, 4 whole Large Eggs, 0.33 cup Granulated Sugar, 4 tbsp Unsalted Butter (melted and cooled), 1 tsp Vanilla Extract, 1 tsp Salt, and 0.25 tsp Black Pepper until fully combined. The eggs should be room temperature to prevent curdling in the next steps.
Step 2: Incorporate the Dry Ingredients
Sift the 0.25 cup All-Purpose Flour and 1 tsp Baking Powder directly into the wet mixture. I sift to avoid lumps—this ensures the custard base stays silky smooth. Whisk just until no dry streaks remain, being careful not to overmix.
Here’s the thing—this batter should look thin, almost like heavy cream. Don’t be tempted to add more flour; the corn and eggs will thicken it during baking. Fold in the pulsed corn kernels and 1 cup Sharp Cheddar Cheese (shredded from block melts better than pre-shredded).
Step 3: Bake Until Set and Golden
Pour the batter into a greased 9×13-inch baking dish. I use butter for greasing—it adds an extra layer of flavor. Bake for 45-50 minutes until the edges pull away from the sides and the center is set but still slightly jiggly, like a firm custard.
You’re looking for a golden brown top with a few darker spots. If the top browns too quickly, tent with foil. The pudding is done when a knife inserted in the center comes out clean. Don’t overbake—this is what keeps it creamy rather than dense.
Step 4: Rest and Garnish Before Serving
Let the corn pudding rest for 10-15 minutes out of the oven. This allows the custard to set fully and makes it easier to slice. The texture will transition from jiggly to perfectly firm but still spoon-tender.
Sprinkle the 0.5 cup Green Onions (thinly sliced) over the top just before serving. The fresh, sharp bite cuts through the richness beautifully. Serve warm—this dish doesn’t reheat as well, so dig in while it’s at its creamy peak.
Pro Tips For Making City Bbq Corn Pudding
- Bake Until Jiggly: Pull it out when the center still has a slight wobble—it’ll set up as it cools. Overbaking turns it dense, and nobody wants dense corn pudding.
- Drain the Corn: I learned this the hard way—rinsing and draining the sweet corn kernels first keeps the pudding from getting watery. Skip this, and you’ll regret it.
- Warm the Milk: Mixing cold whole milk with eggs can cause curdling. Take 30 seconds to warm the milk slightly—just enough to take the chill off.
- Blend the Corn: Sounds weird, but it works: pulse half the corn kernels in a blender before adding to the batter for a creamier texture without losing that fresh corn flavor.
Dietary Considerations for city bbq corn pudding
Gluten-Free Adaptation
Swap the 0.25 cup All-Purpose Flour for 2 tbsp cornstarch or almond flour. I’ve tested both, and the cornstarch keeps the texture closest to the original. The baking time may shorten by 5 minutes, so check at 40 minutes. 🌾
Dairy-Free Option
Use coconut milk (full-fat) instead of whole milk, and dairy-free butter like Miyoko’s. For the cheese, Violife cheddar melts beautifully. The flavor will be slightly different but still delicious and creamy.
Lower Sugar Version
Reduce the 0.33 cup Granulated Sugar to 2 tbsp or use monk fruit sweetener for a no-sugar option. The natural sweetness of the corn will still shine. I often do this for a more savory take on the dish.
Egg-Free Alternative
Replace the 4 whole Large Eggs with 1 cup unsweetened applesauce or flax eggs (4 tbsp ground flaxseed + 10 tbsp water). The texture will be denser, but still tasty. Let the mixture rest 10 minutes before baking to thicken.
Vegan Modifications
Combine the dairy-free and egg-free swaps above for a fully vegan version. I’ve had success with this combo, though the pudding sets slightly firmer. Garnish with chives instead of green onions if preferred.
Allergen Note
This recipe contains dairy, eggs, and gluten in its original form. Always check labels for cross-contamination warnings, especially with cheese and flour. For nut allergies, avoid almond flour in gluten-free versions. 💡
Nutrition Facts
Frequently Asked Questions
Can I use canned corn instead of fresh?
Drain and rinse 4 cups canned corn well before using. It works just as well, though fresh corn offers the best texture. Frozen thawed corn is another great alternative.
Why does my pudding turn out dense?
Overmixing the batter or baking too long can cause this. Mix just until combined and bake until the center is set but still slightly jiggly. 45-50 minutes at 350°F is ideal.
Can I make this ahead of time?
It’s best served fresh, but you can prep the batter a day ahead. Store it covered in the fridge, then bake as directed. Leftovers keep 3-4 days but the texture changes slightly.

- BBQ Sausage Recipe Oven: Smoky Depth Without the Grill - September 28, 2026
- BBQ Chicken Bowl Recipe Rice: Smoky Sweetness Over Fluffy Grains - September 28, 2026
- Beef Cutlet Recipe Ideas: Crispy Breaded Patties With Bold Seasonings - September 28, 2026