
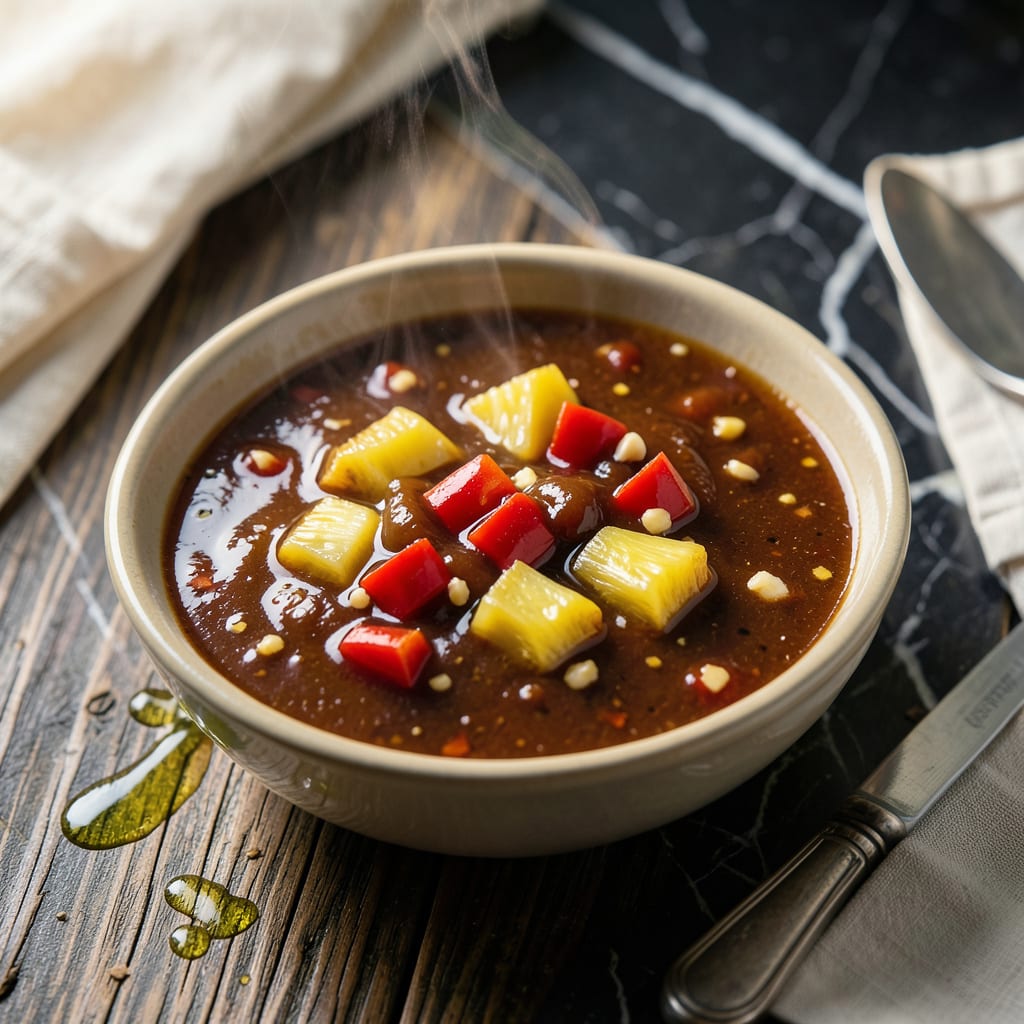
This sauce delivers the perfect balance of tangy and sweet that elevates any Asian-inspired dish. No complicated techniques required—just simple ingredients simmered together to create a versatile condiment.
Use it for dipping, stir-frying, or glazing proteins. The bold flavor profile works with chicken, pork, or vegetables, and it stores beautifully in the fridge for up to two weeks.
Ingredients for Contadina Sweet and Sour Sauce
Ten ingredients transform into this versatile, tangy-sweet sauce for any Asian dish.
| Ingredient | Amount | Notes |
|---|---|---|
| Pineapple Juice 🍍 | 1 ½ cups | Unsweetened, canned or fresh |
| White Vinegar 💧 | ½ cup | Distilled white preferred |
| Brown Sugar 🍚 | ½ cup | Light or dark, packed |
| Ketchup 🍅 | ½ cup | Classic tomato ketchup |
| Soy Sauce 🫒 | 2 tbsp | Low-sodium for balance |
| Garlic Cloves 🧄 | 3 cloves | Minced finely for even flavor |
| Ginger Root 🌿 | 1 tbsp | Fresh, grated or minced |
| Cornstarch 🌾 | 2 tbsp | For thickening the sauce |
| Water 💧 | ¼ cup | Cold for cornstarch slurry |
| Red Bell Pepper 🌶️ | ½ whole | Diced small for texture |
The pineapple juice is non-negotiable for that classic sweetness. Dole or Del Monte canned juice works perfectly—just avoid added sugars. For the vinegar, Heinz distilled white gives the cleanest tang. Brown sugar adds depth; Domino or C&H are reliable. Ginger and garlic should be fresh (not powdered)—their pungency is key to the sauce’s complexity.
No pineapple juice? Orange juice with a splash of lime gets you close. Out of ketchup? Tomato paste plus a teaspoon of sugar works in a pinch. For a gluten-free version, swap soy sauce for tamari. The cornstarch slurry is essential for that glossy finish—arrowroot powder can substitute if needed, but use the same ratio.
This sauce keeps in an airtight container in the fridge for up to 2 weeks. For longer storage, freeze in ice cube trays—thaw only what you need. The flavors meld and deepen over 24 hours, so make it a day ahead if possible.
Why You’ll Love This Recipe
- 5-Minute Mix: I dump everything in one pot—pineapple juice, vinegar, and the rest—and it’s done before the rice finishes.
- Sweet-Tangy Balance: That first hit of brown sugar followed by vinegar’s zing keeps me going back for another taste.
- Dinner or Dip: I slather it on chicken one night, then use the leftovers as a dipping sauce for egg rolls the next.
- Pantry Staples: Honestly, I always have ketchup and soy sauce on hand, so this costs me almost nothing extra.
Step-by-Step Instructions for Contadina Sweet and Sour Sauce
Master this balanced sauce with precise timing and professional technique for authentic results.
Step 1: Sauté Aromatics for Depth of Flavor
Heat a medium saucepan over medium heat without oil. Dice the 0.5 whole Red Bell Pepper into small, uniform pieces—about ¼-inch dice for consistent texture. Add the diced red bell pepper to the dry pan and sauté for 3-4 minutes until it softens slightly and begins to develop slight char marks.
Add the minced 3 cloves Garlic Cloves and grated 1 tbsp Ginger Root to the pan. Cook for an additional 30-45 seconds until fragrant, stirring constantly to prevent burning. This brief cooking time intensifies the aromatics without making them bitter, which is crucial for the sauce’s complexity.
Step 2: Build the Sauce Base
Pour in the 1.5 cups Pineapple Juice, 0.5 cup White Vinegar, 0.5 cup Brown Sugar, 0.5 cup Ketchup, and 2 tbsp Soy Sauce. Stir well to combine and dissolve the brown sugar. Increase heat to medium-high and bring the mixture to a gentle boil.
Once boiling, reduce heat to medium-low and let it simmer for 8-10 minutes. You’ll notice the liquid reduce slightly and the flavors begin to meld. The sauce should take on a deeper, more cohesive color as the ingredients marry together during this simmering period.
Step 3: Thicken to Perfect Consistency
In a small bowl, whisk together the 2 tbsp Cornstarch and 0.25 cup Water until completely smooth, creating a slurry. This cold water method prevents lumps from forming in your sauce.
Slowly pour the cornstarch slurry into the simmering sauce while whisking constantly. Continue cooking for 2-3 minutes until the mixture thickens to a glossy, syrup-like consistency that coats the back of a spoon. The transformation happens quickly—watch for the sauce to change from thin and liquid to thick and luscious.
Step 4: Finish and Adjust
Remove the saucepan from heat and let it sit for 1-2 minutes. This brief rest allows the sauce to reach its final thickness. Taste and adjust the balance if needed—though with these precise measurements, you should achieve the perfect sweet-tangy equilibrium that defines Contadina-style sweet and sour sauce.
The finished sauce should have visible bits of red bell pepper suspended in a thick, glossy liquid with a vibrant color. It will continue to thicken slightly as it cools. Use immediately for stir-fries or let cool completely before storing in an airtight container in the refrigerator for up to 5 days.
Pro Tips For Making Contadina Sweet And Sour Sauce
- Simmer Low and Slow: Keep the heat at medium-low once the sauce starts bubbling—I learned this the hard way after scorching a batch by cranking it too high. The brown sugar caramelizes evenly at a gentle simmer.
- Strain Pineapple Juice: Use only the clear pineapple juice, not the pulp, unless you want a chunky sauce. Sounds picky, but it actually changes the outcome.
- Skip the Boil Over: Stir frequently, especially once the brown sugar dissolves, or the vinegar and ketchup will stick and burn. Resist the urge to walk away.
- Taste Before Serving: The soy sauce can overpower if you’re heavy-handed, so I check the flavor after 5 minutes of simmering and adjust with a splash more pineapple juice if needed.
Essential Equipment for contadina sweet and sour sauce
Saucepan Selection
I always reach for a medium saucepan with a heavy bottom—like my All-Clad Stainless Steel 3-Quart. The even heat distribution prevents hot spots that could scorch the sugar in your sauce. A 2-3 quart capacity gives enough room for simmering without risking spills.
Whisk Matters
A balloon whisk is my go-to for this recipe. The rounded shape fits perfectly in saucepan corners to dissolve brown sugar and incorporate the cornstarch slurry. I prefer OXO’s 11-inch—it’s sturdy and comfortable for constant stirring.
Precision Measuring
Accurate measurements make the difference between perfect balance and cloying sweetness. Use liquid measuring cups for the pineapple juice and vinegar, and dry measuring cups for the brown sugar and cornstarch. I keep a set of Pyrex glass for liquids and stainless steel for dry ingredients.
Fine Grater
For the ginger, a microplane grater extracts maximum flavor with minimal effort. I use the Microplane 40020—it creates a fine, almost paste-like consistency that blends seamlessly into the sauce. Fresh ginger is non-negotiable here.
Storage Containers
Once cooled, transfer your sauce to airtight containers for fridge storage. I love Glasslock containers—they’re leakproof and won’t absorb odors. Leave ½-inch headspace for expansion if freezing. 💡
Optional Tools
A garlic press makes quick work of the cloves, and a sharp chef’s knife ensures clean dice on the bell pepper. These aren’t essential but make prep faster and more consistent. I’ve had my Wüsthof 8-inch for over a decade.
Nutrition Facts
Frequently Asked Questions
Can I use canned pineapple instead of juice?
Yes!Blend canned pineapple chunks with their juice to make 1.5 cups. Strain if you prefer a smoother sauce. The texture will be slightly different but the flavor remains excellent.
How do I fix sauce that’s too thin?
Mix 1 tsp cornstarch with 1 tbsp cold water and whisk into simmering sauce. Cook for 1-2 minutes until thickened. Avoid adding dry cornstarch directly as it will clump.
What can I substitute for brown sugar?
Use ½ cup white sugar plus 1 tbsp molasses for similar depth. Alternatively, coconut sugar works in a 1:1 ratio. Each option brings a slightly different flavor profile.
How long does homemade sauce keep?
Store in an airtight container in the fridge for up to 2 weeks. For longer storage, freeze in ice cube trays for up to 3 months. Thaw overnight in the fridge.

- BBQ Sausage Recipe Oven: Smoky Depth Without the Grill - September 28, 2026
- BBQ Chicken Bowl Recipe Rice: Smoky Sweetness Over Fluffy Grains - September 28, 2026
- Beef Cutlet Recipe Ideas: Crispy Breaded Patties With Bold Seasonings - September 28, 2026