
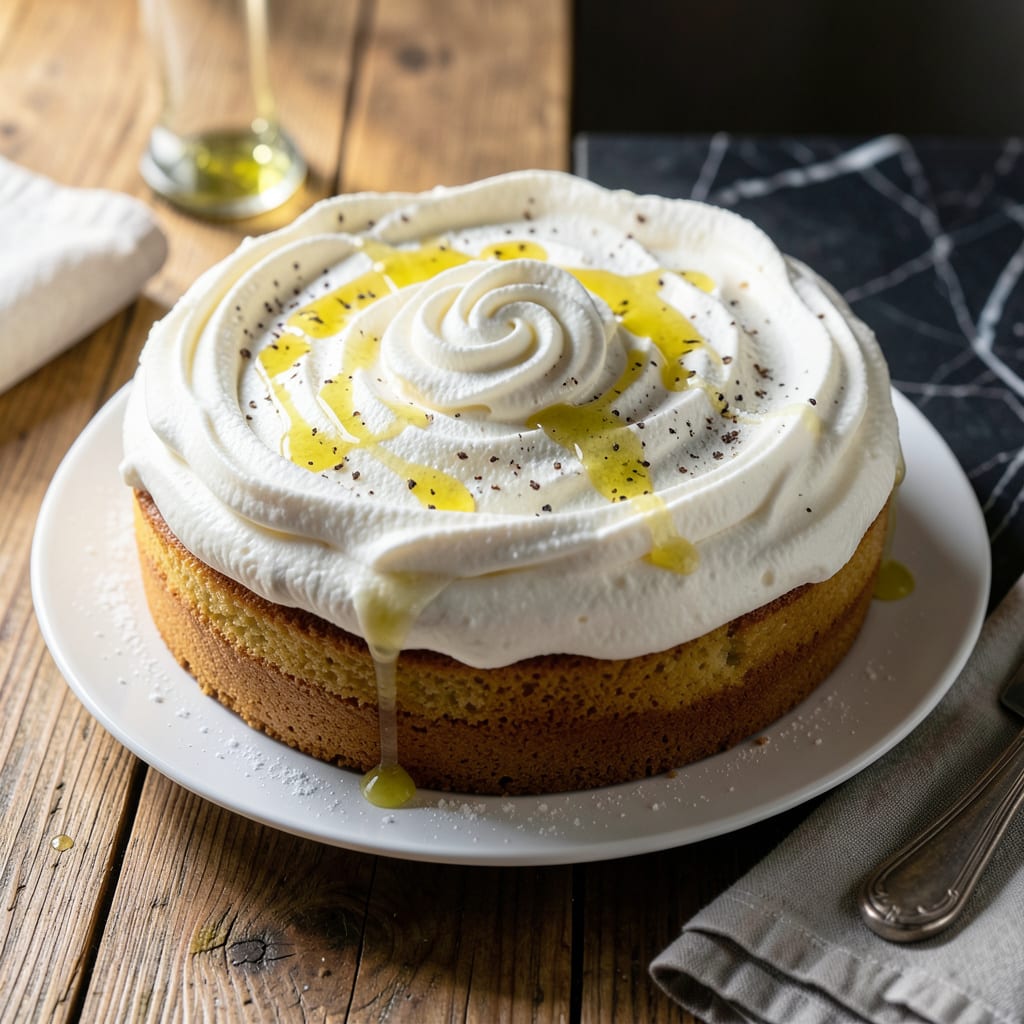
This frosting combines the lightness of Cool Whip with the richness of cream cheese for a perfectly balanced topping. It’s ideal for cakes, cupcakes, or any dessert needing a smooth, creamy finish.
With just a few simple ingredients and 5 minutes of mixing, you’ll have a frosting that’s both fluffy and stable. No baking skills required—just blend, spread, and enjoy.
Ingredients for Cool Whip Cream Cheese Frosting
Six simple ingredients create this light, creamy frosting everyone will love on desserts.
| Ingredient | Amount | Notes |
|---|---|---|
| Cool Whip Topping 🍦 | 8 oz | Thawed completely before using |
| Cream Cheese 🧀 | 8 oz | Full-fat, softened to room temperature |
| Powdered Sugar 🍚 | 1 cup | Sifted for smooth texture |
| Vanilla Extract 🌿 | 1 tsp | Pure vanilla for best flavor |
| Unsalted Butter 🧈 | 2 tbsp | Softened, optional for richness |
| Lemon Juice 🍋 | ½ tsp | Freshly squeezed for balance |
The cream cheese is the star here. Philadelphia brand is my go-to for consistent texture, but any full-fat variety works. Cool Whip needs to be fully thawed—straight from the freezer ruins the consistency. For the powdered sugar, Domino or C&H dissolve the smoothest (skip the generic stuff if it looks clumpy). Butter is optional but adds a richness that balances the tang.
No Cool Whip? Homemade whipped cream works but won’t be as stable. Need a lighter version? Neufchâtel cheese at one-third less fat gets you close. Skip the butter if you want it extra light. The vanilla can be vanilla bean paste for those pretty flecks. For a citrus twist, add orange zest—just a teaspoon does it.
This keeps 5 days in the fridge in an airtight container. Freeze for up to 3 months (thaw in the fridge overnight). Let it sit at room temp 10 minutes before re-whipping for best texture.
Why You’ll Love This Recipe
- 5-Minute Mix: I just dump everything in one bowl—Cool Whip, cream cheese, the works—and it’s ready before the cake even cools.
- Velvety Sweetness: The cream cheese cuts through the sugar with that tangy edge, while the Cool Whip keeps it light, not cloying.
- Crowd-Pleasing Staple: I’ve slathered it on carrot cake, cupcakes, even graham crackers, and nobody complains.
Step-by-Step Instructions for Cool Whip Cream Cheese Frosting
This method delivers a silky, spreadable frosting that pipes beautifully and holds its shape.
Step 1: Soften and Prepare the Base Ingredients
Ensure the 8 oz Cream Cheese is fully softened to room temperature—press it gently with your finger; it should yield slightly. Cold cream cheese creates lumps that ruin the texture. Meanwhile, verify the 8 oz Cool Whip Topping is completely thawed—it should be smooth and spoonable, not icy.
If you’re using the optional 2 tbsp Unsalted Butter, make sure it’s softened as well. I like to cube it and let it sit out for 30 minutes before starting. This ensures even incorporation without overworking the mixture.
Step 2: Cream the Cheese and Butter
In a large mixing bowl, beat the 8 oz Cream Cheese with the 2 tbsp Unsalted Butter (if using) on medium speed for 2-3 minutes until completely smooth and free of lumps. Scrape down the sides of the bowl halfway through—this prevents pockets of unblended cream cheese.
The mixture should look velvety and pale. If it appears grainy, the cream cheese wasn’t soft enough; let it sit for another 10 minutes and try again. Patience here ensures a flawless final product.
Step 3: Incorporate the Sweet and Flavorful Elements
Gradually add the 1 cup Powdered Sugar, about ¼ cup at a time, beating on low speed until each addition is fully incorporated. This prevents a sugar dust cloud and ensures even distribution. Once all the powdered sugar is in, increase the speed to medium-high and beat for 1-2 minutes until light and fluffy.
Add the 1 tsp Vanilla Extract and 0.5 tsp Lemon Juice, then mix for another 30 seconds. The vanilla deepens the flavor, while the lemon juice brightens it—this balance is what makes the frosting irresistible.
Step 4: Fold in the Cool Whip for Lightness
Using a silicone spatula, gently fold in the thawed 8 oz Cool Whip Topping by hand. Stir from the bottom of the bowl upward, turning the bowl as you go, until no streaks remain. This step maintains the airy texture—using a mixer here would deflate the Cool Whip.
Watch for the mixture to become uniformly smooth and slightly billowy. If it looks too thick, fold for another 30 seconds; the Cool Whip will loosen it naturally. The frosting should hold a peak when you lift the spatula but still feel light.
Step 5: Chill and Use
Transfer the frosting to an airtight container and refrigerate for 15-20 minutes to let the flavors meld. This brief rest also firms it up slightly for easier spreading or piping. If you plan to pipe decorative borders or rosettes, chill for the full 20 minutes.
Use immediately on cooled cakes or cupcakes. The frosting will keep in the refrigerator for up to 3 days if stored properly. Bring it to room temperature and give it a quick stir before using leftovers to restore its spreadable consistency.
Pro Tips For Making Cool Whip Cream Cheese Frosting
- Soften the Cream Cheese: Leave the cream cheese out for at least an hour before mixing—cold blocks will leave lumps no matter how hard you beat it.
- Fold in Cool Whip Last: After creaming the butter, sugar, and vanilla, gently fold in the Cool Whip at the very end to keep the frosting light and fluffy.
- Skip the Extra Sugar: Cool Whip is already sweet, so start with less powdered sugar than the recipe calls for and taste as you go.
- Chill Before Using: Pop the frosting in the fridge for 20 minutes before spreading—I learned this the hard way after watching my layers slide right off the cake.
Serving Suggestions for Leftovers
Cake Pairings
This frosting works beautifully on carrot cake—the tangy cream cheese balances the sweetness perfectly. I also love it with red velvet, where its light texture contrasts the dense cake. Spread about ½ cup between layers for a 9-inch cake. 💛
Cupcake Ideas
Pipe it onto vanilla or chocolate cupcakes using a star tip for a professional look. For a fun twist, swirl in 1 tbsp of crushed Oreos or sprinkles before piping. A single batch frosts about 12-15 cupcakes generously.
Other Desserts
Spread it on graham crackers for quick sandwich cookies, or dollop on brownies for an easy upgrade. It also makes a great dip for strawberries or apple slices—just thin it slightly with 1 tsp milk if needed.
Garnishing Tips
Top with toasted coconut, chopped nuts, or chocolate shavings for extra flair. For holidays, add colored sprinkles or edible glitter. A dusting of cocoa powder through a stencil adds an elegant touch.
Serving Temperature
This frosting spreads best at room temperature, so take it out of the fridge 10-15 minutes before serving. If it’s too soft, chill for 5-10 minutes to firm up. Avoid leaving it out for more than 2 hours to prevent spoilage. ❄️
Nutrition Facts
Frequently Asked Questions
Can I use low-fat cream cheese?
It’s not recommended. Full-fat cream cheese gives the best texture and flavor. Low-fat versions can make the frosting runny or grainy. Stick with the 8 oz full-fat for perfect results.
How long can this frosting sit out?
No more than 2 hours at room temperature. Since it contains dairy, leaving it out longer risks spoilage. For outdoor events, keep it chilled in a cooler.
Why did my frosting turn out lumpy?
Lumps usually mean the cream cheese wasn’t softened enough. Always let it sit at room temperature for 30 minutes before mixing. Beating it longer won’t fix cold lumps.
Can I make this ahead of time?
Yes! Prepare it up to 3 days in advance. Store in an airtight container in the fridge. Give it a quick stir before using to restore its fluffy texture.

- BBQ Sausage Recipe Oven: Smoky Depth Without the Grill - September 28, 2026
- BBQ Chicken Bowl Recipe Rice: Smoky Sweetness Over Fluffy Grains - September 28, 2026
- Beef Cutlet Recipe Ideas: Crispy Breaded Patties With Bold Seasonings - September 28, 2026