
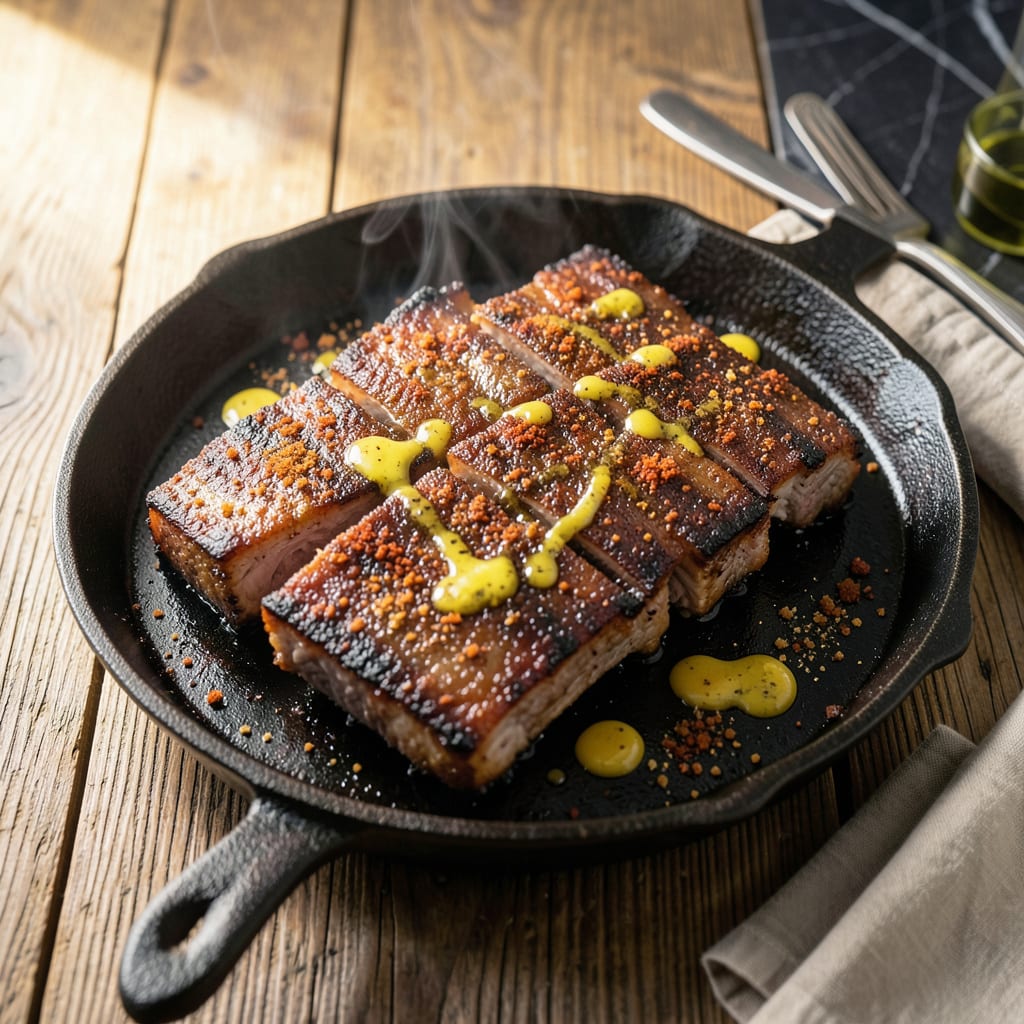
This oven-baked method delivers fall-off-the-bone St. Louis ribs with a bold dry rub crust. The slow, low-temperature approach ensures tender meat without the need for a smoker.
After years of testing, I’ve perfected the timing and seasoning balance. The result is juicy, flavorful ribs with a caramelized exterior that rivals any barbecue joint.
Ingredients for St Louis Ribs Dry Rub Oven
Fall-off-the-bone ribs start with this bold dry rub and simple ingredients.
| Ingredient | Amount | Notes |
|---|---|---|
| St. Louis Style Pork Ribs 🥩 | 4 lb | Membrane removed, trimmed of excess fat |
| Brown Sugar 🍚 | ½ cup | Light or dark variety |
| Paprika 🌶️ | 2 tbsp | Sweet or smoked variety |
| Garlic Powder 🧄 | 1 tbsp | Not garlic salt |
| Onion Powder 🧅 | 1 tbsp | Fresh ground preferred |
| Ground Cumin 🌿 | 1 tsp | Toasted for deeper flavor |
| Chili Powder 🌶️ | 1 tbsp | Mild or hot variety |
| Kosher Salt 🧂 | 1 tbsp | Diamond Crystal preferred for consistency |
| Black Pepper 🌶️ | 1 tbsp | Freshly ground preferred |
| Dried Oregano 🍃 | 1 tsp | Mediterranean oregano ideal |
| Cayenne Pepper 🔥 | ½ tsp | Adjust for heat preference |
| Apple Cider Vinegar 🍏 | ¼ cup | For acidity balance |
| Olive Oil 🫒 | 2 tbsp | For binding dry rub |
| Yellow Mustard 🟡 | 2 tbsp | For rub adhesion |
[recipeingredientscaler]
The ribs are everything here. St. Louis style (rectangular, meaty) gives the best texture—avoid baby back for this method. Look for slabs with even marbling and no membrane (ask your butcher to remove it). Costco has great pre-trimmed options, or hit Whole Foods for organic. The dry rub spices? Penzeys or bulk bins for freshness—old spices kill the flavor.
No St. Louis ribs? Baby backs work in a pinch (reduce cook time by 30 minutes). Out of cumin? Coriander at half the amount adds similar warmth. Skip the cayenne for kid-friendly heat. The apple cider vinegar can be white vinegar—just avoid balsamic (too sweet). Dijon mustard instead of yellow? Works, but the flavor’s more assertive.
Rub keeps in a jar for 3 months—store in a cool, dark place. Ribs are best cooked fresh, but you can prep the dry rub 24 hours ahead. Leftovers? They reheat well wrapped in foil at 325°F for 20 minutes.
Why You’ll Love This Recipe
- Set It and Forget: I toss the ribs with the dry rub, pop them in the oven, and let the brown sugar and paprika work their magic while I do literally anything else.
- Sweet and Smoky: That mix of brown sugar with garlic and onion powder gives the ribs this caramelized crust that’s sticky, smoky, and just a little spicy.
- Weeknight Hero: Honestly, it’s my go-to for feeding a crowd or just prepping Sunday dinner—no grill, no fuss, same great ribs.
- Budget Friendly: One rack of St. Louis ribs, a handful of pantry staples, and I get two meals out of it with leftovers that reheat like a dream.
Step-by-Step Instructions for St Louis Ribs Dry Rub Oven Recipe
Master the technique for ribs so tender they nearly slide off the bone.
Step 1: Prepare the Ribs and Create the Dry Rub
Pat the 4 lb St. Louis Style Pork Ribs completely dry with paper towels after removing the membrane and trimming excess fat. This step ensures the dry rub adheres properly and creates that coveted bark we’re after.
In a bowl, combine the 0.5 cup Brown Sugar, 2 tbsp Paprika, 1 tbsp Garlic Powder, 1 tbsp Onion Powder, 1 tsp Ground Cumin, 1 tbsp Chili Powder, 1 tbsp Kosher Salt, 1 tbsp Black Pepper, 1 tsp Dried Oregano, and 0.5 tsp Cayenne Pepper. The mixture should be uniformly colored with no visible streaks of individual spices.
Step 2: Apply the Rub and Marinate
Brush the 4 lb St. Louis Style Pork Ribs lightly with the 2 tbsp Yellow Mustard—this acts as a binder for the rub. The mustard’s tang will mellow during cooking, leaving only its adhesive properties behind.
Rub the spice mixture generously over all surfaces of the ribs, pressing it into the meat. Drizzle with the 2 tbsp Olive Oil and the 0.25 cup Apple Cider Vinegar, then massage these liquids into the rub. Let the ribs sit at room temperature for 30 minutes while your oven preheats—this allows the spices to begin penetrating the meat.
Step 3: Slow-Roast the Ribs
Preheat your oven to 275°F. Place the ribs meat-side down on a foil-lined baking sheet. Cover tightly with another sheet of foil, creating a sealed environment that traps steam for the first portion of cooking.
Roast for 2.5 hours in this covered state. You’ll know it’s working when you can see the meat pulling back from the ends of the bones by about ¼ inch. This visual cue indicates the collagen is beginning to break down into gelatin, the secret to that fall-off-the-bone texture.
Step 4: Finish and Caramelize
Carefully remove the top foil and flip the ribs meat-side up. Increase the oven temperature to 375°F and return the ribs to the oven, uncovered, for an additional 30-45 minutes. This higher heat phase develops the crust and caramelizes the sugars in the rub.
Watch for the rub to transform into a glossy, dark mahogany bark. The ribs are done when the meat between the bones sags slightly when you lift a rack with tongs, and a toothpick slides in with no resistance. This indicates the collagen has fully rendered, giving you that promised tenderness.
Step 5: Rest and Serve
Transfer the ribs to a cutting board and let them rest for 10 minutes before slicing. This brief rest allows the juices to redistribute throughout the meat, ensuring each bite is as moist as possible.
Slice between the bones and serve immediately. The exterior should have a slight crispness that gives way to meat so tender it nearly melts in your mouth. The bark should have a complex flavor profile from the spice blend, balanced by the sweetness of the brown sugar and the tang from the vinegar.
Pro Tips For Making St Louis Ribs Dry Rub Oven
- Preheat Low and Slow: Set your oven to 275°F—any hotter and the brown sugar in the rub will burn before the ribs get tender. I learned this the hard way after pulling out a tray of blackened, bitter ribs.
- Pat Ribs Dry: Blot the ribs with paper towels before applying the dry rub; the spices stick better and form a proper crust. Sounds weird, but it works.
- Skip the Overcrowding: Give each slab its own space on the rack—stacking them steams the ribs instead of roasting, and you’ll lose that caramelized sugar crust.
- Foil for Fall-Apart: After 2 hours, wrap the ribs tightly in foil with a splash of apple juice or water, then return to the oven for 1 more hour. This isn’t the prettiest method, but it’s the tastiest.
Pro Cooking Tips for This Recipe
Rub Application Secrets
Always pat ribs completely dry before applying the rub—this ensures maximum adhesion and better bark formation. I use paper towels for this step, pressing firmly to remove all moisture from the surface. 💡
Oven Temperature Control
Maintain a steady 275°F during the slow-roast phase. I recommend an oven thermometer to verify your oven’s accuracy—many run 10-15°F off. This low temp is crucial for breaking down collagen without drying the meat.
Foil Wrapping Technique
Use heavy-duty aluminum foil for wrapping to prevent leaks. Seal the package tightly, leaving no gaps for steam to escape. For extra tenderness, add ¼ cup apple juice to the foil packet before sealing.
Bark Development
Uncover and flip ribs only after 2.5 hours of covered cooking. The final 30-45 minutes at 375°F caramelizes the sugars. Watch closely—bark burns easily at this stage.
Resting Matters
Let ribs rest 10 minutes before slicing. This allows juices to redistribute. I tent loosely with foil during resting to keep them warm. Slice between bones, not through them, for clean presentation. 🔥
Doneness Test
The toothpick test is foolproof—it should slide in like butter with no resistance. Also look for meat pulling back from bone ends by ¼ inch. These signs guarantee perfect tenderness every time.
Nutrition Facts
Frequently Asked Questions
Can I use baby back ribs instead?
Yes, but reduce cooking time by 30 minutes. Baby backs are smaller and cook faster than St. Louis ribs. Watch for the meat to pull back from bones by ¼ inch as your doneness cue.
Why pat the ribs dry first?
Dry ribs let the rub stick better and form a better bark. Moisture creates steam, which prevents the crust from developing properly during cooking.
Can I make the rub ahead?
Store dry rub in an airtight container for up to 3 months. This gives flavors time to meld together for even better results.
How do I know when they’re done?
Use the toothpick test—it should slide in like butter. Also look for meat pulling back from bone ends by ¼ inch. These signs guarantee perfect tenderness.

- BBQ Sausage Recipe Oven: Smoky Depth Without the Grill - September 28, 2026
- BBQ Chicken Bowl Recipe Rice: Smoky Sweetness Over Fluffy Grains - September 28, 2026
- Beef Cutlet Recipe Ideas: Crispy Breaded Patties With Bold Seasonings - September 28, 2026