
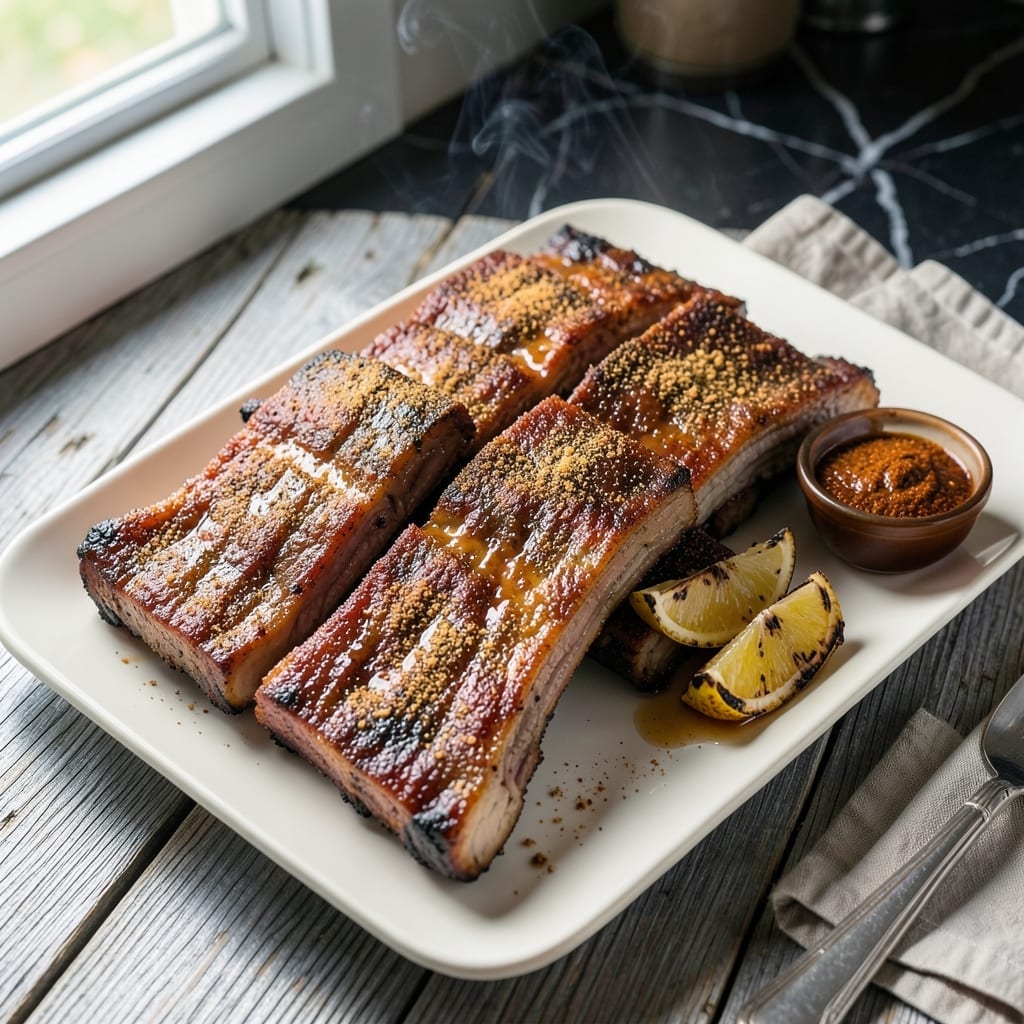
This oven-baked method delivers tender, fall-off-the-bone ribs without a smoker or grill. I developed this approach to replicate that coveted smoky flavor indoors using simple pantry staples and a few strategic techniques.
The key is a long, slow bake at 275°F followed by a quick finish under the broiler. This breaks down the connective tissue while creating a caramelized crust. A dry rub with smoky paprika and brown sugar builds depth before cooking even begins.
What emerges is meat so tender it nearly slides off the bone, with a sticky, flavorful bark on the outside. The oven does most of the work, requiring just 10 minutes of active prep time before the ribs practically cook themselves.
Serve with classic sides like coleslaw and cornbread for a complete meal. Here’s how to achieve professional results at home.
Ingredients for Costco Ribs
A full rack plus pantry staples yields smoky, tender ribs right from your oven.
| Ingredient | Amount | Notes |
|---|---|---|
| Pork Baby Back Ribs 🥩 | 4 lb | Full rack, membrane removed |
| Brown Sugar 🍚 | ½ cup | Light or dark variety |
| Smoked Paprika 🌶️ | 2 tbsp | For smoky depth |
| Garlic Powder 🧄 | 1 tbsp | Not garlic salt |
| Onion Powder 🧅 | 1 tbsp | Balances sweetness |
| Salt 🧂 | 1 tbsp | Kosher or sea salt |
| Black Pepper 🌶️ | 1 tsp | Freshly ground preferred |
| Chili Powder 🌶️ | 1 tbsp | Mild or hot variety |
| Apple Cider Vinegar 💧 | ¼ cup | For tangy balance |
| Olive Oil 🫒 | 2 tbsp | For binding rub |
| Barbecue Sauce 🍯 | 1 ½ cups | For finishing glaze |
| Mustard 🟡 | 2 tbsp | Yellow or Dijon |
The ribs are the star here. Costco’s pork baby back ribs are consistently meaty and well-trimmed—look for racks around 4 lbs each (they often sell them in packs of two). Ask the butcher to remove the membrane if you’re not comfortable doing it yourself (it peels off easily with a paper towel). The dry rub builds a flavor base, so use fresh spices for maximum punch.
No smoked paprika? Regular paprika plus a pinch of liquid smoke works in a pinch. Brown sugar can be swapped for coconut sugar or maple syrup (adjust liquid content accordingly). If you don’t have apple cider vinegar, white vinegar or lemon juice will add the needed acidity. For the barbecue sauce, Sweet Baby Ray’s or Stubb’s are reliable store-bought options.
Ribs can be prepped and rubbed the night before—cover tightly with plastic wrap. Bake as directed, then keep warm in a 200°F oven for up to 1 hour. Leftovers (if any) reheat beautifully in the oven or on the grill for 3-4 days.
Why You’ll Love This Recipe
- Set and Forget: I love that I can season these ribs with brown sugar and spices, then let the oven do all the work.
- Smoky Sweet Crust: The brown sugar caramelizes with the smoked paprika and garlic powder to create this ridiculously sticky, flavorful bark.
- Feeds the Crew: Honestly, a full rack of Costco baby back ribs serves my family of four with leftovers for sandwiches the next day.
- Pantry Staples: Between us, I always have these spices on hand—no last-minute grocery runs for this recipe.
Step-by-Step Instructions for Smoky Oven-Baked Ribs
Here’s the method. Straightforward, tested, works every time.
Step 1: Prepare and Season the Ribs
Start by patting the 4 lb Pork Baby Back Ribs completely dry with paper towels. This removes any surface moisture that would prevent the rub from adhering properly. Place them on a large sheet of aluminum foil.
In a bowl, combine the 0.5 cup Brown Sugar, 2 tbsp Smoked Paprika, 1 tbsp Garlic Powder, 1 tbsp Onion Powder, 1 tbsp Salt, 1 tsp Black Pepper, and 1 tbsp Chili Powder. Add the 2 tbsp Olive Oil and 0.25 cup Apple Cider Vinegar, then mix until it forms a thick paste.
Rub this mixture all over the ribs, pressing it into the meat so it sticks. The paste should coat the ribs evenly. Let them sit at room temperature for 20-30 minutes while the oven preheats.
Step 2: Wrap and Slow Cook in the Oven
Preheat your oven to 275°F. Tightly wrap the seasoned ribs in the aluminum foil, creating a sealed packet. This traps steam inside, which breaks down the connective tissue for that fall-off-the-bone tenderness.
Place the wrapped ribs on a baking sheet and bake for 2.5 to 3 hours. You’ll know they’re ready when the meat has pulled back from the bones by about ¼ inch and the ribs bend easily when picked up with tongs. The low temperature ensures they cook evenly without drying out.
Step 3: Unwrap and Glaze with Sauce
Carefully remove the ribs from the oven and unwrap the foil, being cautious of the hot steam. Drain any excess liquid from the foil packet and discard it. Return the ribs to the baking sheet.
In a bowl, mix the 1.5 cups Barbecue Sauce with the 2 tbsp Mustard until smooth. Brush this mixture generously over both sides of the ribs, coating them completely. This glaze will caramelize under the broiler, adding a sticky, smoky finish.
Step 4: Broil for the Perfect Finish
Switch your oven to broil on high heat. Place the ribs under the broiler for 3-5 minutes, watching closely to prevent burning. The sugar in the barbecue sauce will caramelize quickly, creating a glossy, slightly charred crust.
Flip the ribs and broil for another 2-3 minutes until the sauce is bubbling and the edges are crisp. The ribs should have a deep, mahogany color with a sticky glaze. Remove them from the oven and let them rest for 5-10 minutes before serving.
Pro Tips For Making Costco Ribs
- Preheat Your Oven: I learned this the hard way—cold ribs in a cold oven means uneven cooking. Crank it to 275°F first so the dry rub with brown sugar and smoked paprika can work its magic right away.
- Pat Ribs Dry: Sounds weird, but it works: blotted ribs grab that brown sugar and spice mix way better than wet ones. I skip this when I’m lazy, but the bark is noticeably better when I don’t.
- Skip the Overcrowding: After burning three batches, I finally figured out—leave space between slabs so the heat circulates. Otherwise, you’ll steam them instead of slow-roast.
- Rest Before Serving: Give them a solid 10 minutes under foil once they’re out. This isn’t the prettiest step, but it lets the juices redistribute so they don’t run all over the cutting board.
Flavor Customization for This costco ribs
Sweet Heat Boost
Add 1 tbsp cayenne pepper to your dry rub for a spicy kick that balances the brown sugar’s sweetness. I also like mixing in 1 tsp cinnamon—it sounds unusual, but it adds a warm, aromatic depth that pairs beautifully with the smoky paprika.
Tangy Twist
For a brighter flavor profile, swap the apple cider vinegar for 0.25 cup lemon juice in the rub. The citrus adds a zesty note that cuts through the richness. You can also brush the ribs with extra vinegar before the final broil for added tang.
Herb Infusion
Stir 1 tbsp dried rosemary or thyme into the dry rub for an earthy, herbal dimension. These herbs complement the smoky and sweet elements without overpowering them. Fresh herbs work too—just use 2 tbsp finely chopped. 💡
Umami Depth
Boost the savory notes by adding 1 tbsp Worcestershire sauce to your barbecue glaze. It enhances the meaty flavor and deepens the sauce’s complexity. A dash of soy sauce in the glaze works similarly for an Asian-inspired twist.
Smoke Intensifier
For a stronger smoky flavor without a smoker, add ½ tsp liquid smoke to the barbecue glaze. Alternatively, use chipotle powder instead of regular chili powder in the dry rub—it delivers heat and smoke in one. 🔥
Crunchy Topping
After broiling, sprinkle ¼ cup toasted breadcrumbs or crushed cornflakes over the sticky glaze for added texture. This gives the ribs a satisfying crunch that contrasts beautifully with the tender meat beneath.
Nutrition Facts
Frequently Asked Questions
Can I use St. Louis style ribs instead of baby back?
St. Louis ribs are meatier and slightly fattier. Increase the cooking time by 30-45 minutes since they’re thicker. The method remains the same, but watch for doneness at the 2.5-hour mark.
Why wrap the ribs in foil?
The foil traps steam, which speeds up cooking and breaks down tough collagen. This creates that signature fall-off-the-bone texture. Without it, the ribs may dry out during the long cook.
How do I know when they’re done?
Two tests: The meat should pull back from the bones by ¼ inch, and the rack should bend easily when lifted with tongs. For extra certainty, use a thermometer—195-203°F indicates perfect tenderness.

- Bread Recipe KitchenAid Mixer: Foolproof Loaf With Perfect Rise - September 28, 2026
- BBQ Oysters Recipe Grill: Smoky Garlic Butter Bliss - September 28, 2026
- Crock Pot Mac and Cheese Recipe Paula Deen: Ultra Creamy Southern-Style Comfort - September 28, 2026