
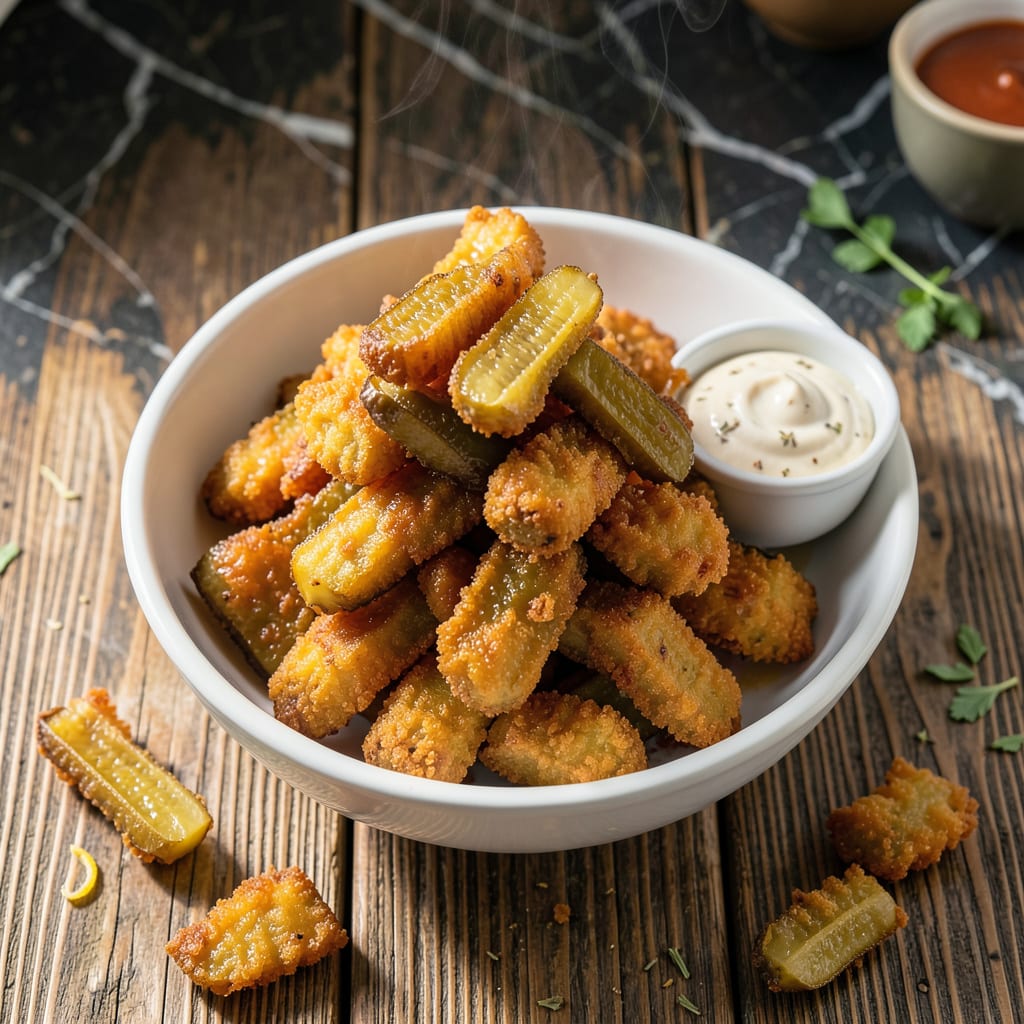
This restaurant-quality appetizer delivers a double-dredged crunch that’s impossible to resist. The secret lies in the layered coating process, which creates an extra-thick shell that stays shatteringly crispy even after cooling.
Each bite offers tangy pickle flavor surrounded by golden, seasoned breading. Serve with ranch or spicy dipping sauce for the full experience. The technique ensures consistent results every time.
Ingredients for Cracker Barrel Fried Pickles
Double-dredged pickles need quality ingredients for that signature crunch everyone craves.
| Ingredient | Amount | Notes |
|---|---|---|
| Dill Pickle Chips 🥒 | 24 pieces | Drained and patted dry |
| All-Purpose Flour 🌾 | 1 ½ cups | Divided for double dredge |
| Cornstarch 🌽 | ½ cup | For extra crispiness |
| Buttermilk 🥛 | 1 cup | Full-fat for richness |
| Large Egg 🥚 | 1 whole | For binding coating |
| Hot Sauce 🌶️ | 1 tbsp | Optional, for spicy kick |
| Garlic Powder 🧄 | 1 tsp | Freshly ground if possible |
| Onion Powder 🧅 | 1 tsp | Balances the tang |
| Paprika 🌶️ | 1 tsp | Sweet or smoked variety |
| Cayenne Pepper 🔥 | ¼ tsp | Adjust for heat preference |
| Salt 🧂 | 1 tsp | Diamond Crystal preferred |
| Black Pepper 🌶️ | ½ tsp | Freshly cracked preferred |
| Vegetable Oil 🫒 | 4 cups | For deep frying |
The pickles must be dill chips—spears won’t give you the right surface area for that thick, craggy coating. Vlasic or Claussen brands hold up best to frying. For the flour, White Lily if you’re in the South (lower protein = tenderer crust), but King Arthur works everywhere. Buttermilk is non-negotiable; the acidity reacts with the coating to create that shatter. Look for the thickest, tangiest buttermilk you can find at Whole Foods or your local dairy.
No buttermilk? Whole milk plus 1 tbsp vinegar (let it sit 5 minutes) works in a pinch. Swap cornstarch for arrowroot powder at a 1:1 ratio. For heat, add half the cayenne first—you can always sprinkle more on after frying. The hot sauce in the wet mix is optional but recommended; Crystal or Tabasco are classic choices. If avoiding eggs, use extra buttermilk—the pickles might not cling as tightly, but they’ll still crisp up.
Fry in batches to avoid crowding—this keeps the oil temp steady and ensures even browning. Leftovers (if any exist) reheat best in a toaster oven at 400°F for 5-7 minutes. The coating stays crisp for 1-2 days in an airtight container, but honestly, they’re best eaten fresh. Oil can be reused once if strained and stored in a cool, dark place for up to 1 month.
Why You’ll Love This Recipe
- One Bowl Wonder: I just toss the flour, cornstarch, buttermilk, and egg together—no fancy prep, no extra dishes.
- Crunch Meets Tang: That first bite with the crispy cornstarch coating and the sour dill pickle inside? Ridiculously good.
- Game Day Ready: I’ve served these at parties, and they’re always the first to disappear—no forks needed.
- Budget Crunch: Pickle chips are cheap, and this recipe stretches them into a crowd-pleasing appetizer without breaking the bank.
Step-by-Step Instructions for Crispy Fried Pickles
This double-dredge method ensures maximum crunch with every tangy, spicy bite.
Step 1: Prepare the Pickles and Wet Coating
Begin by draining the 24 pieces Dill Pickle Chips thoroughly, then pat them completely dry with paper towels. Any excess moisture will prevent the coating from adhering properly and cause splattering in the hot vegetable oil.
In a medium bowl, whisk together the 1 cup Buttermilk, 1 whole Large Egg, and 1 tbsp Hot Sauce until fully combined. The buttermilk’s acidity tenderizes the coating while the egg binds everything together. This wet mixture should be thick enough to cling to the pickles.
Step 2: Create the Seasoned Dry Dredge
In a separate large bowl, combine 1 cup All-Purpose Flour, 0.5 cup Cornstarch, 1 tsp Garlic Powder, 1 tsp Onion Powder, 1 tsp Paprika, 0.25 tsp Cayenne Pepper, 1 tsp Salt, and 0.5 tsp Black Pepper. Whisk until evenly distributed.
The cornstarch is critical here—it creates an ultra-crisp texture that all-purpose flour alone can’t achieve. Reserve the remaining 0.5 cup All-Purpose Flour for the second dredge. This division ensures each layer stays distinct for superior crunch.
Step 3: Double-Dredge for Maximum Crispiness
Working in batches, dip each pickle chip into the buttermilk mixture, allowing excess to drip off. Then dredge in the seasoned flour-cornstarch mixture, pressing gently to adhere. Shake off any loose coating.
Repeat the process: dip back into the buttermilk, then into the reserved 0.5 cup All-Purpose Flour for a final dry coating. This double layer creates a thick, shatteringly crisp shell. Place coated pickles on a wire rack to prevent sticking while you finish the batch.
Step 4: Fry to Golden Perfection
In a deep, heavy-bottomed pot or Dutch oven, heat the 4 cups Vegetable Oil to 375°F. Use a deep-fry thermometer for accuracy—oil that’s too cool will make the pickles greasy, while oil that’s too hot will burn the coating before the inside warms.
Fry the pickles in batches, without crowding, for 2-3 minutes until deep golden brown and crisp. The coating should bubble vigorously when first submerged. Drain on a wire rack or paper towels to maintain crispness. The pickles are done when the coating is uniformly golden and the bubbles slow.
Serve immediately while hot—the contrast between the cool, tangy pickle and the crisp, spiced coating is at its peak right out of the fryer.
Pro Tips For Making Cracker Barrel Fried Pickles
- Drain the Pickles: Pat those dill chips bone dry with paper towels before dredging—I learned this the hard way after my first batch turned soggy. The wetter the pickle, the more the coating slides right off.
- Chill the Batter: After mixing the buttermilk and egg into the flour/cornstarch, let it rest in the fridge for 10 minutes. Sounds weird, but it thickens up just enough to cling better to the pickles.
- Skip Cold Oil: Get that oil to 375°F before the first pickle hits the pan. After burning three batches at lower temps, I finally figured out that lukewarm oil = greasy, undercooked pickles.
- Double Dredge: Dip the pickles in the batter, then back into dry flour for a second dusting. My grandmother swore by this, and she was right—it’s the thing that matters most for that extra crunch.
Common Mistakes When Making This Recipe
Skipping the Dry Step
Never skip patting the pickles completely dry after draining. Even 1 tsp of moisture will prevent the coating from adhering properly, leading to bare spots and uneven browning. I use paper towels and press firmly to extract all liquid.
Overcrowding the Fryer
Frying too many pickles at once lowers the oil temperature, resulting in greasy, soggy pickles. I fry in batches of 6-8 pickles at a time in my 5-quart Dutch oven. This maintains the 375°F temperature needed for that perfect crunch.
Inconsistent Oil Temp
Oil that’s too cool (below 350°F) creates greasy pickles, while oil above 400°F burns the coating before cooking through. I use a candy thermometer clipped to the pot side for constant monitoring. Adjust heat as needed between batches. 🌡️
Skipping the Double Dredge
The magic is in the layers. A single dredge creates a thin, fragile coating that won’t hold up to frying. I’ve found the second dip in buttermilk and final flour dredge adds 50% more crunch to each bite. Don’t rush this process.
Using Wrong Pickle Type
Only dill pickle chips work for this recipe. Spears don’t provide enough surface area for the coating to cling to, and bread-and-butter pickles are too sweet. I always use Vlasic or Claussen for their firm texture and tangy flavor.
Improper Draining
Draining on paper towels can make the bottoms soggy. I use a wire rack set over a baking sheet to allow air circulation on all sides. This keeps the coating crisp while excess oil drips away. Serve immediately for maximum crunch.
Nutrition Facts
Frequently Asked Questions
Can I use a different type of pickle?
Stick with dill pickle chips for best results. Spears lack surface area for proper coating adhesion, and sweet pickles alter the flavor balance.
What’s the ideal oil temperature?
Maintain 375°F for perfect crispiness. Use a thermometer—oil that’s too cool makes greasy pickles, while too hot burns the coating.
How do I keep them crispy after frying?
Drain on a wire rack, not paper towels. This allows air circulation to prevent sogginess. Serve immediately while hot.
Can I bake these instead of frying?
Baking at 425°F for 15-20 minutes works, but won’t achieve the same shatteringly crisp texture as frying.

- BBQ Sausage Recipe Oven: Smoky Depth Without the Grill - September 28, 2026
- BBQ Chicken Bowl Recipe Rice: Smoky Sweetness Over Fluffy Grains - September 28, 2026
- Beef Cutlet Recipe Ideas: Crispy Breaded Patties With Bold Seasonings - September 28, 2026