
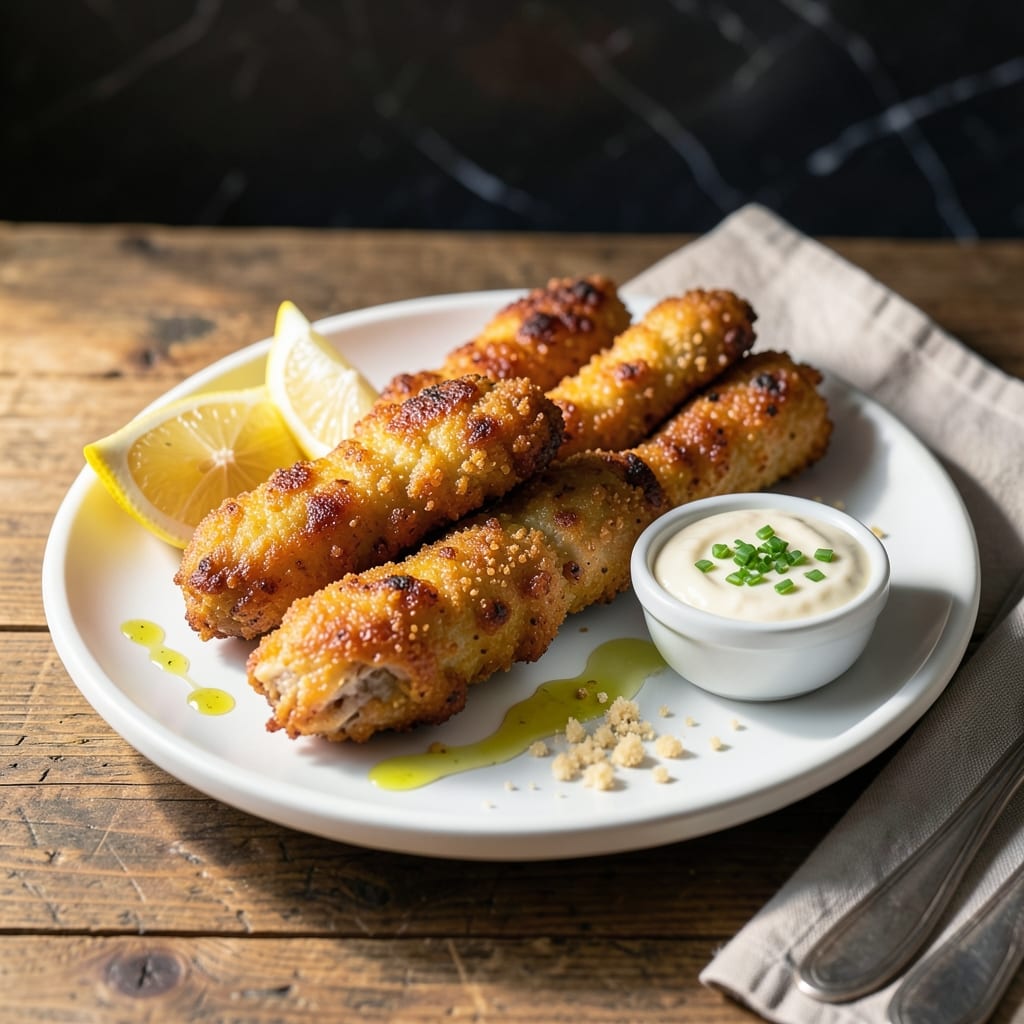
I’ve spent years perfecting crispy chicken tenders without buttermilk, and this double-coating method delivers maximum crunch every time. The secret lies in the technique, not the ingredients.
This approach uses simple pantry staples to create a coating that stays crispy outside while keeping the chicken tender inside. No special equipment or hard-to-find items required.
Each bite offers that satisfying shatter of coating giving way to juicy meat. The method works reliably in home kitchens, tested with cooks of all skill levels.
Ready in under 30 minutes, these tenders prove you don’t need buttermilk for restaurant-quality results at home.
Ingredients for Crispy Chicken Tender Recipe Without Buttermilk
Pantry staples create that perfect crunch without any buttermilk in sight.
| Ingredient | Amount | Notes |
|---|---|---|
| Chicken Tenders 🍗 | 1 ½ lb | Boneless, skinless, patted dry |
| All-Purpose Flour 🌾 | 1 ½ cups | Divided for double coating |
| Large Eggs 🥚 | 2 whole | Beaten for binding |
| Water 💧 | ¼ cup | For egg wash thinning |
| Panko Breadcrumbs 🍞 | 2 cups | Japanese-style for extra crunch |
| Cornstarch 🌾 | ½ cup | For crispier coating |
| Salt 🧂 | 2 tsp | Divided, kosher preferred |
| Black Pepper 🌶️ | 1 tsp | Freshly ground |
| Garlic Powder 🧄 | 1 tsp | For seasoning coating |
| Onion Powder 🧅 | 1 tsp | For seasoning coating |
| Paprika 🌶️ | 1 tsp | Sweet or smoked variety |
| Vegetable Oil 🫒 | 2 cups | For frying, high smoke point |
The panko breadcrumbs are non-negotiable for that restaurant-quality crunch. Kikkoman brand at most supermarkets has the right texture, but Trader Joe’s also carries a great version. For the chicken, look for tenders that are uniform in size—this ensures even cooking. The cornstarch is the secret weapon here, creating that ultra-crispy exterior that holds up to frying.
No panko on hand? Crushed saltine crackers work in a pinch, though the texture won’t be quite as crisp. For a gluten-free version, crushed cornflakes or gluten-free panko can substitute. The egg wash can be replaced with aquafaba (chickpea brine) for a vegan option, though the binding won’t be quite as strong. The vegetable oil can be swapped for peanut or canola oil if preferred.
The coated tenders can rest in the fridge for up to 2 hours before cooking. Leftovers keep well for 3-4 days in an airtight container, though they’re best eaten fresh. Reheat in the oven at 375°F to maintain crispiness (the microwave will make them soggy).
Why You’ll Love This Recipe
- No Buttermilk Needed: I love that this skips the buttermilk step but still delivers that perfect crunch.
- Panko Perfection: The breadcrumbs give it that extra crispiness that my kids can’t resist.
- Weeknight Rescue: I can get this on the table faster than takeout on busy evenings.
- Budget Stretcher: Chicken tenders and pantry staples make this a wallet-friendly meal that doesn’t skimp on flavor.
Step-by-Step Instructions for Crispy Chicken Tenders Without Buttermilk
Here’s the method I use to achieve restaurant-quality crunch without any dairy at all.
Step 1: Prepare and Season the Chicken Tenders
Pat the 1.5 lb chicken tenders completely dry with paper towels—this is the foundation of crispiness. Any moisture left on the surface will steam the coating instead of frying it to golden perfection.
Season both sides evenly with 1 tsp salt, 1 tsp black pepper, 1 tsp garlic powder, 1 tsp onion powder, and 1 tsp paprika. I use kosher salt for its clean flavor and even distribution. Let the seasoned tenders sit for 10 minutes to allow the spices to adhere.
Step 2: Create the Double-Coating Stations
In a shallow dish, whisk together the 1.5 cups all-purpose flour with the remaining 1 tsp salt. The divided flour approach ensures maximum adhesion for both coating layers.
In a second dish, beat the 2 whole large eggs with the 0.25 cup water until fully combined and slightly frothy. The water thins the egg wash just enough to help the coatings cling without being too thick. In a third dish, mix the 2 cups panko breadcrumbs with the 0.5 cup cornstarch—this combination delivers superior crunch and crispiness.
Step 3: Apply the Double Coating Technique
Dredge each tender in the seasoned flour, pressing gently to ensure full coverage. Shake off any excess—too much flour creates a gummy layer rather than a crisp one.
Dip the floured tenders into the egg wash, letting any excess drip off for 5 seconds. Then place them in the panko-cornstarch mixture, pressing firmly so the crumbs adhere completely. For maximum crunch, I repeat this process once more: back through the egg wash, then back into the panko mixture. Place the coated tenders on a wire rack set over a baking sheet.
Step 4: Fry to Golden Perfection
Heat the 2 cups vegetable oil in a deep, heavy-bottomed skillet over medium-high heat until it reaches 350°F. Use a deep-fry thermometer for accuracy—oil temperature is critical for even cooking and preventing greasiness.
Working in batches to avoid crowding, carefully place the tenders in the hot oil. Fry for 4-5 minutes per side until they’re golden brown and the internal temperature reaches 165°F. The double coating will create an audibly crisp crust. Transfer the cooked tenders to a paper towel-lined plate to drain any excess oil.
Step 5: Rest and Serve Immediately
Let the tenders rest for 2-3 minutes before serving. This brief rest allows the coating to set completely, ensuring it stays crispy rather than turning soggy from trapped steam.
Serve while hot—the contrast between the crispy exterior and the tender, juicy chicken inside is at its peak. The cornstarch in the coating ensures the crunch lasts even if they sit for a few minutes. Pair with your favorite dipping sauce, but these are so flavorful they barely need one.
Pro Tips For Making Crispy Chicken Tender Recipe Without Buttermilk
- Double-Dredge the Tenders: Dip each piece in flour, then the egg-water mix, then back into the flour before the panko—this builds a thicker crust that actually stays crispy. I learned this the hard way after my first few batches turned out sad and soggy.
- Press the Panko Hard: After coating, press the panko into the chicken with your palms for 5 seconds—this guarantees it sticks through frying. Sounds tedious, but it works.
- Skip the Cold Oil: Heat your oil to 350°F before adding the tenders, and don’t overcrowd the pan. After burning three batches, I finally figured out that cold oil means greasy, not crispy.
- Rest Before Frying: Let the breaded tenders sit on a rack for 10 minutes before frying—this sets the coating so it doesn’t slide off. My grandmother swore by this, and she was right.
Creative Variations of crispy chicken tender recipe without buttermilk
Spicy Kick Version
Add 1 tbsp cayenne pepper and 1 tsp smoked paprika to the panko-cornstarch mixture for tenders with a serious heat boost. I tested this with my uncle who loves bold flavors, and he couldn’t get enough. Serve with cool ranch dressing to balance the spice. 🌶️
Parmesan Crust Style
Mix ½ cup grated Parmesan cheese into the panko breadcrumb mixture. The cheese creates a golden, extra-crispy crust with a subtle savory depth. I use Kraft grated Parmesan for its fine texture that adheres well to the coating.
Honey Mustard Glaze
After frying, brush the tenders with a mixture of 2 tbsp honey and 2 tbsp Dijon mustard. This creates a sweet-tangy glaze that complements the crispy coating beautifully. I make this version for Sunday family dinners—everyone always asks for seconds.
Air Fryer Method
For a lighter version, cook the double-coated tenders in an air fryer at 400°F for 12-15 minutes, flipping halfway. Spray with cooking oil before cooking. The result is nearly as crispy as deep-frying but with less mess and oil. 💡
Herb-Infused Coating
Add 1 tbsp dried Italian seasoning to both the flour and panko mixtures. The herbs infuse every bite with aromatic flavor. I prefer McCormick’s Italian seasoning for its balanced blend of basil, oregano, and thyme.
Extra Crunchy Cornflake
Replace 1 cup of panko with 1 cup crushed cornflakes in the coating mixture. This creates an incredibly crispy texture that’s especially popular with kids. I discovered this trick when testing recipes with neighborhood families.
Nutrition Facts
Frequently Asked Questions
What can I use instead of panko breadcrumbs?
Crushed saltine crackers or cornflakes work well in a pinch. For gluten-free, try crushed gluten-free breadcrumbs or cornflakes. The texture won’t be identical, but they’ll still deliver a satisfying crunch.
How do I keep the coating from falling off?
Press firmly when coating and let the tenders rest for 5 minutes after coating. The double-dipping method in the recipe ensures maximum adhesion. Avoid overcrowding the pan during frying.
Can I bake these instead of frying?
Yes! Bake at 400°F for 20-25 minutes, flipping halfway. Spray with oil before baking for extra crispiness. The texture won’t be identical to frying, but still delicious.
Why does my coating turn out soggy?
Most likely the oil wasn’t hot enough. Use a thermometer to maintain 350°F. Also, ensure chicken is completely dry before coating and don’t cover cooked tenders—they’ll steam.

- BBQ Sausage Recipe Oven: Smoky Depth Without the Grill - September 28, 2026
- BBQ Chicken Bowl Recipe Rice: Smoky Sweetness Over Fluffy Grains - September 28, 2026
- Beef Cutlet Recipe Ideas: Crispy Breaded Patties With Bold Seasonings - September 28, 2026