
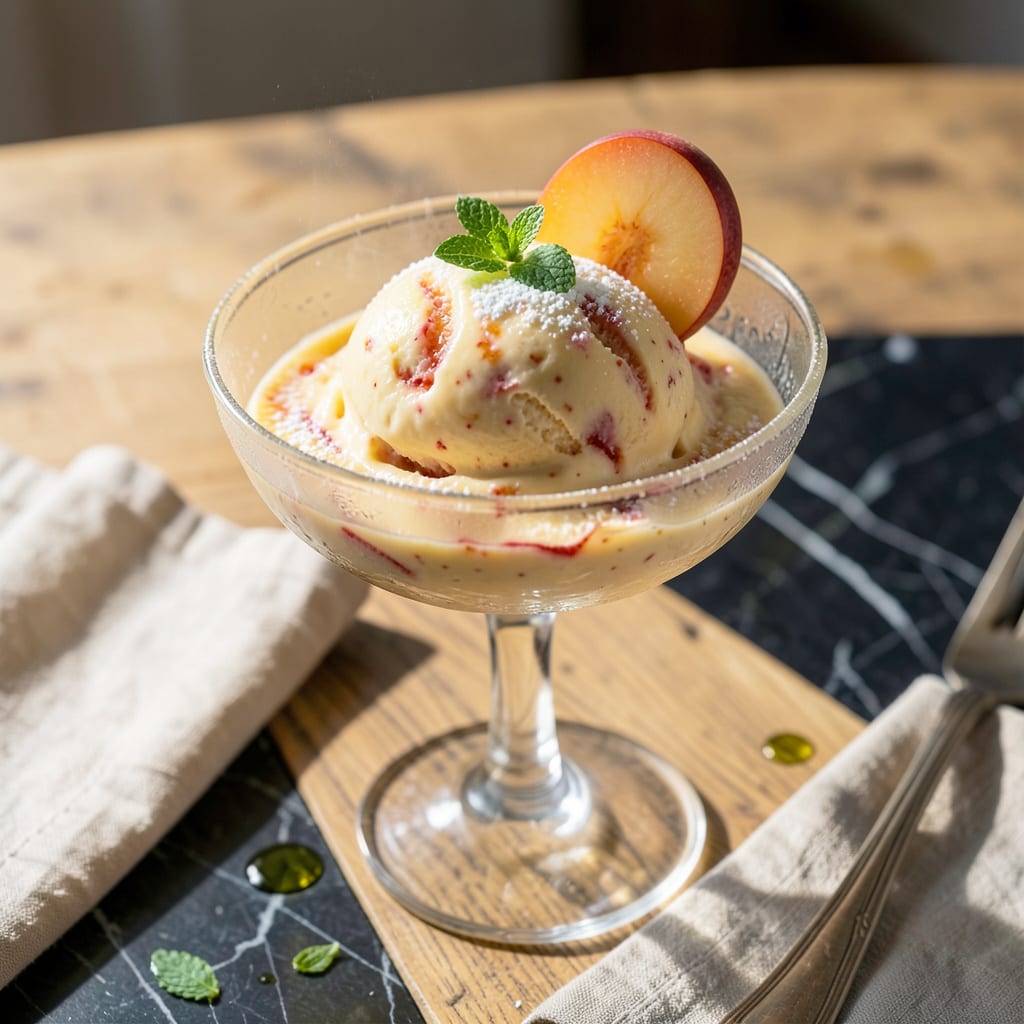
Nothing beats homemade peach ice cream when summer peaches are at their peak. This recipe transforms ripe fruit into a creamy, dreamy dessert that’s pure summer in a bowl.
With just a few simple ingredients and your Cuisinart, you’ll create a rich, velvety texture that store-bought versions can’t match. The secret lies in proper chilling and precise churning.
Ingredients for Cuisinart Peach Ice Cream
Simple, fresh ingredients transform summer peaches into creamy, dreamy homemade ice cream.
| Ingredient | Amount | Notes |
|---|---|---|
| Ripe Peaches 🍑 | 4 whole | Peeled, pitted, and diced |
| Heavy Cream 🥛 | 2 cups | Full-fat for richness |
| Whole Milk 🥛 | 1 cup | Cold, for smooth texture |
| Granulated Sugar 🍚 | ¾ cup | Adjust to taste preference |
| Vanilla Extract 🌿 | 1 tsp | Pure vanilla for best flavor |
| Large Egg Yolks 🥚 | 4 whole | Pasture-raised if available |
| Lemon Juice 🍋 | 1 tbsp | Freshly squeezed for brightness |
| Salt 🧂 | ¼ tsp | Fine sea salt preferred |
| Vanilla Bean 🌿 | 1 whole | Split and scraped, optional |
| Peach Schnapps 🍹 | 2 tbsp | Optional, for depth of flavor |
The peaches are everything here. Farmers market or orchard-fresh will give you the best flavor—look for fruit that yields slightly when pressed and has a sweet aroma. Freestone varieties are easier to pit. If using store-bought, let them ripen on the counter until fragrant. The cream and milk should be full-fat for that ultra-creamy texture the recipe promises.
No fresh peaches? Frozen peaches work in a pinch—just thaw and drain them well (or the ice cream will be icy). Swap the vanilla bean for an extra teaspoon of extract if you don’t have one. For a lighter version, half-and-half can replace the heavy cream (texture won’t be as rich). Skip the alcohol if preferred, but it helps keep the final product soft.
The custard base keeps in the fridge for 24 hours before churning—great for prepping ahead. Once churned, ice cream stays fresh for about 1 week in an airtight container. Press plastic wrap directly on the surface to prevent ice crystals from forming.
Why You’ll Love This Recipe
- No-Fuss Mixing: I just toss the peaches, cream, and sugar into the Cuisinart and let it do the work—no fancy techniques needed.
- Summer in a Scoop: The ripe peaches and vanilla create that sweet, sunny flavor that tastes like biting into a fresh orchard peach.
- Crowd-Pleasing Dessert: I’ve served this at BBQs, birthday parties, and lazy Sunday suppers, and it’s always the first to disappear.
Step-by-Step Instructions for Cuisinart Peach Ice Cream
Follow this method precisely for silky, luxurious texture that defines perfect homemade ice cream.
Step 1: Prepare the Peach Mixture
Peel, pit, and dice the 4 whole Ripe Peaches. Place them in a blender with the 1 tbsp Lemon Juice and 0.25 tsp Salt, then puree until smooth. This acidity brightens the peach flavor and prevents browning.
For extra depth, stir in the 2 tbsp Peach Schnapps after blending. The alcohol enhances the peach aroma and keeps the mixture from freezing too hard. Set this peach puree aside while you prepare the custard base.
Step 2: Heat the Cream and Milk
In a medium saucepan, combine the 2 cups Heavy Cream, 1 cup Whole Milk, and 0.75 cup Granulated Sugar. Warm this mixture over medium heat until the sugar fully dissolves and tiny bubbles form at the edges—about 5-7 minutes.
If using the 1 whole Vanilla Bean, split it lengthwise, scrape the seeds into the cream mixture, then add the pod. This infuses maximum vanilla flavor. Remove from heat once the sugar dissolves completely and the mixture is steaming but not boiling.
Step 3: Temper and Thicken the Custard
In a separate bowl, whisk the 4 whole Large Egg Yolks until smooth. Slowly pour about 1 cup of the hot cream mixture into the yolks while whisking constantly—this tempering prevents scrambled eggs. Once combined, pour the yolk mixture back into the saucepan.
Return to low heat and cook, stirring constantly with a wooden spoon, until the custard thickens enough to coat the back of the spoon. This should take 8-10 minutes. Strain the custard through a fine-mesh sieve into a clean bowl to remove any cooked bits or vanilla pod.
Step 4: Combine, Chill, and Churn
Stir the peach puree and 1 tsp Vanilla Extract into the strained custard. Cover and refrigerate for at least 4 hours, or preferably overnight, until completely chilled. This resting time ensures the flavors meld and the mixture reaches the ideal 40°F temperature for churning.
Pour the chilled mixture into your Cuisinart ice cream maker and churn according to the manufacturer’s instructions, typically 20-25 minutes. The ice cream is ready when it resembles soft-serve and holds its shape when scooped.
Step 5: Freeze to Perfect Consistency
Transfer the churned ice cream to a freezer-safe container. Press a piece of parchment paper directly onto the surface to prevent ice crystals from forming. Freeze for at least 4 hours or until firm.
For the creamiest texture, let the ice cream sit at room temperature for 10 minutes before scooping. The result should be velvety smooth with a balanced sweetness and vibrant peach flavor in every bite.
Pro Tips For Making Cuisinart Peach Ice Cream
- Chill the Base: After mixing your peach puree with the cream, milk, and sugar, refrigerate it for at least 4 hours—overnight is even better. I learned this the hard way when my first batch came out soupy instead of creamy.
- Roast the Peaches: Skip the raw puree and roast your peaches at 400°F for 15-20 minutes first. Sounds weird, but it works: the flavor deepens and the natural sugars caramelize, making a real difference in the final taste.
- Strain the Puree: Even ripe peaches can be fibrous, so strain the puree through a fine-mesh sieve before mixing it into the dairy. This isn’t the prettiest step, but it guarantees a silky-smooth texture in your ice cream.
- Use Full-Fat Dairy: Resist the urge to swap in low-fat milk or cream—it just doesn’t work here. The higher fat content in whole milk and heavy cream is non-negotiable for that rich, scoopable consistency.
Storing and Reheating Leftovers
Freezer Storage
Transfer your ice cream to an airtight container immediately after churning. Press parchment paper directly on the surface to prevent ice crystals. Store at 0°F or below for up to 2 weeks for peak freshness. ❄️
Fridge Storage
If you need to pause before freezing, the custard base keeps in the fridge for 24 hours. Cover tightly with plastic wrap touching the surface. This prevents a skin from forming on the custard.
Rehardening Soft Ice Cream
If your ice cream softens during serving, return it to the freezer uncovered for 15-20 minutes. For longer storage, cover with a lid after it firms up. Avoid refreezing melted ice cream as texture suffers.
Serving Temperature
Let your ice cream sit at room temperature for 10 minutes before scooping. This makes it easier to serve and enhances the creamy texture. Use a warm spoon dipped in hot water for perfect scoops.
Preventing Freezer Burn
Double-wrap your container with plastic wrap then foil for maximum protection. Squeeze out as much air as possible before sealing. Label with the date to track freshness. 💡
Reviving Stored Ice Cream
If ice crystals form, let the container sit in the fridge for 30 minutes before serving. Stir gently to redistribute moisture. Add a splash of cream and rechurn for 5 minutes to restore texture.
Nutrition Facts
Frequently Asked Questions
Can I use frozen peaches instead of fresh?
Yes, thaw and drain them well first to remove excess liquid. Undrained frozen peaches can make the ice cream icy.
Why does my ice cream turn rock hard in the freezer?
This happens when the alcohol content is too low. Add 1-2 tbsp more peach schnapps next time to keep it scoopable.
How do I know when the custard is thick enough?
It should coat the back of a spoon with a clear path when you run your finger through it. This takes about 8-10 minutes on low heat.
Can I skip the egg yolks for a lighter version?
You can, but the texture won’t be as rich and creamy. Egg yolks add fat and emulsifiers that create that luxurious mouthfeel.

- BBQ Sausage Recipe Oven: Smoky Depth Without the Grill - September 28, 2026
- BBQ Chicken Bowl Recipe Rice: Smoky Sweetness Over Fluffy Grains - September 28, 2026
- Beef Cutlet Recipe Ideas: Crispy Breaded Patties With Bold Seasonings - September 28, 2026