
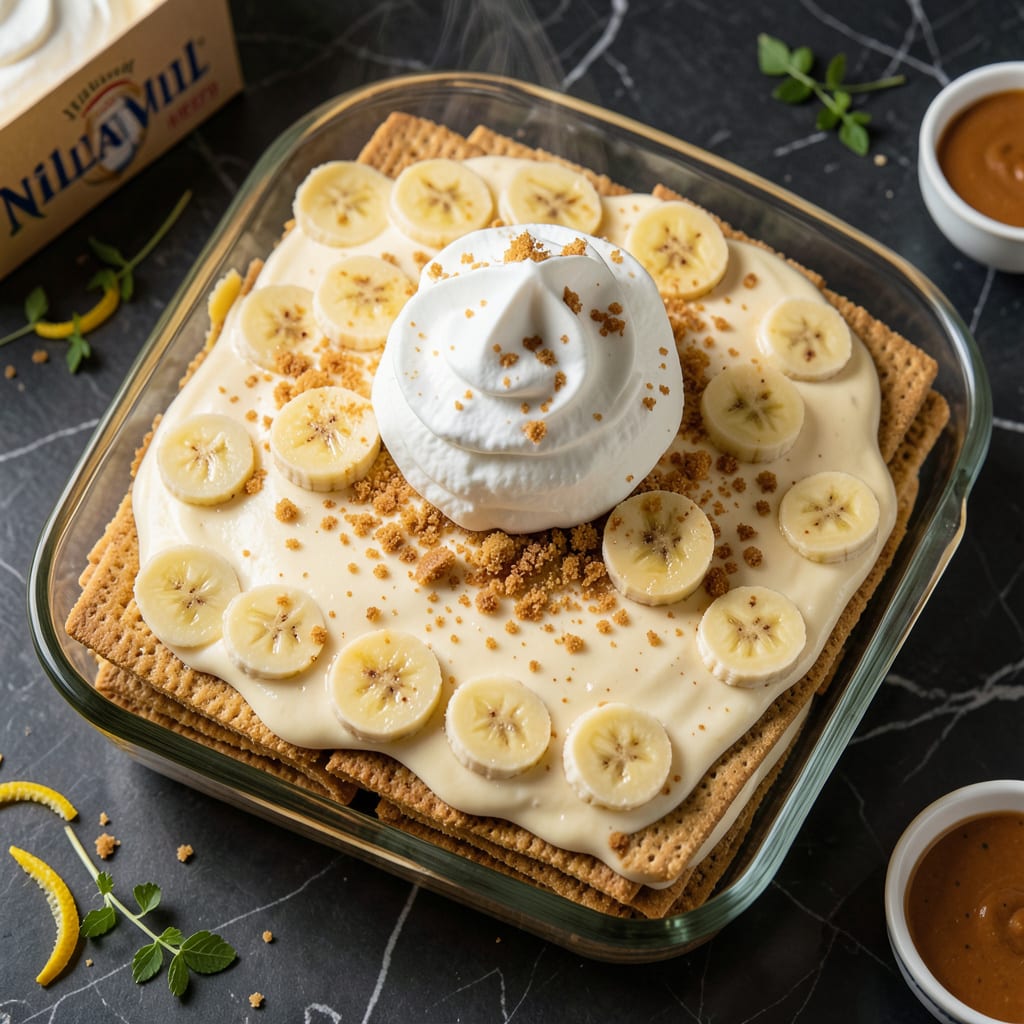
There’s a timeless appeal to layered banana pudding that brings back childhood memories with every bite. This version uses the classic box recipe as its foundation, creating that nostalgic taste without complicating the process.
You’ll achieve perfectly balanced layers of vanilla wafers, fresh bananas, and creamy pudding that soften just enough to meld together. The result is a dessert that’s both comforting and impressively simple.
Ingredients for Nilla Wafer Banana Pudding Recipe on Box
Classic box pudding meets fresh bananas and crispy wafers for nostalgic layers.
| Ingredient | Amount | Notes |
|---|---|---|
| Instant Vanilla Pudding Mix 🥣 | 1 box | 3.4 oz size recommended |
| Whole Milk 🥛 | 2 cups | Cold for best texture |
| Nilla Vanilla Wafers 🍪 | 1 box | 11 oz box standard |
| Ripe Bananas 🍌 | 4 whole | Medium size, sliced |
| Heavy Whipping Cream 🥣 | 1 cup | Optional for topping |
| Granulated Sugar 🧂 | 2 tbsp | For sweetening cream |
| Vanilla Extract 🌿 | 1 tsp | Pure extract preferred |
| Unsalted Butter 🧈 | ½ cup | Melted, optional |
| Salt 🧂 | 0.125 tsp | Pinch for balance |
| Sour Cream 🥣 | ½ cup | Optional layer addition |
The pudding mix is non-negotiable for that authentic box-recipe taste. Jell-O brand is the gold standard here—most grocery stores carry it in the baking aisle. Use whole milk (not 2% or skim) for the creamiest texture; it makes a noticeable difference. The Nilla wafers should be the original Keepler’s brand for true nostalgia. Look for boxes with the vintage red packaging.
No whole milk on hand? 2% works in a pinch but expect slightly thinner pudding. For a lighter version, Greek yogurt layered between bananas adds tang without sacrificing creaminess. If avoiding dairy entirely, coconut milk pudding mix is your best bet. The bananas must be ripe—yellow with brown speckles—for natural sweetness. Underripe ones taste starchy.
Assemble in a glass trifle dish to show off the layers. Refrigerate at least 4 hours (overnight is ideal) so the wafers soften perfectly. Keeps 3-4 days covered in the fridge—if it lasts that long. The wafers will continue to absorb moisture over time.
Why You’ll Love This Recipe
- 5-Minute Assembly: I just dump the pudding mix and milk, layer with wafers and bananas, and call it done. Honestly, it’s faster than baking cookies.
- Nostalgia in a Bowl: That first bite with the creamy pudding, soft bananas, and crunchy Nilla wafers? Takes me right back to my grandma’s kitchen.
- Potluck MVP: I’ve brought this to three summer picnics this year—always the first dish to disappear.
- Stays Fresh Overnight: The wafers soften just enough, and the flavors meld beautifully, so leftovers taste even better the next day.
Step-by-Step Instructions for Nilla Wafer Banana Pudding
Master the classic layering technique that delivers perfect texture and balance in every bite.
Step 1: Prepare the Vanilla Pudding Base
In a medium bowl, whisk together the 1 box Instant Vanilla Pudding Mix and 2 cups Whole Milk for 2 minutes until the mixture thickens and becomes smooth. The pudding should hold its shape when you pull the whisk through it.
This immediate thickening is your visual cue that the pudding has properly set. I always scrape the sides of the bowl with a spatula to ensure all the dry mix is fully incorporated. The texture should resemble a soft pudding that still has some fluidity for easy layering.
Step 2: Create the Wafer and Banana Layers
Line the bottom of a 9×13-inch dish with a single layer of Nilla Vanilla Wafers. Then arrange sliced Ripe Bananas evenly over the wafers, creating a complete layer that covers the entire surface. The bananas should be about ¼-inch thick slices for even texture in each bite.
Repeat with another layer of wafers, pressing down gently to compress the layers slightly. This compression helps the pudding adhere to the wafers and prevents shifting when served. The wafers will begin to soften as they absorb moisture from the bananas and pudding.
Step 3: Add Pudding and Optional Sour Cream Layer
Spread half of the prepared pudding mixture evenly over the wafer and banana layers, using a spatula to create a smooth surface. For an enhanced creaminess, dollop the ½ cup Sour Cream in small spoonfuls across the pudding and gently swirl it in with the tip of a knife.
The sour cream adds a subtle tang that balances the sweetness of the pudding and wafers. Ensure the layer is level for a professional presentation when sliced later.
Step 4: Complete the Final Layers
Add a final layer of Nilla Vanilla Wafers, followed by the remaining pudding mixture. Top with the remaining banana slices arranged in an overlapping pattern. This top layer of bananas prevents the wafers from drying out and adds visual appeal.
If using the optional whipped cream topping, wait until serving to add it. The bananas should look fresh and vibrant, with no browning—this indicates they were sliced just before assembly.
Step 5: Chill and Serve
Cover the dish with plastic wrap, pressing it directly onto the surface to prevent a skin from forming. Refrigerate for at least 4 hours or overnight. This chilling time allows the wafers to soften to the perfect texture while the pudding sets completely.
To serve, slice into squares, ensuring each portion contains all the layers. The wafers should be tender but still retain some structure, and the pudding should hold its shape when plated. For an elegant touch, top each serving with whipped Heavy Whipping Cream sweetened with 2 tbsp Granulated Sugar and 1 tsp Vanilla Extract.
Pro Tips For Making Nilla Wafer Banana Pudding Recipe On Box
- Chill the Pudding: After mixing the pudding with milk, refrigerate it for at least 10 minutes before layering—this keeps the wafers from turning soggy too fast.
- Slice Bananas Last: Wait to slice the bananas until right before assembling; they’ll brown less and stay fresh-looking longer in the pudding.
- Skip Low-Fat Milk: Whole milk is non-negotiable here; lower-fat versions make the pudding thin and watery, and the layers won’t set properly.
- Whip Cream Separately: Fold the whipped cream in just before serving instead of mixing it into the pudding base—it stays fluffier and looks prettier in layers.
Flavor Customization for This Dish
Chocolate Twist
Transform this dish by adding 2 tbsp cocoa powder to the pudding mix before whisking. The chocolate flavor pairs beautifully with the bananas and adds depth. I love using Hershey’s Special Dark for a richer taste that complements the vanilla wafers. 💛
Cinnamon Spice
Add ½ tsp ground cinnamon to the pudding mixture for a warm, spiced flavor. Sprinkle an additional ¼ tsp between the wafer layers for extra aroma. This small addition elevates the dessert with a cozy, nostalgic touch.
Crunchy Topping
Crush ¼ cup Nilla Vanilla Wafers and mix with ¼ cup toasted pecans for a textured topping. Sprinkle this over the final layer before chilling. The crunch contrasts nicely with the creamy pudding and soft bananas.
Coconut Flavor
Replace ½ cup whole milk with ½ cup coconut milk in the pudding mix for a tropical twist. Layer ¼ cup toasted coconut flakes between the bananas and wafers. This adds a subtle coconut flavor that pairs well with the vanilla.
Fruit Variations
Swap 1 banana for 1 cup sliced strawberries or 1 cup blueberries for a fruity variation. The berries add a fresh, tangy contrast to the sweet pudding. Ensure they’re dry to prevent soggy wafers.
Boozy Upgrade
Add 1 tbsp bourbon or 1 tbsp dark rum to the pudding mixture for an adult-friendly version. The alcohol enhances the vanilla and caramel notes. I recommend Maker’s Mark for its smooth, sweet profile.
Nutrition Facts
Frequently Asked Questions
Can I use pudding mix other than vanilla?
Yes! Cheesecake or banana cream pudding mix work well. The flavor will be slightly different but still delicious. Just follow the same preparation steps as the vanilla version.
How do I prevent the bananas from browning?
Toss banana slices in 1 tbsp lemon juice before layering. This keeps them fresh-looking for 24-48 hours. Avoid slicing bananas too far in advance.
Can I make this ahead of time?
In fact, it’s better made 1 day ahead. The wafers soften perfectly and flavors meld. Store covered in the fridge for up to 3 days.
What if my pudding doesn’t thicken?
Whisk for a full 2 minutes—it needs time to set. If still thin, chill 15-20 minutes then re-whisk. Always use cold milk for best results.

- BBQ Sausage Recipe Oven: Smoky Depth Without the Grill - September 28, 2026
- BBQ Chicken Bowl Recipe Rice: Smoky Sweetness Over Fluffy Grains - September 28, 2026
- Beef Cutlet Recipe Ideas: Crispy Breaded Patties With Bold Seasonings - September 28, 2026