
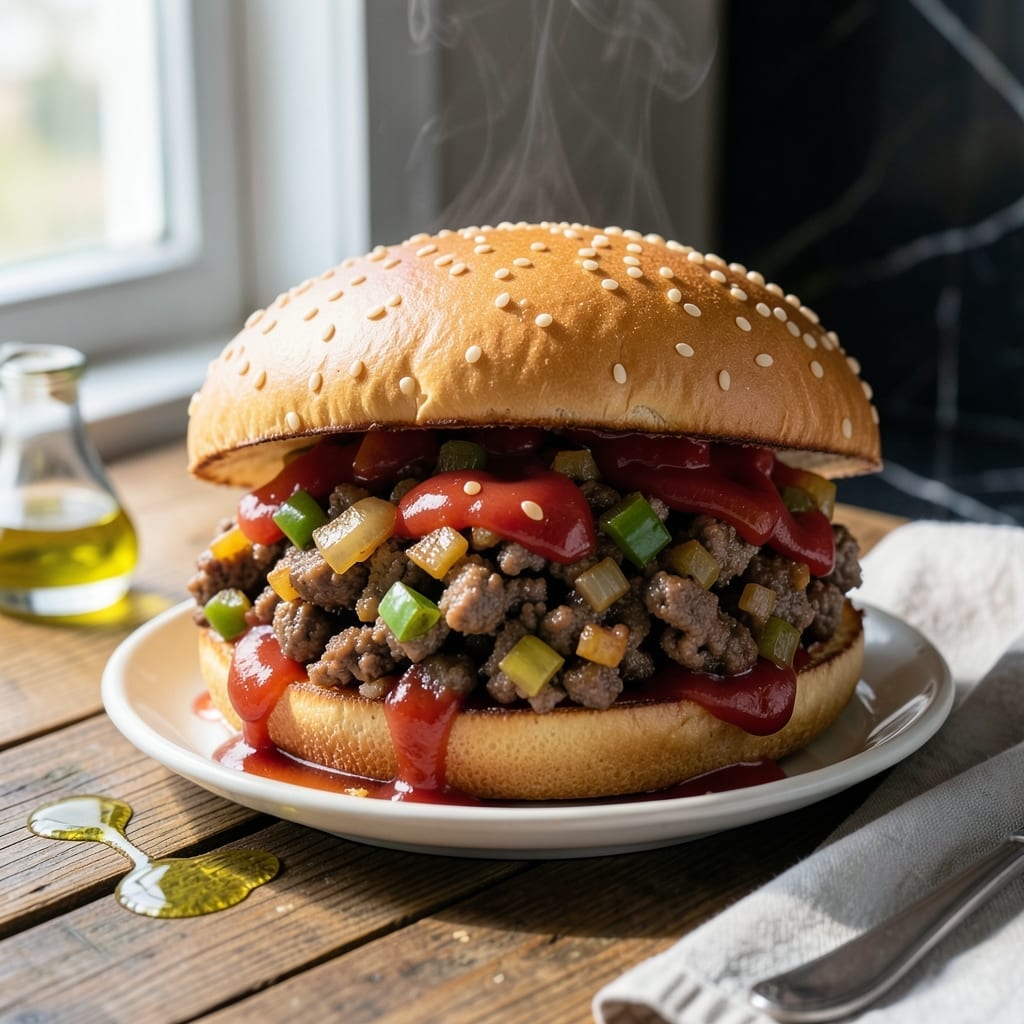
There’s a reason Dairy Queen’s sloppy joes became a nostalgic favorite—they’re messy, flavorful, and impossible to resist. This homemade version captures that same diner-style magic with a few simple tweaks to make it even better.
Ground beef simmers in a tangy-sweet sauce with just the right balance of spices, creating a rich, hearty filling that soaks into soft buns. The secret is letting it thicken slowly so every bite delivers that signature texture.
You’ll get the same comforting, saucy sandwich you remember, but with the satisfaction of making it yourself. The aroma alone will transport you straight to a retro drive-in.
Serve with a side of crinkle-cut fries for the full experience. Here’s how to recreate it.
Ingredients for Dairy Queen Sloppy Joe
Ground beef and tangy sauce meet soft buns for that retro diner magic you remember.
| Ingredient | Amount | Notes |
|---|---|---|
| Ground Beef 🥩 | 1 ½ lb | 80/20 fat ratio preferred |
| Yellow Onion 🧅 | 1 whole | Finely diced for even texture |
| Green Bell Pepper 🌶️ | 1 whole | Finely diced for crunch |
| Garlic Cloves 🧄 | 3 cloves | Minced for aromatic base |
| Ketchup 🍅 | 1 cup | Quality brand for sweetness |
| Tomato Paste 🍅 | 2 tbsp | For depth of flavor |
| Yellow Mustard 🟡 | 2 tbsp | Tangy balance to sauce |
| Worcestershire Sauce 🫒 | 1 tbsp | Umami depth essential |
| Apple Cider Vinegar 🍏 | 1 tbsp | Brightens the sauce |
| Brown Sugar 🫙 | 2 tbsp | Light or dark works |
| Chili Powder 🌶️ | 1 tsp | Mild or medium heat |
| Dried Oregano 🌿 | 1 tsp | Mediterranean flavor base |
| Salt 🧂 | 1 tsp | Kosher or sea salt |
| Black Pepper 🌶️ | ½ tsp | Freshly ground preferred |
| Hamburger Buns 🍞 | 4 whole | Soft, diner-style preferred |
The beef is non-negotiable here—80/20 ground chuck gives you the juiciest, most flavorful filling. Look for it at Whole Foods or your local butcher if the supermarket selection seems lackluster. The buns matter more than you think; potato buns from the bakery section soak up the sauce without falling apart (the kind in the bread aisle work too, but go for the freshest).
No Worcestershire? Soy sauce plus a dash of lemon juice gets you close. Out of fresh bell pepper? Frozen diced peppers work in a pinch—just thaw and drain them first. The brown sugar can be swapped for honey or maple syrup if that’s what you’ve got on hand. And if you’re feeding a crowd, this sauce scales up beautifully—just keep an eye on the thickness as it simmers.
This actually tastes better the next day once the flavors meld. Keeps in the fridge for 4-5 days or freeze the sauce for 3 months (just reheat and spoon onto fresh buns). The buns are best bought day-of—stale ones just won’t do.
Why You’ll Love This Recipe
- One Pan Meal: I brown the beef, toss in the onions, peppers, and garlic, then let the ketchup tie it all together—no extra pots, no fuss.
- Savory Sweet Kick: The ketchup and garlic team up to give that classic Dairy Queen tangy-sweet punch I keep craving.
- Crowd Pleaser: Between us, even my pickiest nephew cleans his plate when I serve these.
- Budget Stretcher: A pound of ground beef feeds four, and leftovers taste even better the next day.
Step-by-Step Instructions for Diner-Style Sloppy Joes
Here’s the method I’ve perfected for that classic loose-meat sandwich with just the right balance of sweet and tangy.
Step 1: Sauté the Aromatic Base
In a large skillet over medium-high heat, cook the 1.5 lb Ground Beef until browned, breaking it up with a wooden spoon. Once cooked through, add the finely diced Yellow Onion and Green Bell Pepper. Sauté for 4-5 minutes until the vegetables soften and the onion becomes translucent.
Add the minced Garlic Cloves and cook for an additional 30 seconds until fragrant. Be careful not to burn the garlic—it should release its aroma without turning brown. This base layer develops the deep, savory foundation for your sandwich filling.
Step 2: Build the Sauce with Bold Flavors
Stir in the 1 cup Ketchup, 2 tbsp Tomato Paste, 2 tbsp Yellow Mustard, 1 tbsp Worcestershire Sauce, and 1 tbsp Apple Cider Vinegar. These ingredients create that signature balance of sweet, tangy, and umami that defines this dish.
Add the 2 tbsp Brown Sugar, 1 tsp Chili Powder, 1 tsp Dried Oregano, 1 tsp Salt, and 0.5 tsp Black Pepper. Stir well to combine, then reduce the heat to medium-low and let the mixture simmer for 10-12 minutes until thickened to your preferred consistency.
Step 3: Toast the Buns and Assemble
While the meat mixture simmers, lightly toast the Hamburger Buns if desired. I prefer a quick toast to add texture, but you can serve them soft if you like. The choice is yours, but toasting helps prevent the buns from becoming soggy under the saucy filling.
Spoon a generous portion of the hot meat mixture onto the bottom half of each bun. For that classic diner presentation, pile it high—it’s called a “sloppy” joe for a reason. Top with the remaining bun halves and serve immediately while hot. The filling should be thick enough to stay on the bun but loose enough to require a napkin or two.
Step 4: Let the Flavors Meld (Optional but Recommended)
If you have the time, let the meat mixture rest off the heat for 5-10 minutes before serving. This allows the flavors to meld together even more deeply, and the sauce will thicken slightly as it cools.
Taste and adjust seasoning if needed—sometimes a pinch more salt or a splash of vinegar can brighten the flavors. This step is optional, but I find it makes a noticeable difference in the depth of the sauce.
Pro Tips For Making Dairy Queen Sloppy Joe
- Brown the Beef Well: Cook the ground beef until it’s deeply browned, not just gray—this builds the rich, savory base that makes Dairy Queen’s version stand out. I learned this the hard way after my first few batches tasted flat.
- Fine Dice the Veggies: Chop the yellow onion, green bell pepper, and garlic into tiny, even pieces so they melt into the sauce. Sounds tedious, but it’s the difference between a chunky mess and that classic smooth texture.
- Skip the Water: Resist the urge to thin the sauce with water—ketchup and the beef’s natural juices are enough. Adding liquid just washes out the flavor, and I’ve ruined more than one batch by overdoing it.
- Simmer 10 Minutes: After mixing everything, let it simmer uncovered for at least 10 minutes. This thickens the sauce and lets the flavors meld—my grandmother swore by this, and she was right.
Troubleshooting This Dish
Sauce Too Thin
If your mixture seems watery after simmering, let it cook uncovered for an additional 5-7 minutes. Stir frequently to prevent burning. A cornstarch slurry (mix 1 tbsp cornstarch with 1 tbsp cold water) can also thicken it quickly. 💡
Sauce Too Thick
Add ¼ cup water or beef broth and stir well. Simmer for 2-3 minutes to incorporate the liquid. This helps restore the perfect loose-meat texture without diluting the flavor.
Bland Flavor
Taste and adjust the seasoning. Add 1 tsp salt, 1 tbsp apple cider vinegar, or 1 tbsp brown sugar to balance the flavors. The vinegar brightens the sauce, while sugar enhances sweetness.
Burnt Garlic
If your garlic burned, discard it and start fresh with new minced cloves. Burnt garlic adds bitterness. Cook the new garlic over low heat for just 30 seconds to avoid the same issue.
Soggy Buns
Toast your Hamburger Buns lightly before assembling. Alternatively, place a lettuce leaf on the bottom bun to create a barrier. This keeps the bread sturdy against the saucy filling.
Meat Too Dry
Use 80/20 ground beef for juicier results. If your meat is already dry, stir in 2 tbsp beef broth or water and simmer for 2-3 minutes to rehydrate. 🔥
Nutrition Facts
Frequently Asked Questions
What type of beef works best?
Use 80/20 ground chuck for the juiciest, most flavorful results. Leaner cuts can make the filling dry. For best texture, avoid pre-formed patties.
Can I make this ahead of time?
The sauce actually improves after 24 hours in the fridge. Store the meat mixture separately and reheat before assembling. It keeps for 4-5 days refrigerated.
How do I prevent soggy buns?
Lightly toast the buns first or add a lettuce leaf barrier. The sauce is designed to be loose, so these steps help maintain structure.
Can I use ground turkey instead?
Yes, but add 1 tbsp olive oil when browning to compensate for lower fat. The flavor will be milder, so consider increasing spices slightly.

- BBQ Sausage Recipe Oven: Smoky Depth Without the Grill - September 28, 2026
- BBQ Chicken Bowl Recipe Rice: Smoky Sweetness Over Fluffy Grains - September 28, 2026
- Beef Cutlet Recipe Ideas: Crispy Breaded Patties With Bold Seasonings - September 28, 2026