
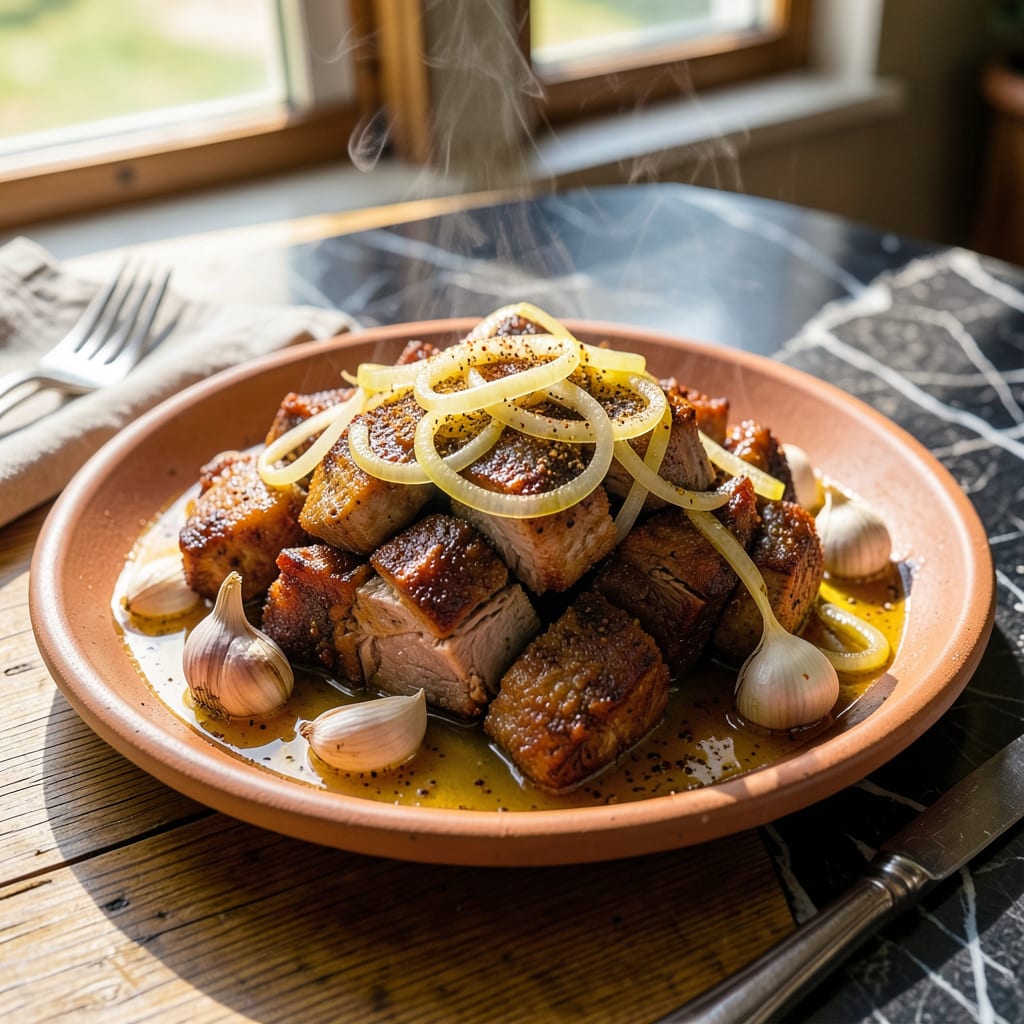
This carnitas recipe delivers slow-cooked pork with a perfect balance of citrus and spice. The method ensures tender, flavorful meat that crisps beautifully when finished.
I’ve refined this technique to create a dish that’s rich in tradition yet simple to prepare. The result is juicy pork with a caramelized exterior, ready for tacos, bowls, or sandwiches.
Ingredients for Defined Dish Carnitas
Citrus and spices transform pork shoulder into tender, caramelized carnitas ready for any meal.
| Ingredient | Amount | Notes |
|---|---|---|
| Pork Shoulder 🥩 | 3 lb | Boneless, cut into chunks |
| Orange Juice 🍊 | ¾ cup | Freshly squeezed preferred |
| Lime Juice 🍈 | ¼ cup | Freshly squeezed for brightness |
| Garlic Cloves 🧄 | 6 cloves | Peeled and minced |
| Yellow Onion 🧅 | 1 whole | Large, diced into chunks |
| Ground Cumin 🌿 | 2 tsp | Toasted for depth of flavor |
| Dried Oregano 🍃 | 2 tsp | Mexican oregano if available |
| Chili Powder 🌶️ | 1 tbsp | Mild or hot variety |
| Sea Salt 🧂 | 2 tsp | Coarse grain preferred |
| Black Pepper 🌶️ | 1 tsp | Freshly ground for best results |
| Bay Leaves 🍃 | 2 pieces | Dried, whole leaves |
| Olive Oil 🫒 | 2 tbsp | Extra-virgin for richness |
| Cinnamon Stick 🌿 | 1 piece | Optional, for warmth |
The pork shoulder is non-negotiable—bone-in or boneless, but ensure good fat marbling for self-basting. Whole Foods or Costco offer excellent quality at a fair price. Look for pieces labeled ‘pork butt’ or ‘Boston butt’ for ideal texture. Fresh citrus juice is key; avoid bottled for the brightest flavor. The oregano should be Mexican oregano (lippia graveolens), which has a more robust, earthy profile than Mediterranean varieties.
No fresh citrus? Bottled orange juice works in a pinch (though fresh is better). Short on spices? One-third the amount of dried can substitute for fresh where applicable. For a deeper flavor, toast whole cumin seeds and grind them yourself. If you lack bay leaves, a pinch of ground allspice can mimic some complexity. The cinnamon stick is optional but adds a subtle warmth that complements the citrus beautifully.
Carnitas taste even better the next day once flavors meld. Store cooked pork in its juices for up to 4 days in the fridge or freeze for 3 months. Reheat in a skillet to re-crisp the edges, adding a splash of reserved cooking liquid to keep it moist.
Why You’ll Love This Recipe
- Set It & Forget It: Most of the work is just letting the pork shoulder simmer in orange and lime juice until it’s fall-apart tender.
- That Citrus Zing: The combo of fresh orange and lime juice with garlic gives it this bright, tangy depth that’s honestly addictive.
- Taco Night Hero: I use these carnitas for tacos, burritos, or even loaded nachos—one batch covers multiple meals.
- Feeds for Days: A big pork shoulder makes enough for leftovers that taste even better the next day.
Step-by-Step Instructions for Slow-Cooked Citrus-Infused Pork
This method ensures tender, flavorful results with a perfect balance of spices and citrus.
Step 1: Season and Sear the Pork
Pat the 3 lb Pork Shoulder chunks dry with paper towels to ensure proper browning. Season generously with the 2 tsp Sea Salt, 1 tsp Black Pepper, 2 tsp Ground Cumin, 2 tsp Dried Oregano, and 1 tbsp Chili Powder. Rub the spices evenly over all surfaces to create a flavorful crust.
Heat the 2 tbsp Olive Oil in a large Dutch oven or heavy pot over medium-high heat. Working in batches if necessary, sear the pork chunks on all sides until deep golden brown. This should take about 3-4 minutes per side. Avoid overcrowding the pan to prevent steaming instead of browning.
Step 2: Build the Aromatic Base
After removing the pork, reduce heat to medium and add the diced 1 whole Yellow Onion to the same pot.Cook for 4-5 minutes until softened and beginning to caramelize, stirring occasionally to loosen any browned bits from the bottom.
Add the minced 6 cloves Garlic Cloves and cook for 30 seconds until fragrant. Stir in the 0.75 cup Orange Juice and 0.25 cup Lime Juice, scraping the browned fond from the pan. This deglazing step creates the foundation of your braising liquid.
Step 3: Slow Cook to Tenderness
Return the seared pork to the pot along with any accumulated juices. Add the 2 pieces Bay Leaves and 1 piece Cinnamon Stick. The liquid should come about halfway up the pork—if needed, add a splash of water to reach this level.
Bring to a simmer, then reduce heat to low. Cover and cook for 2.5-3 hours, turning the pork occasionally, until it shreds easily with a fork. The meat should be fall-apart tender and the sauce reduced to a rich, flavorful consistency.
Step 4: Shred and Crisp the Carnitas
Using two forks, shred the pork directly in the pot. The strands should be coarse and irregular for the best texture. Taste and adjust seasoning if needed—remember the flavors will concentrate as the liquid reduces.
For the signature crispy finish, increase heat to medium-high and cook uncovered for 8-10 minutes, stirring occasionally. This step allows the liquid to evaporate and the pork to develop crispy, caramelized edges. Watch closely to prevent burning.
Serve immediately while hot and crispy, or store in the refrigerator for up to 5 days. The carnitas will keep well and can be easily reheated in a skillet or oven.
Pro Tips For Making Defined Dish Carnitas
- Braise Until Fork-Tender: I learned this the hard way—don’t rush the pork shoulder. Let it cook in the citrus liquid for at least 3-4 hours on low heat until it shreds effortlessly with a fork.
- Char the Onions: Sounds weird, but it works: brown your yellow onions in the pot before adding the pork—it deepens the flavor of the carnitas and cuts through the acidity of the lime and orange juice.
- Skip the Lean Cuts: Resist the urge to use pork loin or tenderloin. Pork shoulder’s fat content is non-negotiable for juicy, flavorful carnitas—it’s the thing that matters most here.
- Reduce the Sauce: After shredding the pork, simmer the remaining cooking liquid for 5-10 minutes to thicken it slightly before mixing it back in—your carnitas will cling to the sauce better and taste more concentrated.
Common Mistakes When Making Perfect Results
Skipping the Sear
I see many home cooks rush straight to slow cooking, but skipping the sear means missing the Maillard reaction that creates deep, complex flavors. Those browned bits on the pork and pot are pure gold—take the 3-4 minutes per side to develop them properly.
Overcrowding the Pan
When browning, resist the urge to cram all 3 lb of pork in at once. Overcrowding steams instead of sears, leaving you with pale, sad meat. Work in batches if needed—I promise it’s worth the extra 5 minutes of effort. 🔥
Underseasoning the Meat
With 3 lb of pork, you need bold seasoning. Don’t be shy with the 2 tsp salt and spices—rub them in thoroughly so every bite sings with flavor. Taste your braising liquid before adding the pork; it should be vibrant, not bland.
Rushing the Cook
This isn’t a weeknight rush job. The 2.5-3 hours of slow cooking transforms tough pork into buttery tenderness. Set a timer for 2 hours, then check—if it doesn’t shred easily with a fork, give it more time. Patience pays off here.
Neglecting the Crisp
The final 8-10 minutes of uncovered cooking are non-negotiable. This is when the carnitas develop their signature crispy edges. Stir frequently and watch closely—the line between perfectly crisp and burnt is thin.
Ditching the Juices
When storing leftovers, keep the pork in its cooking liquid. This prevents drying out and lets flavors continue developing. Reheat in a skillet with some of this liquid to restore moisture and crispiness. 💡
Nutrition Facts
Frequently Asked Questions
What’s the best cut of pork for this?
Pork shoulder (also called pork butt) is ideal for its fat marbling and connective tissue. These break down during the 2.5-3 hours of slow cooking, creating tender, juicy results.
Can I make this in a slow cooker?
Yes! Brown the pork first, then transfer everything to a slow cooker. Cook on low for 6-8 hours or high for 4-5 hours. Finish by crisping in a skillet.
Why isn’t my pork crispy?
You likely skipped the final step. After shredding, cook uncovered on medium-high heat for 8-10 minutes to evaporate liquid and caramelize the edges.
How do I store leftovers?
Keep in an airtight container with cooking juices for up to 5 days in the fridge. Freeze for 3 months. Reheat in a skillet to restore crispiness.

- BBQ Sausage Recipe Oven: Smoky Depth Without the Grill - September 28, 2026
- BBQ Chicken Bowl Recipe Rice: Smoky Sweetness Over Fluffy Grains - September 28, 2026
- Beef Cutlet Recipe Ideas: Crispy Breaded Patties With Bold Seasonings - September 28, 2026