
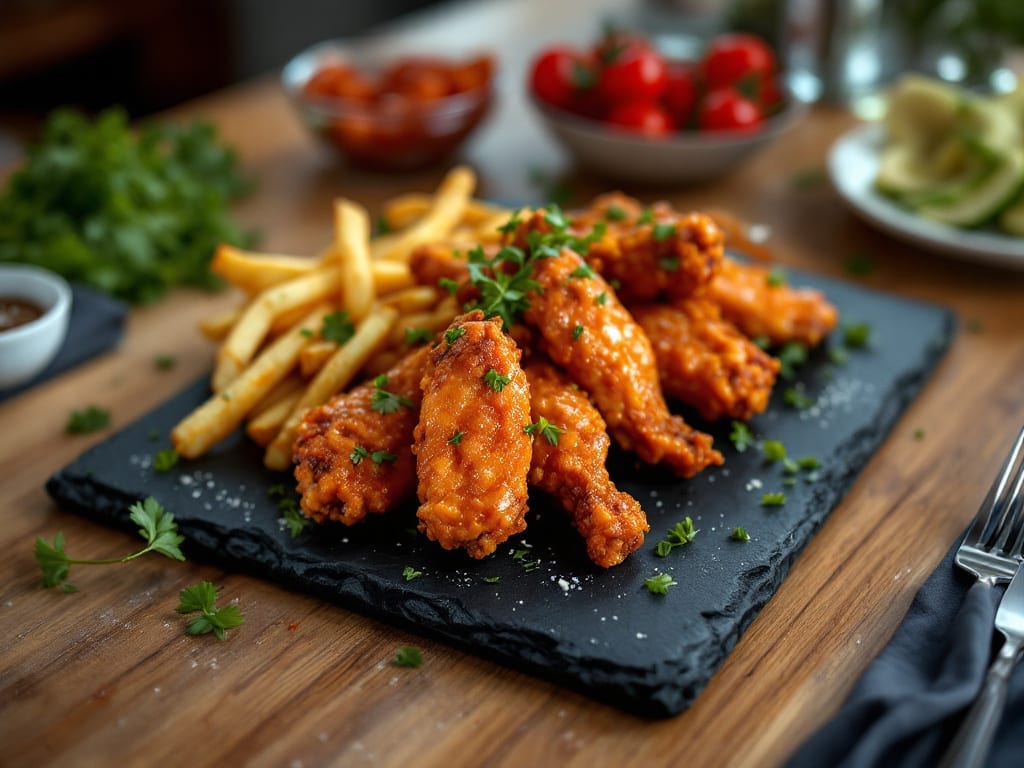
Recreating Domino’s wings at home means achieving that signature crispy texture and tangy-sweet sauce that makes them irresistible. After analyzing the key elements of their restaurant version, I’ve developed a method that delivers the same addictive combination of crunchy coating and sticky, flavorful glaze.
The secret lies in the right blend of spices and a baking technique that ensures even browning without burning.
This recipe focuses on authentic results using simple ingredients you likely already have in your pantry. We’ll start with a dry rub that penetrates the chicken, followed by a baking process that creates that signature crispy exterior.
The sauce, inspired by Domino’s signature blend, is what truly elevates these wings from ordinary to craving-worthy. With just a few key steps, you’ll have wings that taste like they came straight from the pizzeria.
The final product delivers crispy wings with a satisfying crunch that gives way to tender meat inside, all coated in that signature sauce. The flavor balance is precise—sweet, tangy, and slightly spicy—with just the right amount of heat to keep things interesting.
These wings pair perfectly with celery and carrot sticks, ranch or blue cheese dressing, and even a side of fries for the ultimate game-day experience.
What makes this recipe work is the combination of proper preparation and attention to detail during cooking. We’ll cover everything from marinating to baking to sauce application, ensuring you achieve professional-quality results every time. Let’s get started on making wings that will have everyone asking for seconds.
Ingredients for domino’s wings
Pantry staples plus a few key ingredients for that Domino’s signature crunch and tangy-sweet sauce.
| Ingredient | Amount | Notes |
|---|---|---|
| Chicken Wings (Wingettes or Drumettes) 🍗 | 2 lb | Split into 32 pieces, tips removed |
| All-Purpose Flour 🌾 | 1 cup | For dredging, sifted |
| Cornstarch 🌾 | ½ cup | For extra crispiness |
| Diamond Crystal Kosher Salt 🧂 | 1 tbsp | Fine grain preferred |
| Garlic Powder 🧄 | 1 tbsp | Freshly ground preferred |
| Ground Black Pepper 🌶️ | 1 tbsp | Freshly cracked |
| Paprika 🌶️ | 1 tbsp | Smoked variety for depth |
| Cayenne Pepper 🔥 | ½ tsp | Adjust for heat preference |
| Unsalted Butter 🧈 | ½ cup | Melted, for sauce base |
| Ketchup 🍅 | ½ cup | Heinz preferred for consistency |
| Worcestershire Sauce 💧 | 1 tbsp | Lea & Perrins brand |
| Apple Cider Vinegar 🍎 | 1 tbsp | For tangy balance |
| Granulated Sugar 🍬 | 2 tbsp | Light brown preferred |
| Honey 🍯 | 1 tbsp | Wildflower preferred |
| Vegetable Oil 🫒 | ½ cup | For frying coating |
The chicken is non-negotiable—wingettes or drumettes (no flats) for that perfect bite. Costco or Trader Joe’s usually have them pre-cut, saving you time. Look for fresh, plump wings with minimal bruising. The flour-cornstarch mix is what creates that signature crisp—sift it together for a lighter coating. For the dry rub, Penzeys or McCormick spices work well, but toast the spices in a dry pan for 30 seconds first to wake up the flavors. The butter in the sauce? Use unsalted—you control the saltiness here.
No smoked paprika? Regular paprika plus a pinch of liquid smoke gets you close. Short on Worcestershire? Substitute with 1 tbsp soy sauce plus 1 tsp balsamic vinegar. The sauce can be made ahead—it actually tastes better after flavors meld for 24 hours. For the frying step, vegetable oil is best (high smoke point), but avocado oil works too. If you’re worried about frying, the baking method in the instructions still delivers crispy results—just expect slightly less crunch. The sugar and honey combo is what gives that signature sweet-tangy balance—don’t skip the vinegar or it’ll taste flat.
The sauce keeps for 1 week in the fridge, but the wings? Eat them fresh—that crisp gets soggy after 2 days. Double the sauce recipe if you’re feeding a crowd—it disappears fast. For leftovers, reheat in a 350°F oven for 10 minutes to revive the crisp. Freeze wings uncoated in a single layer, then transfer to a bag. They’ll keep for 3 months—just bake from frozen at 425°F for 30-40 minutes.
Why You’ll Love This Recipe
- One-Bowl Wonder: I swear by this recipe—just flour, cornstarch, salt, and garlic powder tossed together in one bowl. No measuring cups, no extra bowls, no mess. The wings come out perfectly seasoned every time, and honestly? That’s half the battle won.
- Crispy-Garlic Magic: That mix of flour and cornstarch gives you the texture—crunchy outside, juicy inside—while the garlic powder adds this subtle, addictive kick. It’s not overpowering, but it lingers just enough to make you crave another bite. (Yes, even on a Tuesday night.)
- Game for Any Gathering: Need a snack for game day? A quick lunch? Or just a lazy Sunday bite? These wings work for all of it. Double the batch, toss them in the fridge, and reheat when you’re ready—no stress, no fuss. My daughter picks out the drumettes first, but we all go back for seconds.
- Budget-Friendly Crunch: Chicken wings are cheap, and this recipe stretches them further with that dry brine trick (thanks, kosher salt!). You get restaurant-quality flavor without the price tag, and leftovers reheat like a dream. Between us, I’ve fed six people for under $15 with this—no complaints.
Step-by-step instructions for Domino’s wings recipe
Here’s how to nail that signature Domino’s crunch and tangy sauce at home.
Prepare the Perfect Coating
In a large bowl, whisk together the 1 cup all-purpose flour, 0.5 cup cornstarch, 1 tablespoon diamond crystal kosher salt, 1 tablespoon garlic powder, 1 tablespoon ground black pepper, 1 tablespoon paprika, and 0.5 teaspoon cayenne pepper. The cornstarch is key here—it creates that signature crispy texture that sets these apart from regular wings. I like to sift the dry ingredients first to break up any lumps in the flour, then whisk vigorously to ensure the spices are evenly distributed throughout the coating.
This blend should look like a fine, powdery mixture with no visible specks of pepper or paprika. If you’re feeling extra spicy, you can add a pinch more cayenne, but start with the recipe amount—it packs more heat than you might expect. Keep this dry mixture ready in your bowl while you prep the wings for dredging.
Fry the Wings to Golden Perfection
Heat 0.5 cup vegetable oil in a deep skillet or Dutch oven over medium-high heat until it reaches 350°F—use a thermometer for accuracy. The oil should shimmer but not smoke. While the oil heats, pat the 2 lb chicken wings completely dry with paper towels. Any moisture left on the wings will cause the coating to steam instead of crisp.
Working in batches to avoid crowding, carefully lower the wings into the hot oil. Fry for 6-8 minutes, turning occasionally, until they’re deep golden brown and the coating is uniformly crisp. You’ll know they’re ready when a small piece of coating breaks away cleanly when you test one. Drain on a wire rack set over a baking sheet—this prevents them from getting soggy as they finish cooking. Keep the oil hot for the next batch, adjusting the temperature back to 350°F if needed.
Make the Signature Sauce
In a medium saucepan, melt the 0.5 cup unsalted butter over medium heat. Once melted, reduce the heat to low and whisk in the 0.5 cup ketchup, 1 tablespoon worcestershire sauce, 1 tablespoon apple cider vinegar, 2 tablespoons granulated sugar, and 1 tablespoon honey. Let the mixture simmer gently for 8-10 minutes, stirring occasionally, until it thickens slightly and coats the back of a spoon.
Here’s the thing—this sauce needs to balance sweet, tangy, and savory perfectly. Taste as you go and adjust the vinegar for more tang or honey for extra sweetness. The sauce should be glossy and smooth, not stringy. Once it reaches the right consistency, remove it from heat and let it cool slightly while you prepare to toss the wings.
Toss and Serve Immediately
Return the fried wings to the skillet over low heat—just enough to keep them warm. Pour the sauce over the wings and toss gently with tongs to coat them evenly. The residual heat will help the sauce cling to the crispy coating. If the sauce seems too thick, add 1 tablespoon hot water at a time until it reaches a pourable consistency.
Serve the wings immediately while they’re still crispy and the sauce is warm. The contrast of the crunchy exterior and tangy-sweet sauce is what makes these wings irresistible. For extra presentation, sprinkle with additional paprika or serve with celery sticks and blue cheese dressing on the side. These wings are best enjoyed fresh out of the fryer—any waiting will turn that perfect crunch into a sad, limp texture.
Pro Tips For Making Domino’S Wings
- PAT THE WINGS DRY: Skip the damp towel—use paper towels to blot wings thoroughly before dredging. I learned this the hard way after my first batch came out soggy; the flour coating won’t stick properly if they’re even slightly sticky.
- MIX FLOUR AND CORNSTARCH: Combine 1 cup all-purpose flour with 1 tablespoon cornstarch (like the recipe says) before seasoning. I used to add salt and garlic powder separately, and the coating always looked streaky—mixing first guarantees even distribution.
- FRIZZLE IN BATCHES: Don’t overcrowd the pan—work in small batches of 8-10 wings at a time. After burning two batches, I finally realized the oil temp drops when you dump too many in; crispy wings start with consistent heat.
- REST BEFORE EATING: Let the wings sit covered for 5 minutes after frying—yes, even if you’re starving. I know, I know, but skipping this step means greasy, unevenly cooked wings. The heat keeps cooking them while they rest.
Essential equipment for this dish
Deep Fryer Essentials
For that signature Domino’s-style crisp, a deep fryer is your best friend. I swear by the Ninja Foodi 4-Quart Deep Fryer—it maintains consistent 350°F oil temperature and has a built-in thermometer.
If you’re tight on space, the Cuisinart 3.5-Quart is a compact alternative. Always use vegetable or canola oil (high smoke point) and never fill beyond the max line. 🔥
Oil Thermometer
Temperature control is everything—350°F is non-negotiable for that perfect golden brown. A Thermoworks Thermapen is my go-to because it’s fast and accurate. If you don’t have one, the Taylor Precision Products digital thermometer works too. Dip it in the oil while frying to monitor—fluctuations mean uneven cooking.
Wire Rack Setup
After frying, transfer wings to a wire cooling rack placed over a baking sheet. This prevents soggy bottoms from steam buildup. I use the OXO Good Grips rack—it’s sturdy and fits my sheet perfectly.
Pro tip: Line the rack with parchment paper for easy cleanup, but keep it loose so air circulates.
Sauce Pot Must-Haves
The sauce needs a heavy-bottomed saucepan to prevent scorching. My All-Clad Stainless Steel pan handles heat beautifully. For stirring, use a silicone spatula—it won’t scratch the pan or burn your hands. A small whisk helps emulsify the sauce for that glossy finish. 💫
Tongs for Tossing
Long-handled tongs are essential for flipping wings and tossing them in sauce. The OXO Good Grips ones have a comfortable grip and reach deep into fryers. I also keep a small bowl nearby to catch any sauce drips—this keeps your workspace tidy and prevents slips.
Optional Air Fryer Hack
Want to skip the deep fryer? An air fryer works surprisingly well. Preheat to 375°F, spray wings with cooking oil, and cook in batches for 12-15 minutes, shaking every 5 minutes.
The Ninja Foodi XXL handles larger batches. The texture won’t be exactly like fried, but it’s still crispy and delicious. 💡
Nutrition facts
Frequently asked questions
Can I use boneless wings instead of traditional wings?
While you can technically use boneless wings, the texture and experience won’t be the same. Traditional wings (especially wingettes or drumettes) have that perfect balance of crispy coating and tender meat inside. Boneless wings tend to dry out faster and lack the satisfying crunch. If you must use them, reduce cooking time by 2-3 minutes and keep them smaller for even cooking.
How do I make the sauce thicker or thinner?
The sauce should coat the back of a spoon but still be pourable. For a thicker sauce, simmer it 2-3 minutes longer or add 1 teaspoon cornstarch mixed with 1 tablespoon water. For a thinner sauce, whisk in 1 tablespoon hot water at a time. Adjust gradually—you can always thicken later, but thinning is trickier.
What’s the best way to keep the wings crispy when serving?
Serve wings immediately after tossing in sauce to lock in crispness. If you need to hold them, place on a wire rack in a 200°F oven for up to 30 minutes. Avoid covering them—they’ll sweat and lose crunch. For a restaurant-style presentation, arrange on a platter with extra sauce drizzled on top and sprinkle with paprika.
Can I make this recipe without frying?
Yes! For a baked version, toss wings in the coating, then bake at 425°F for 25-30 minutes, flipping halfway. Brush with melted butter halfway through for extra crispiness. The texture will be slightly different (less crunchy), but still delicious. Air fryers work too—cook at 375°F for 12-15 minutes, shaking every 5 minutes.
Why do my wings taste bland compared to Domino’s?
Most likely, your coating isn’t crispy enough or the sauce lacks balance. Double-check your spices—use freshly ground black pepper and toast your spices in a dry pan for 30 seconds to wake up flavors. For the sauce, ensure you’re using apple cider vinegar (not white vinegar) and adjust sweetness/tang with honey or sugar. The cornstarch in the coating is also key for that signature crunch.

- Mary Berry’s Boiled Fruit Cake Recipe: Moist Center and Spiced Crust Magic - November 5, 2026
- Atlantic Salmon Recipe: Honey-Dill Pan-Seared With Crispy Skin - November 5, 2026
- Blaze Pizza Copycat Dough Recipe: Chewy, Airy Crust That Mimics the Original - November 5, 2026