
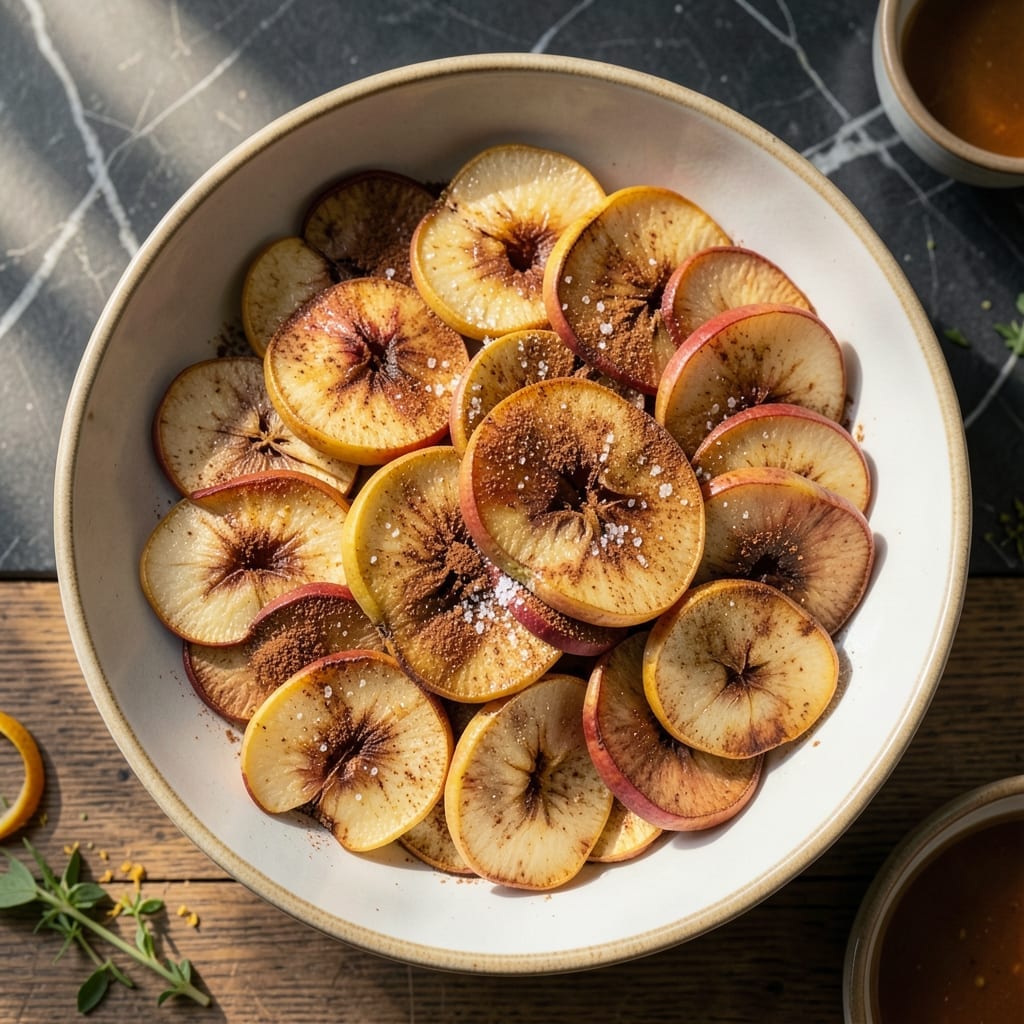
There’s a simple joy in making your own dried apples at home with a dehydrator. This method locks in natural sweetness while creating a chewy, portable snack that’s perfect for any time of day.
With just a few basic steps and consistent temperature control, you’ll achieve evenly dried slices every time. No preservatives, no added sugars—just pure, concentrated apple flavor in every bite.
Ingredients for Dried Apples Recipe Dehydrator
Just apples and a few pantry staples. Simple, clean, and naturally sweet.
| Ingredient | Amount | Notes |
|---|---|---|
| Apples 🍎 | 8 whole | Cored, sliced 1/4-inch thick |
| Lemon Juice 🍋 | 2 tbsp | Freshly squeezed for color |
| Water 💧 | 4 cups | Cold, for soaking slices |
| Ground Cinnamon 🌿 | 1 tsp | Optional, for dusting |
| Granulated Sugar 🍚 | 2 tbsp | Optional, for sweetness |
The apples are everything. Honeycrisp or Fuji give you that perfect balance of sweet and tart. Grab them from your local farmers market if you can—they’re usually fresher and taste better than supermarket picks. Slice them evenly (about 1/4-inch thick) so they dry at the same rate. A mandoline makes quick work of it, but a sharp knife does the job too (worth the extra minute).
No fresh lemon juice? Bottled works in a pinch (just use a little less). Want to skip the soak? You can, but the apples might brown a bit. The cinnamon is totally optional—pumpkin pie spice is a great swap if you’ve got it. Prefer no added sugar? The apples are sweet enough on their own, so feel free to leave it out.
Store in an airtight container at room temp for up to 2 weeks, or freeze for 6 months. Perfect for lunchboxes or trail mix. Keeps best in a dark, cool spot (like your pantry).
Why You’ll Love This Recipe
- Set and Forget: I slice the apples, toss them with lemon juice and cinnamon, then let the dehydrator do all the work—no babysitting required.
- Sweet & Spiced: The cinnamon-sugar dusting turns plain apples into little caramelized bites with just the right tang from the lemon.
- Snack Stash: I keep a jar on my desk for mid-afternoon cravings and another in the car for road trips—honestly, they disappear faster than store-bought chips.
- Pantry Savior: A 5-pound bag of apples becomes shelf-stable snacks for weeks, saving me both money and last-minute grocery runs.
Step-by-Step Instructions for Dried Apples in a Dehydrator
Here’s how to turn fresh fruit into sweet, chewy snacks with minimal effort.
Step 1: Prep the Apples for Even Drying
Start by coring all 8 whole Apples and slicing them into ¼-inch thick pieces. I use an apple corer for speed, but a sharp knife works just as well. The key is consistent thickness—this ensures every slice dries at the same rate.
Thicker slices take forever to dry; thinner ones might crisp too much. Aim for uniform pieces, about the size of a quarter. If you notice any browning as you work, that’s normal—we’ll handle that in the next step.
Step 2: Soak Slices to Preserve Color and Flavor
In a large bowl, combine the 4 cups Water with 2 tbsp Lemon Juice. Add all the apple slices and let them soak for 5-10 minutes. The lemon juice prevents browning and keeps the dried fruit looking vibrant.
Don’t skip this step—it makes a noticeable difference in both appearance and taste. While the slices soak, I like to stir them gently every few minutes to ensure even coverage. Drain the apples thoroughly before moving on; excess moisture slows down the drying process.
Step 3: Season the Slices (Optional but Recommended)
Pat the soaked apple slices dry with a clean kitchen towel or paper towels. At this point, you can leave them plain or add some extra flavor. For a touch of sweetness, sprinkle both sides lightly with 2 tbsp Granulated Sugar.
If you’re a fan of warm spices, dust the slices with 1 tsp Ground Cinnamon before arranging them on the dehydrator trays. I find that a light dusting is plenty—the flavor intensifies as the apples dry. Don’t overdo it, or the spices might overpower the natural apple taste.
Step 4: Arrange and Dehydrate
Lay the apple slices in a single layer on your dehydrator trays, making sure they don’t overlap. Overcrowding leads to uneven drying and can cause some pieces to stick together. Leave a little space between each slice for proper airflow.
Set your dehydrator to 135°F and let the apples dry for 6-12 hours. Check on them after 6 hours—they’re done when the slices are leathery but still pliable, with no visible moisture. If they’re still soft in the center, give them more time. Rotate the trays halfway through if your dehydrator has uneven heat distribution.
Step 5: Cool and Store
Once the apples are fully dried, turn off the dehydrator and let them cool completely on the trays. This usually takes 30-60 minutes. They’ll firm up a bit as they cool, which is exactly what you want.
Store the dried apples in an airtight container at room temperature. They’ll keep for 2-3 weeks, though I doubt they’ll last that long—they’re too good to resist! If you notice any condensation inside the container after a day, the slices needed more drying time. In that case, pop them back in the dehydrator for another hour or two.
Pro Tips For Making Dried Apples Recipe Dehydrator
- Slice Evenly: Cut apples into 1/4-inch slices—any thicker and they’ll take forever to dry, any thinner and they’ll turn to leather. I learned this the hard way after a batch came out half crisp, half chewy.
- Prevent Browning: Toss apple slices in a mix of 1 cup water and 2 tablespoons lemon juice before dehydrating. Sounds weird, but it keeps them looking fresh and bright instead of sad and brown.
- Space Them Out: Lay slices in a single layer with no overlaps on the dehydrator trays. Skip the crowding, or you’ll end up with sticky, unevenly dried clumps instead of perfect chips.
- Use Cinnamon Sparingly: A light dusting of cinnamon and sugar is plenty—about 1/2 teaspoon per pound of apples. Resist the urge to go heavy, or the spice will overpower the natural sweetness.
Regional Styles of dried apples recipe dehydrator
Pacific Northwest Style
In this region, we love using Honeycrisp apples for their perfect balance of sweet and tart. The cool climate here produces apples with exceptional flavor. I slice them slightly thicker, about ⅓-inch, for a chewier texture that holds up well in trail mixes. 🗺️
Southern Tradition
Down south, they often use Granny Smith apples for a tarter dried snack. The extra acidity pairs beautifully with the region’s love for bold flavors. I’ve found adding a pinch of cayenne pepper to the cinnamon dusting gives it that classic Southern kick.
Midwest Classic
The Midwest stays true to tradition with Jonathan apples, a local favorite. These hold their shape well during drying. Many families here add 1 tsp vanilla extract to the soaking water for an extra layer of warmth and nostalgia.
California Fusion
Out west, we often see Fuji apples used for their natural sweetness. The innovation here is adding orange zest to the lemon water soak. This small tweak brightens the flavor profile, reflecting California’s love for citrus-infused treats.
New England Heritage
In New England, McIntosh apples are the go-to for dried snacks. The softer texture becomes wonderfully tender when dehydrated. I’ve noticed many locals use maple syrup instead of sugar for a touch of regional authenticity.
Frequently Asked Questions
What’s the best apple variety for dehydrating?
Sweet varieties like Honeycrisp or Fuji work best for chewy, flavorful results. Tart options like Granny Smith add a nice tang but may need extra sweetness.
How do I know when they’re fully dry?
Slices should be leathery with no moisture when cooled. If they feel sticky or bend easily, dehydrate for another 1-2 hours at 135°F.
Can I skip the lemon juice soak?
You can, but slices may brown and lose freshness faster. The soak preserves color and adds a subtle brightness to the flavor.
How long will they stay fresh?
Stored in an airtight container, they’ll keep for 2-3 weeks at room temperature. For longer storage, freeze for up to 6 months.
Nutrition Facts

- BBQ Sausage Recipe Oven: Smoky Depth Without the Grill - September 28, 2026
- BBQ Chicken Bowl Recipe Rice: Smoky Sweetness Over Fluffy Grains - September 28, 2026
- Beef Cutlet Recipe Ideas: Crispy Breaded Patties With Bold Seasonings - September 28, 2026