
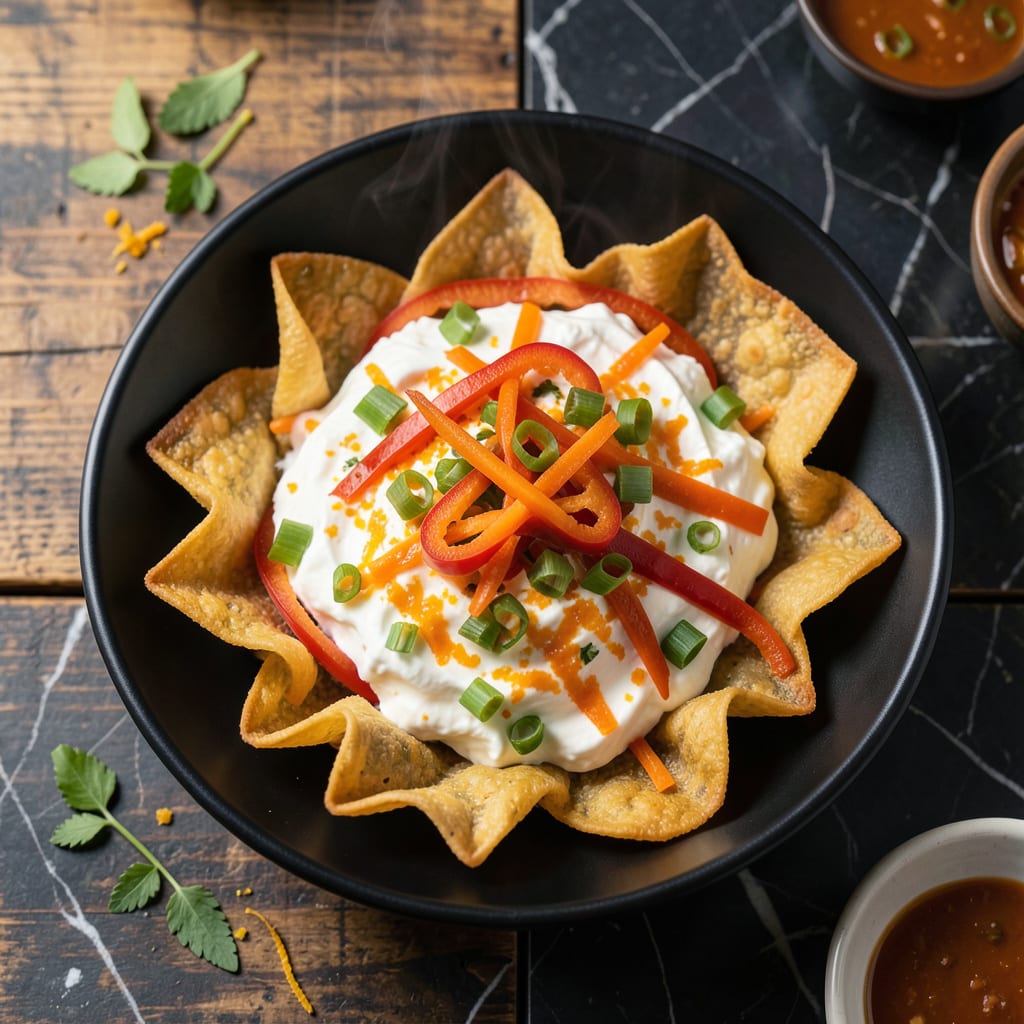
I’ve discovered that egg roll wrappers are far more versatile than their name suggests. These thin, crispy sheets can transform into creative appetizers that go well beyond the classic roll.
From savory cups to crispy strips, the possibilities are endless. Each idea maintains the traditional texture while offering a fresh, unexpected twist.
Ingredients for Egg Roll Wrapper Recipe Ideas
Thin, crispy sheets ready to transform into something totally unexpected and delicious.
| Ingredient | Amount | Notes |
|---|---|---|
| Egg Roll Wrappers 🥟 | 12 sheets | Thawed if frozen, keep covered |
| Cream Cheese 🧀 | 8 oz | Softened to room temperature |
| Shredded Cheddar Cheese 🧀 | 1 cup | Sharp or mild variety |
| Green Onions 🧅 | 4 whole | Thinly sliced, green parts only |
| Bell Peppers 🌶️ | 2 whole | Any color, finely diced |
| Carrots 🥕 | 2 whole | Julienned or matchstick cut |
| Soy Sauce 🫒 | 3 tbsp | Low-sodium preferred for balance |
| Sesame Oil 🫒 | 1 tsp | Toasted variety for depth |
| Vegetable Oil 🫒 | 2 cups | Neutral flavor for frying |
| Large Eggs 🥚 | 2 whole | Beaten for sealing edges |
| Cornstarch 🌾 | 2 tbsp | For slurring or thickening |
| Water 💧 | ¼ cup | For cornstarch slurry |
| Salt 🧂 | ½ tsp | Adjust to taste |
| Black Pepper 🌶️ | ¼ tsp | Freshly ground preferred |
The wrappers are the foundation here. Nasoya brand is my go-to—consistent thickness, great crisp. Find them in the refrigerated section near tofu (not the freezer aisle, which are spring roll wrappers—different texture). If you’re making cups or nests, room temperature wrappers are easier to shape without cracking. Look for ones without added preservatives if you’re frying a big batch.
No egg roll wrappers? Wonton wrappers work in a pinch, but they’re smaller and cook faster. For a gluten-free swap, try rice paper sheets (soak before using). The cream cheese can be swapped for goat cheese if you want a tangier bite. Out of sesame oil? Skip it entirely—it’s for flavor depth, not structure. Bell peppers can be swapped for mushrooms or zucchini for a different texture.
Keep unopened packages in the fridge for up to 2 weeks. Once opened, use within 5 days or freeze for 3 months. Wrappers dry out fast—seal tightly in plastic. Frying oil can be reused once if strained and cooled (but honestly, it’s easier to just start fresh).
Why You’ll Love This Recipe
- No-Fuss Assembly: I just roll, fill, and bake—no fancy techniques, and the wrappers crisp up perfectly every time.
- Creamy-Crunchy heaven: That melty cheddar and cream cheese with the crisp wrapper? Honestly, it’s the bite I keep coming back for.
- Party or Snack: I’ve served these as appetizers at gatherings and also scarfed them down for lunch. Versatile doesn’t cover it.
- Budget Stretcher: A pack of wrappers and a little cheese go a long way, and leftovers reheat like a dream.
Step-by-Step Instructions for Egg Roll Wrapper Creations
Transform these wrappers into something new with my tested technique for crispy, flavorful results.
Step 1: Prepare the Cream Cheese Filling
In a bowl, beat the 8 oz cream cheese until smooth and creamy. Add the 1 cup shredded cheddar cheese, 4 whole green onions (thinly sliced), 0.5 tsp salt, and 0.25 tsp black pepper. Mix thoroughly until all ingredients are evenly distributed.
The filling should be thick but spreadable. I like to let it sit at room temperature for 10 minutes to soften slightly, making it easier to work with when assembling. This ensures a smooth, uniform texture in every bite.
Step 2: Prepare the Vegetable Stir-Fry Filling
In a pan, heat 1 tsp sesame oil over medium-high heat. Add the 2 whole bell peppers (finely diced) and 2 whole carrots (julienned). Stir-fry for 4-5 minutes until the vegetables soften but remain slightly crisp.
Pour in the 3 tbsp soy sauce and cook for an additional 1-2 minutes, stirring constantly. The soy sauce should coat the vegetables evenly, giving them a glossy, savory finish. Remove from heat and let cool before using.
Step 3: Assemble the Wrapper Cups
Preheat your oven to 375°F. Press each of the 12 sheets egg roll wrappers into the cups of a muffin tin, creating a small well in the center. Lightly brush the edges with some of the 2 whole large eggs (beaten) to help them hold their shape.
Spoon a generous amount of either the cream cheese filling or the vegetable stir-fry into each wrapper cup. Press down gently to ensure the filling is compact. Brush the tops with the remaining beaten egg to promote browning.
Step 4: Bake to Golden Perfection
Bake for 12-15 minutes until the edges of the wrappers are golden brown and crisp. Keep an eye on them toward the end—egg roll wrappers can go from golden to over-brown quickly.
If you prefer a deeper fry, heat 2 cups vegetable oil in a deep pan to 350°F. Fry the assembled cups in batches for 2-3 minutes until golden and crispy, turning occasionally for even cooking. Drain on a paper towel-lined plate.
Step 5: Create a Dipping Sauce (Optional)
For a simple dipping sauce, combine the remaining 3 tbsp soy sauce with 2 tbsp cornstarch and 0.25 cup water in a small saucepan. Whisk until smooth, then heat over medium heat until the mixture thickens to a syrup-like consistency, about 3-4 minutes.
This sauce pairs perfectly with either the baked or fried wrapper cups. Serve warm alongside your creations for dipping, or drizzle lightly over the top for added flavor.
Pro Tips For Making Egg Roll Wrapper Recipe Ideas
- Seal the Edges: Use a tiny bit of water on your finger to moisten the wrapper edges before folding—I learned this the hard way after my first three rolls popped open mid-fry.
- Drain the Peppers: After dicing bell peppers, pat them dry with a paper towel to prevent soggy wrappers. Sounds tedious, but it actually changes the outcome.
- Skip Overfilling: Resist the urge to stuff wraps with too much cheese or veggies—stick to about 2 tablespoons max, or they’ll burst when cooking.
- Soften the Cream Cheese: Let the cream cheese sit out for 20 minutes before mixing, or it’ll clump in your filling. My grandmother swore by this, and she was right.
Storing and Reheating This egg roll wrapper recipe ideas
Refrigerator Storage
Let your baked wrapper cups cool completely before storing. Place them in an airtight container with parchment paper between layers to prevent sticking. They’ll stay fresh in the fridge for up to 4 days. The crispiness softens slightly but returns with a quick reheat. ❄️
Freezer Storage
For longer storage, freeze cooled cups in a single layer on a baking sheet first. Once frozen, transfer to a ziplock freezer bag with parchment between layers. They’ll keep for up to 3 months. No need to thaw—just reheat directly from frozen.
Oven Reheating
Preheat your oven to 350°F and place cups on a baking sheet. Reheat for 8-10 minutes until crisp and warmed through. This method restores the original texture best. For frozen cups, add 2-3 minutes to the time. 🔥
Air Fryer Reheating
Arrange cups in a single layer in your air fryer basket. Heat at 350°F for 3-4 minutes, shaking halfway. This gives them a delightful crisp without drying out. Works perfectly for both fresh and frozen cups.
Microwave Option
Place cups on a microwave-safe plate and cover with a damp paper towel. Heat on high for 30-45 seconds, checking halfway. The texture won’t be as crisp, but it’s the fastest method when you’re in a hurry.
Nutrition Facts
Frequently Asked Questions
Can I bake instead of frying?
Bake at 375°F for 12-15 minutes until golden. Brush with oil first for extra crispiness. This method works for cups, nests, and even strips.
How do I prevent wrappers from drying out?
Keep them covered with a damp towel while working. Once assembled, cook immediately or store in an airtight container with parchment between layers. Always reheat to restore crispness.
What fillings work best?
Cream cheese, veggies, or shredded chicken all shine. Avoid watery ingredients like fresh tomatoes. Pre-cook fillings to remove excess moisture for the best texture.
Can I make these gluten-free?
Yes! Use rice paper wrappers instead. Soak them briefly in warm water to soften before filling. They crisp up beautifully when baked or fried.

- Beefaroni Recipe With Tomato Soup: One-Pot Nostalgic Comfort - September 28, 2026
- Bread Recipe KitchenAid Mixer: Foolproof Loaf With Perfect Rise - September 28, 2026
- BBQ Oysters Recipe Grill: Smoky Garlic Butter Bliss - September 28, 2026