
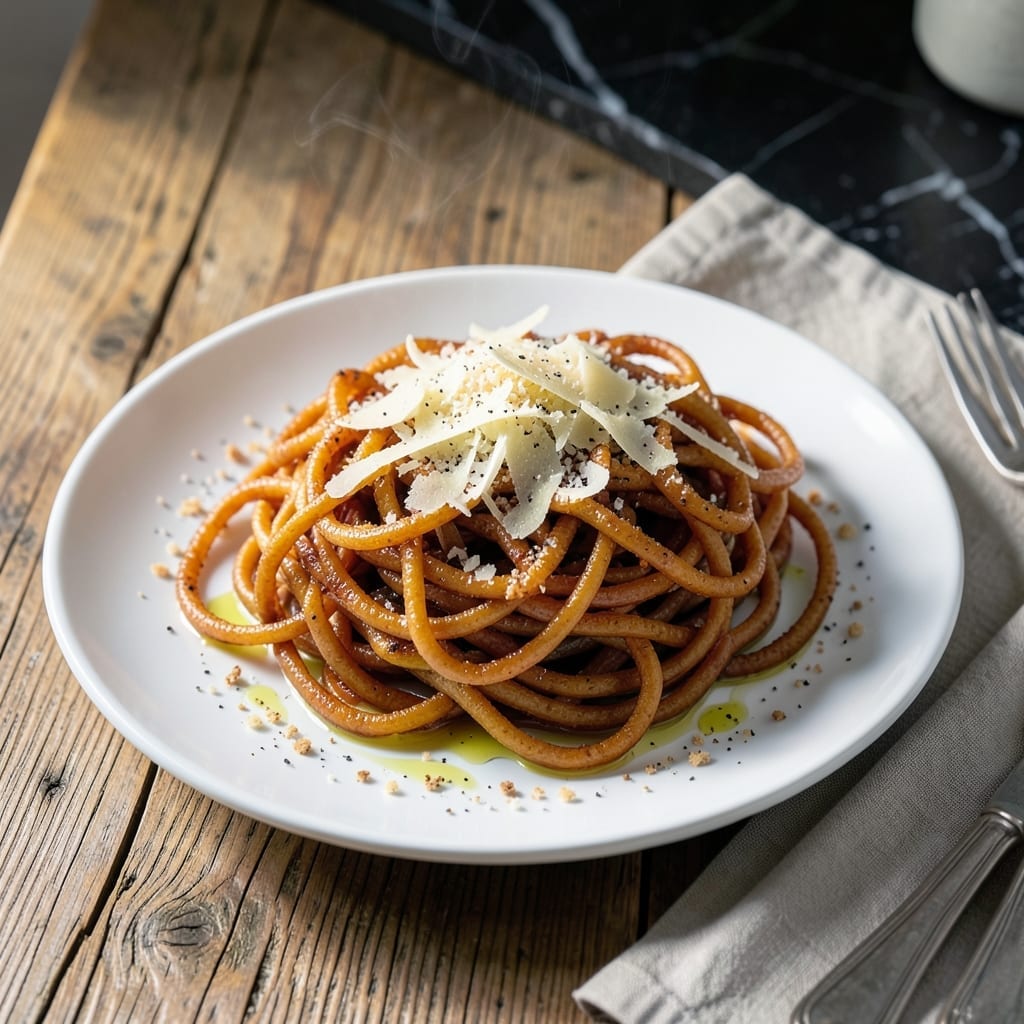
Capellini transforms into a crispy, golden nest with this simple frying technique that takes just 15 minutes. The delicate angel hair pasta creates a unique texture that’s both crunchy and satisfying.
This method requires precise heat control and minimal ingredients. A hot pan and neutral oil work together to turn plain pasta into an elegant, edible centerpiece. No special equipment is needed.
You’ll achieve a lacy, crisp structure that holds its shape beautifully. The result is a dish that’s as visually impressive as it is delicious, with a subtle nutty flavor from the toasted pasta.
Serve immediately as a base for sauces or as a standalone crispy garnish. This recipe delivers consistent results every time.
Ingredients for Fried Capellini
Minimal ingredients create maximum impact with this crispy pasta transformation.
| Ingredient | Amount | Notes |
|---|---|---|
| Capellini Pasta 🍝 | 8 oz | Angel hair pasta, uncooked |
| Neutral Cooking Oil 🫒 | ½ cup | Vegetable or canola oil preferred |
| Fine Sea Salt 🧂 | ½ tsp | For seasoning pasta water |
| Freshly Ground Black Pepper 🌶️ | ¼ tsp | For finishing |
| Grated Parmesan Cheese 🧀 | ½ cup | Optional, for serving |
| Garlic Powder 🧄 | ¼ tsp | Optional, for extra flavor |
| Dried Oregano 🌿 | ¼ tsp | Optional, for garnish |
| Red Pepper Flakes 🌶️ | 0.125 tsp | Optional, for heat |
| Lemon Zest 🍋 | 1 tsp | Optional, for brightness |
| Fresh Parsley 🌿 | 2 tbsp | Chopped, for garnish |
The pasta choice is non-negotiable here. Capellini (angel hair) is essential for that delicate, lacy structure—thicker pastas won’t crisp properly. Look for De Cecco or Barilla brands at most supermarkets. The oil must have a high smoke point; vegetable or canola oil works best. Avoid olive oil—its low smoke point will burn before the pasta crisps.
No capellini? Angel hair is the same thing (just different branding). For extra flavor, add garlic powder or Parmesan right after frying while the pasta’s still hot. Red pepper flakes bring heat if you like a kick. Fresh parsley or lemon zest brighten it up. The key is working fast—this dish loses its crispness quickly, so have your garnishes ready.
Store uncooked capellini in a cool, dry place for up to 2 years. Once fried, serve immediately—it’s best straight from the pan. Leftovers? Reheat in a 350°F oven for 5 minutes to revive some crispness, but it’s never quite the same. Don’t bother refrigerating; this is a make-and-serve dish.
Why You’ll Love This Recipe
- No Boiling Needed: I just fry the capellini directly in hot oil—no waiting for water to boil or draining pasta.
- Crispy Cheese Bites: The grated Parmesan melts into golden, crispy edges that are honestly irresistible.
- Weeknight Hero: Between us, this is my backup plan when I need dinner ready before the kids start complaining.
- Budget Stretcher: A pound of capellini and a handful of cheese feeds four—no fancy ingredients required.
Step-by-Step Instructions for Fried Capellini
Master this technique for perfectly crisp angel hair pasta with minimal effort.
Step 1: Cook the Capellini Pasta Al Dente
Bring a large pot of water to a rolling boil and add the 8 oz Capellini Pasta. Stir immediately to prevent sticking, as angel hair tends to clump. Cook for 2-3 minutes—capellini cooks faster than standard pasta.
Drain the pasta in a colander but do not rinse. The surface starch helps create crispiness later. Toss the drained pasta with 0.5 tsp Fine Sea Salt while still hot to season the noodles evenly. Spread the pasta on a baking sheet to cool and dry slightly, which prevents sogginess during frying.
Step 2: Heat the Oil to Optimal Frying Temperature
In a large, deep skillet or wok, heat the 0.5 cup Neutral Cooking Oil over medium-high heat until it shimmers and reaches 350-375°F. A wooden chopstick inserted into the oil should bubble vigorously when the temperature is correct.
Avoid overheating the oil, as this can burn the pasta before it crisps. If the oil begins to smoke, remove it from heat and let it cool slightly before proceeding. The right temperature ensures the pasta fries quickly and evenly without absorbing excess oil.
Step 3: Fry the Pasta in Batches
Working in 2-3 batches to avoid overcrowding, carefully add a portion of the cooled capellini to the hot oil. Use a slotted spoon or tongs to separate the strands as they hit the oil, ensuring even frying.
Fry for 1-2 minutes until the pasta turns golden brown and becomes crisp. The strands should puff slightly and develop a delicate, lacy texture. Remove the fried pasta with a slotted spoon and drain on a paper towel-lined plate.
Step 4: Season and Garnish Immediately
While the pasta is still hot, sprinkle it with the 0.25 tsp Freshly Ground Black Pepper, 0.25 tsp Garlic Powder, and 0.125 tsp Red Pepper Flakes. The heat from the fried pasta will help the spices adhere and release their aromas.
Transfer the seasoned pasta to a serving platter. Top with the 0.5 cup Grated Parmesan Cheese, 1 tsp Lemon Zest, and 2 tbsp Fresh Parsley. The lemon zest adds a bright contrast to the rich, crisp pasta, while the parsley provides a fresh finish.
Pro Tips For Making Fried Capellini
- Boil Al Dente: Cook the capellini 1-2 minutes less than package instructions—it’ll finish frying in the pan. I learned this the hard way after ending up with mushy noodles.
- Use High Smoke Oil: Grab a neutral oil like avocado or refined peanut oil with a high smoke point. Sounds obvious, but I ruined a batch once with butter that burned instantly.
- Pat Noodles Dry: Drain the pasta, then spread it on a tray and pat with a towel. Sounds tedious, but wet noodles steam instead of fry, and nobody wants soggy capellini.
- Grate Cheese Fresh: Skip the pre-grated stuff—it’s coated in anti-caking agents that make it clump. Freshly grated Parmesan melts smoothly and actually sticks to the pasta.
Serving Suggestions for Leftovers
Plating Perfection
Serve this crispy creation on a large platter to showcase its lacy structure. The golden nest looks stunning against dark plates or wooden boards. I love using a white ceramic platter for maximum contrast. 💫
Sauce Pairings
Drizzle lightly with warm marinara or pesto just before serving. The sauce will soften the pasta slightly while keeping most of its crispness. A balsamic glaze adds sweet contrast to the savory notes.
Protein Toppings
Top with grilled shrimp or chicken tenders for a complete meal. The protein nestles perfectly into the pasta nest. I often add crumbled bacon for a smoky touch that complements the nutty flavor.
Fresh Garnishes
Scatter cherry tomatoes and baby arugula around the platter for color and freshness. The acidity from tomatoes balances the richness beautifully. A sprinkle of fresh basil adds aromatic depth.
Cheese Variations
Swap Parmesan for Pecorino Romano for sharper flavor, or use shaved Parmigiano-Reggiano for elegant presentation. The salty cheese enhances the pasta’s natural nuttiness without overpowering it.
Serving Temperature
This dish is best served immediately while still hot and crisp. The texture changes dramatically as it cools, losing that perfect crunch. I always bring the platter straight from the kitchen to the table for maximum impact. ✨
Nutrition Facts
Frequently Asked Questions
What’s the best oil for frying?
Use a neutral oil with a high smoke point like vegetable or canola oil. Avoid olive oil as its low smoke point will burn the pasta before it crisps. 0.5 cup is perfect for 8 oz of capellini.
Can I make this ahead of time?
No, this dish is best served immediately. The pasta loses its crispness quickly as it cools. If needed, reheat in a 350°F oven for 5 minutes to revive some texture.
Why did my pasta turn out soggy?
Overcrowding the pan or using oil that’s not hot enough causes sogginess. Fry in 2-3 batches and ensure the oil reaches 350-375°F before adding the pasta.
Can I use a different pasta?
Only capellini or angel hair will give you the lacy, crisp texture. Thicker pastas won’t crisp properly and can become chewy. Stick to the recipe for the best results.

- BBQ Sausage Recipe Oven: Smoky Depth Without the Grill - September 28, 2026
- BBQ Chicken Bowl Recipe Rice: Smoky Sweetness Over Fluffy Grains - September 28, 2026
- Beef Cutlet Recipe Ideas: Crispy Breaded Patties With Bold Seasonings - September 28, 2026