
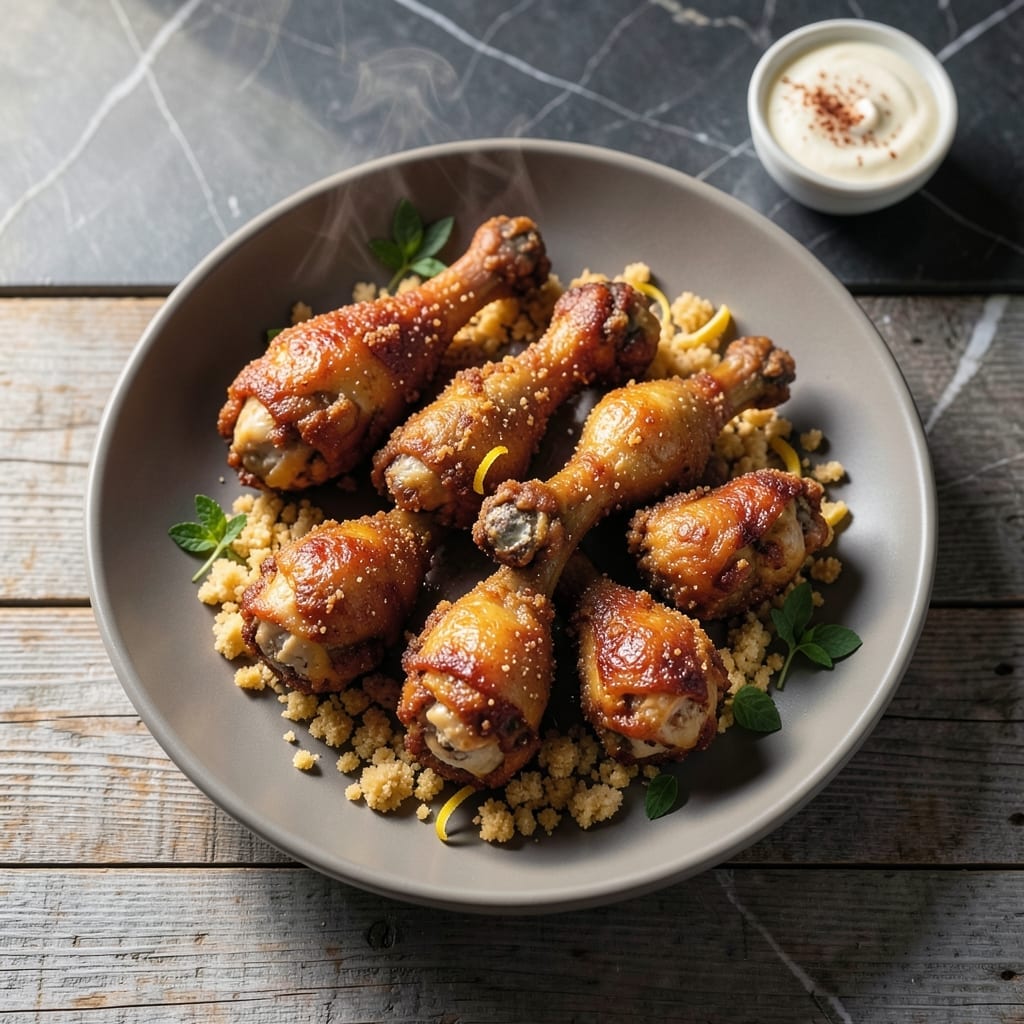
There’s a science to achieving crispy skin and juicy meat in fried chicken legs, and this recipe delivers both every time. I’ve tested countless methods to perfect the balance between crunch and tenderness.
The secret lies in a buttermilk brine that keeps the meat moist while the seasoned coating creates a shatteringly crispy exterior. A hot oil bath at the right temperature ensures even cooking without drying out the chicken.
What you’ll get is golden, crispy legs with meat so tender it nearly falls off the bone. The seasoning is bold but balanced, letting the chicken’s natural flavor shine through.
Serve hot for the best texture, or keep warm in the oven while frying in batches. Here’s how to make it right.
Ingredients for Fried Chicken Legs
Simple ingredients, crispy results. Buttermilk and spices work magic on chicken legs.
| Ingredient | Amount | Notes |
|---|---|---|
| Chicken Legs 🍗 | 8 pieces | Drumsticks and thighs included |
| Buttermilk 🥛 | 2 cups | Full-fat for extra moisture |
| All-Purpose Flour 🌾 | 2 cups | For dredging and coating |
| Cornstarch 🌾 | ½ cup | Makes coating extra crispy |
| Salt 🧂 | 2 tsp | Kosher or sea salt preferred |
| Black Pepper 🌶️ | 1 tsp | Freshly ground for best flavor |
| Paprika 🌶️ | 1 tbsp | Sweet or smoked variety |
| Garlic Powder 🧄 | 1 tsp | Not garlic salt |
| Onion Powder 🧅 | 1 tsp | Adds depth of flavor |
| Cayenne Pepper 🔥 | ½ tsp | Adjust for spice preference |
| Vegetable Oil 🫒 | 4 cups | For deep frying, high smoke point |
| Large Eggs 🥚 | 2 whole | Beaten for binding coating |
The chicken legs are the star. Look for plump, moist-looking pieces—avoid anything with dry or grayish skin. I grab mine from Costco for bulk savings, but any supermarket will do. The buttermilk matters too—full-fat gives the best brine. If you’re lucky enough to find local, farm-fresh buttermilk, even better (that tangy, thick stuff is liquid gold).
No buttermilk? Whole milk plus 1 tbsp lemon juice or vinegar works in a pinch. Swap cornstarch with baking powder for extra crispiness. Short on spices? Cajun seasoning at half the amount gives a nice kick. The oil needs to hit 350°F—use a thermometer if you’ve got one (worth the $10 investment). Peanut oil works too if you prefer its flavor.
Fry in batches to avoid overcrowding—keeps the oil hot and the coating crispy. Leftovers? They’re best fresh, but will keep in the fridge for 3-4 days. Reheat in the oven at 375°F to revive some crunch (microwave ruins it).
Why You’ll Love This Recipe
- Minimal Effort: I toss the legs in buttermilk the night before, then it’s just flour, cornstarch, and a hot pan—no fancy steps.
- That Crunch: The cornstarch in the coating makes it shatter when you bite in, with juicy meat underneath.
- Feeds Everyone: I’ve served this for Sunday dinner, game day, even packed leftovers for lunch—always disappears.
- Budget Hero: Chicken legs are cheap, and one batch stretches to feed my whole family with seconds to spare.
Step-by-Step Instructions for Fried Chicken Legs
Here’s how to get that perfect crunch and juicy meat with minimal fuss.
Step 1: Marinate the Chicken Legs in Buttermilk
Place all 8 pieces Chicken Legs in a large bowl and pour over the 2 cups Buttermilk. Ensure each piece is fully coated. Cover and refrigerate for at least 4 hours, or ideally overnight.
This buttermilk soak tenderizes the meat and adds a subtle tang that balances the rich, crispy coating. The longer you marinate, the juicier your chicken will be—don’t skip this step. The acid in the buttermilk breaks down proteins, ensuring every bite stays moist.
Step 2: Prepare the Seasoned Flour and Cornstarch Coating
In a large shallow dish, whisk together the 2 cups All-Purpose Flour, 0.5 cup Cornstarch, 2 tsp Salt, 1 tsp Black Pepper, 1 tbsp Paprika, 1 tsp Garlic Powder, 1 tsp Onion Powder, and 0.5 tsp Cayenne Pepper. The cornstarch is the secret to that extra-crispy texture.
In a separate bowl, beat the 2 whole Large Eggs lightly. This two-step dredging process (egg wash then flour) creates a thick, craggy crust that clings to the chicken. Make sure the spices are evenly distributed in the flour mixture for consistent flavor in every bite.
Step 3: Coat the Chicken Legs Thoroughly
Remove the chicken legs from the buttermilk, letting any excess drip off. Dip each piece into the beaten eggs, then press firmly into the seasoned flour mixture. Turn to coat completely, pressing the coating onto the meat so it adheres well.
Place the coated legs on a wire rack set over a baking sheet. Let them rest for 10-15 minutes—this helps the coating set and prevents it from falling off during frying. You should see a thick, even layer of flour clinging to each piece.
Step 4: Fry to Golden Perfection
Heat the 4 cups Vegetable Oil in a large, heavy pot or deep Fryer to 350°F. Use a deep-fry or candy thermometer to monitor the temperature—it should stay steady between 340-360°F for even cooking.
Fry the chicken legs in batches to avoid crowding the pot, which would lower the oil temperature. Cook for 12-15 minutes, turning occasionally, until the coating is deep golden brown and the internal temperature reaches 165°F. The coating should be crispy and the juices should run clear when you pierce the thickest part of a leg.
Step 5: Drain and Rest Before Serving
Transfer the fried chicken legs to a wire rack or paper towel-lined plate to drain excess oil. Let them rest for 5 minutes before serving—this allows the coating to set fully and keeps the meat juicy.
The result should be a shatteringly crisp exterior giving way to tender, flavorful meat. Serve immediately while hot and crispy. If you need to keep them warm, place them on a wire rack in a 200°F oven for up to 20 minutes, but they’re best eaten fresh out of the fryer.
Pro Tips For Making Fried Chicken Legs
- Double Dredge: Dip the buttermilk-soaked legs in flour, then back in buttermilk, then flour again—this builds a shatteringly crisp crust that actually stays put.
- Rest Before Frying: Let the dredged legs sit on a rack for 10 minutes before frying; I learned this the hard way after my first few batches had coating that slid right off.
- Oil at 350°F: Use a thermometer and keep the oil steady at 350°F—any lower and you’ll get greasy chicken, any higher and the outside burns before the inside cooks.
- Cornstarch Boost: Swap ¼ cup of the all-purpose flour for cornstarch in your dredge; sounds weird, but it makes the crust lighter and crunchier every time.
Make-Ahead Tips for fried chicken legs
Overnight Brining
For the juiciest results, I always brine my chicken legs in buttermilk for at least 8 hours, or up to 24 hours in the fridge. This gives the acid time to work its magic on the meat fibers. Just whisk 2 cups buttermilk with spices and submerge the legs completely. 💡
Prep the Coating
You can mix your dry coating up to 2 days ahead and store it in an airtight container. Combine 2 cups flour, ½ cup cornstarch, and all spices. This saves time on frying day and lets flavors meld.
Batch Coating
After brining, coat all legs at once and arrange them on a rack. Cover loosely with plastic wrap and refrigerate for up to 4 hours before frying. This helps the coating adhere better during cooking.
Keep Warm in Oven
While frying in batches, keep finished legs warm on a rack in a 200°F oven. Place a baking sheet underneath to catch drips. This maintains crispiness without overcooking. 🔥
Freeze Uncooked
Coated, unbaked legs can be frozen for up to 1 month. Lay them flat on a tray to freeze, then transfer to a bag. Fry from frozen, adding 2-3 minutes to cooking time.
Reheating Leftovers
For day-old chicken, reheat in a 375°F oven for 10-12 minutes on a rack. This revives some crispiness. Avoid microwaving—it turns the coating soggy.
Nutrition Facts
Frequently Asked Questions
What oil temperature should I use?
Maintain oil at 350°F throughout frying. Use a thermometer for accuracy. If too cool, the coating absorbs oil and becomes greasy.
Can I bake instead of fry?
Yes, bake at 400°F for 35-40 minutes on a rack. The texture won’t be as crispy, but it’s a healthier alternative. Turn halfway through.
Why did my coating fall off?
Lack of resting time after coating is the usual culprit. Let coated legs rest for 10-15 minutes before frying so the flour adheres properly.
How do I know when it’s done?
Use a meat thermometer—internal temp should reach 165°F. The coating will be deep golden brown and juices should run clear.

- BBQ Sausage Recipe Oven: Smoky Depth Without the Grill - September 28, 2026
- BBQ Chicken Bowl Recipe Rice: Smoky Sweetness Over Fluffy Grains - September 28, 2026
- Beef Cutlet Recipe Ideas: Crispy Breaded Patties With Bold Seasonings - September 28, 2026