
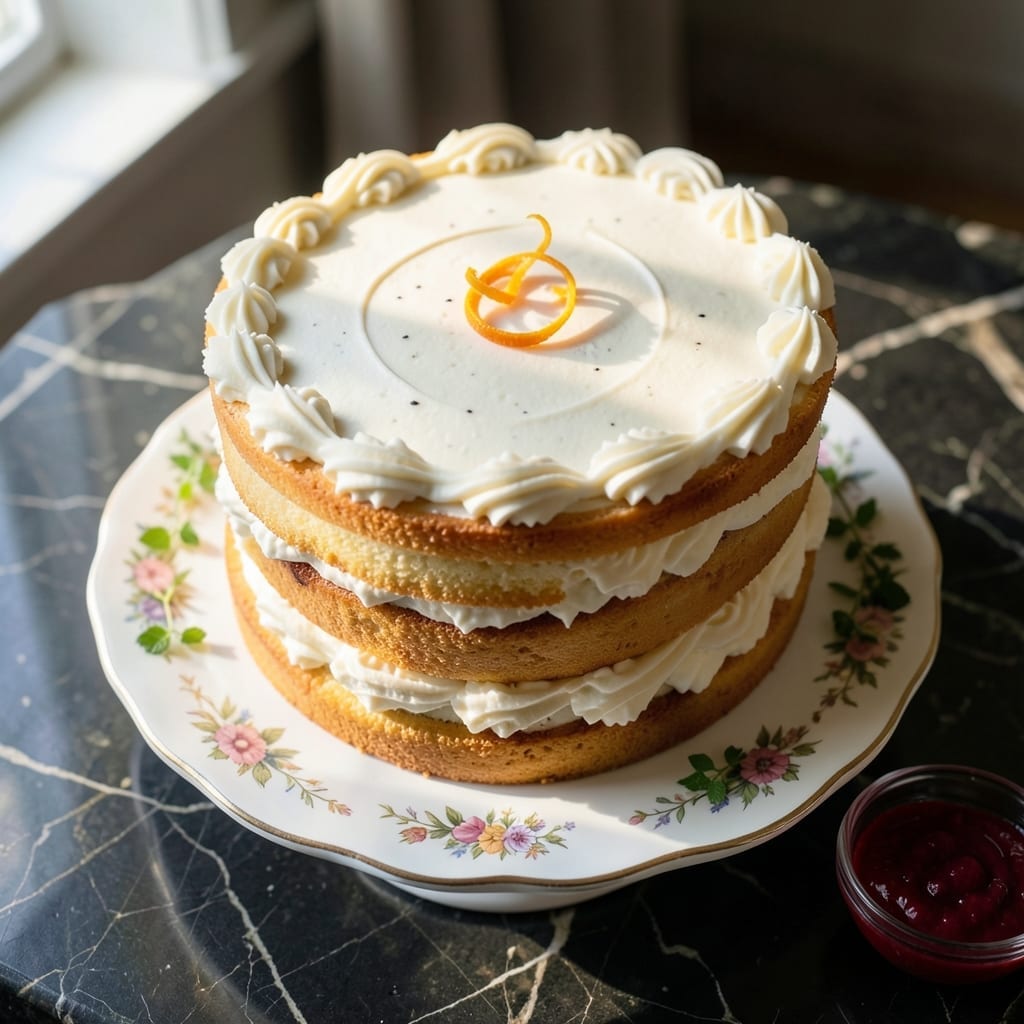
This white cake recipe delivers the classic elegance that Hough Bakery built its reputation on. The secret lies in a precise balance of buttery richness and pure vanilla flavor, creating a tender crumb that melts in your mouth.
What sets this apart is the careful layering technique and a simple yet effective mixing method. The result is a cake with perfect structure that holds up beautifully to fillings and frostings while maintaining a light, airy texture.
Each bite offers that signature bakery-quality experience—moist without being dense, sweet without being cloying. The vanilla notes shine through without competing with the buttery base.
Perfect for celebrations or when you want to recreate that nostalgic bakery taste at home. Here’s how to achieve it.
Ingredients for Hough Bakery White Cake
Classic bakery ingredients combine for a cake with buttery richness and vanilla elegance in every slice.
| Ingredient | Amount | Notes |
|---|---|---|
| Cake Flour 🌾 | 3 cups | Sifted, not self-rising |
| Granulated Sugar 🍚 | 2 ¼ cups | Fine white sugar preferred |
| Unsalted Butter 🧈 | 1 ½ cups | Room temperature, softened |
| Large Egg Whites 🥚 | 8 whole | Room temperature, separated |
| Whole Milk 🥛 | 1 ¼ cups | Full-fat for richness |
| Pure Vanilla Extract 🌿 | 2 tsp | High-quality, alcohol-based |
| Baking Powder 🧂 | 1 tbsp | Aluminum-free preferred |
| Salt 🧂 | ¾ tsp | Fine sea salt or table salt |
| Almond Extract 🌰 | ½ tsp | Optional, for depth of flavor |
| Vegetable Shortening 🫒 | ½ cup | For structure and moisture |
| Buttermilk 🥛 | ½ cup | Full-fat for best texture |
The cake flour is non-negotiable—King Arthur or Swans Down brands deliver the fine, consistent texture this recipe demands. Butter quality matters enormously; Plugrá or European-style butters have the fat content (82-86%) that creates that signature tender crumb. Always check the expiration on your baking powder—old leaveners produce flat, dense layers. For milk and buttermilk, whole-fat dairy ensures the moisture balance Hough Bakery perfected.
No buttermilk? Whole milk plus 1.5 tsp lemon juice or vinegar per cup works in a pinch (let sit 5 minutes). Out of cake flour? All-purpose minus 2 tbsp per cup, replaced with cornstarch mimics the lower protein content. Vanilla extract should be pure, not imitation—the Nielsen-Massey or Rodelle brands have the depth to carry the flavor. Egg whites must be room temperature; cold whites won’t incorporate properly.
Baked layers keep 2 days at room temperature, wrapped tightly in plastic. For longer storage, freeze unfrosted layers for up to 3 months. Always bring ingredients to room temperature before mixing—this ensures even emulsification and maximum volume in the batter.
Why You’ll Love This Recipe
- One Bowl Magic: I toss everything in—cake flour, sugar, butter—and mix. No fancy steps, just simple layers of flavor.
- Melt-in-Your-Mouth Light: The egg whites and milk make it airy yet rich. Honestly, it’s the fluffiest cake I’ve ever baked.
- Birthday Ready: Works for weddings, birthdays, or just because. I’ll be real: it’s my go-to for any celebration.
- Budget Stretcher: A pantry-full of basics, no pricey extras. Between us, it feeds a crowd without breaking the bank.
Step-by-Step Instructions for Buttery Vanilla White Cake
Master the technique for a moist, fine-crumbed cake with professional results every time.
Step 1: Prepare Pans and Preheat Oven
Begin by positioning oven racks in the upper and lower thirds of the oven. Preheat to 350°F. While heating, thoroughly grease three 8-inch round cake pans with vegetable shortening, then line the bottoms with parchment paper circles.
Lightly dust the parchment and pan sides with cake flour, tapping out any excess. This meticulous preparation ensures clean release and professional presentation. Proper pan prep prevents sticking and allows the cake to rise evenly without doming.
Step 2: Cream Fats and Sugar
In a large bowl, combine the 1.5 cups unsalted butter and 0.5 cup vegetable shortening with the 2.25 cups granulated sugar. Using an electric mixer on medium-high speed, beat for 4-5 minutes until the mixture becomes light, pale, and fluffy.
The butter should be at room temperature—65-68°F—to properly emulsify with the sugar. Stop occasionally to scrape the bowl with a spatula, ensuring even incorporation. This step aerates the base, creating a fine crumb structure essential for white cake.
Step 3: Incorporate Wet Ingredients
Alternate adding the 1.25 cups whole milk and 0.5 cup buttermilk with the dry ingredients to the creamed mixture. Begin and end with the 3 cups cake flour, 1 tbsp baking powder, and 0.75 tsp salt mixture, combining in three additions.
Mix on low speed just until each addition disappears. Overmixing develops gluten, which would toughen the cake. In a separate bowl, lightly whisk the 8 large egg whites with the 2 tsp pure vanilla extract and 0.5 tsp almond extract, then fold into the batter by hand to maintain air.
Step 4: Divide and Bake Layers
Pour the batter evenly into the prepared pans, using a scale for precision. Each pan should contain approximately 1 pound 2 ounces of batter. Smooth the tops with an offset spatula for even layers.
Bake for 25-30 minutes, rotating pans halfway through, until a toothpick inserted in the center comes out clean and the tops spring back when lightly pressed. The edges should begin to pull away from the pan sides, and the centers should appear set without jiggling.
Step 5: Cool and Prepare for Assembly
Allow the cakes to cool in their pans for 10 minutes on a wire rack. This brief rest helps them set without collapsing. Then invert onto the rack, remove the parchment, and reinvert to cool right-side up.
Cool completely, about 1 hour, before leveling the tops with a serrated knife if necessary. The cakes should be room temperature before frosting to prevent melting. Proper cooling ensures structural integrity for stacking and a clean, professional finish.
Pro Tips For Making Hough Bakery White Cake
- Cream Butter Thoroughly: Beat the unsalted butter and sugar for a full 4-5 minutes until pale and fluffy—I learned this the hard way after my first dense, greasy cake.
- Room Temp Egg Whites: Let the egg whites sit out for 30 minutes before using, or they won’t whip properly and your cake will lack that signature lightness.
- Don’t Overmix Flour: Fold in the cake flour just until it disappears—overmixing after this point guarantees a tough crumb, and nobody wants that.
- Use Clear Pans: Bake in light-colored metal pans for even heat; dark or nonstick pans can overbrown the edges before the center sets.
Essential Equipment for Great hough bakery white cake
Mixing Essentials
A stand mixer is non-negotiable for this recipe—I use my KitchenAid 5-quart with the paddle attachment. It handles the dense batter without straining. A hand mixer works in a pinch, but expect 5 extra minutes of beating time to achieve proper aeration.
Precision Tools
A kitchen scale ensures equal batter distribution—each 8-inch pan needs exactly 1 pound 2 ounces. I swear by my OXO Good Grips 11lb scale for accuracy. An offset spatula helps smooth batter evenly in pans for uniform layers.
Pan Preparation
Invest in quality 8-inch round cake pans—Fat Daddio’s or USA Pan brands release cakes cleanly. Parchment circles prevent sticking; I trace pan bottoms on parchment for perfect fits. A pastry brush helps apply shortening evenly to every crevice. 💡
Cooling Equipment
Wire cooling racks are essential for proper airflow—I use stackable stainless steel racks to save space. A long serrated knife levels domed layers perfectly. Always cool completely before frosting to prevent melting and sliding.
Temperature Control
An oven thermometer verifies your 350°F setting—many ovens run hot or cold. I check mine with a Taylor Classic. Room temperature ingredients mix more evenly; I pull butter and eggs out 1 hour before starting.
Optional Extras
A cake turntable makes frosting easier, and a bench scraper creates sharp edges. For perfect layers, a Wilton cake leveler works wonders. These tools aren’t essential but elevate your final presentation. ✨
Nutrition Facts
Frequently Asked Questions
Can I substitute all-purpose flour?
For each 1 cup of cake flour, use 1 cup all-purpose flour minus 2 tablespoons, replaced with 2 tablespoons cornstarch. This mimics the lower protein content for a tender crumb.
Why use both butter and shortening?
Butter adds flavor while shortening provides structure and moisture. The combination creates the signature bakery texture—light yet rich. This dual-fat approach prevents a dry or dense result.
How do I prevent domed layers?
Ensure your oven is properly calibrated to 350°F. Avoid overmixing the batter, and fill pans only 2/3 full. Rotate pans halfway through the 25-30 minute bake time for even rising.
Can I make this ahead?
Bake layers up to 2 days in advance. Cool completely, wrap tightly in plastic, and store at room temperature. For longer storage, freeze unfrosted layers for up to 3 months.

- BBQ Sausage Recipe Oven: Smoky Depth Without the Grill - September 28, 2026
- BBQ Chicken Bowl Recipe Rice: Smoky Sweetness Over Fluffy Grains - September 28, 2026
- Beef Cutlet Recipe Ideas: Crispy Breaded Patties With Bold Seasonings - September 28, 2026