
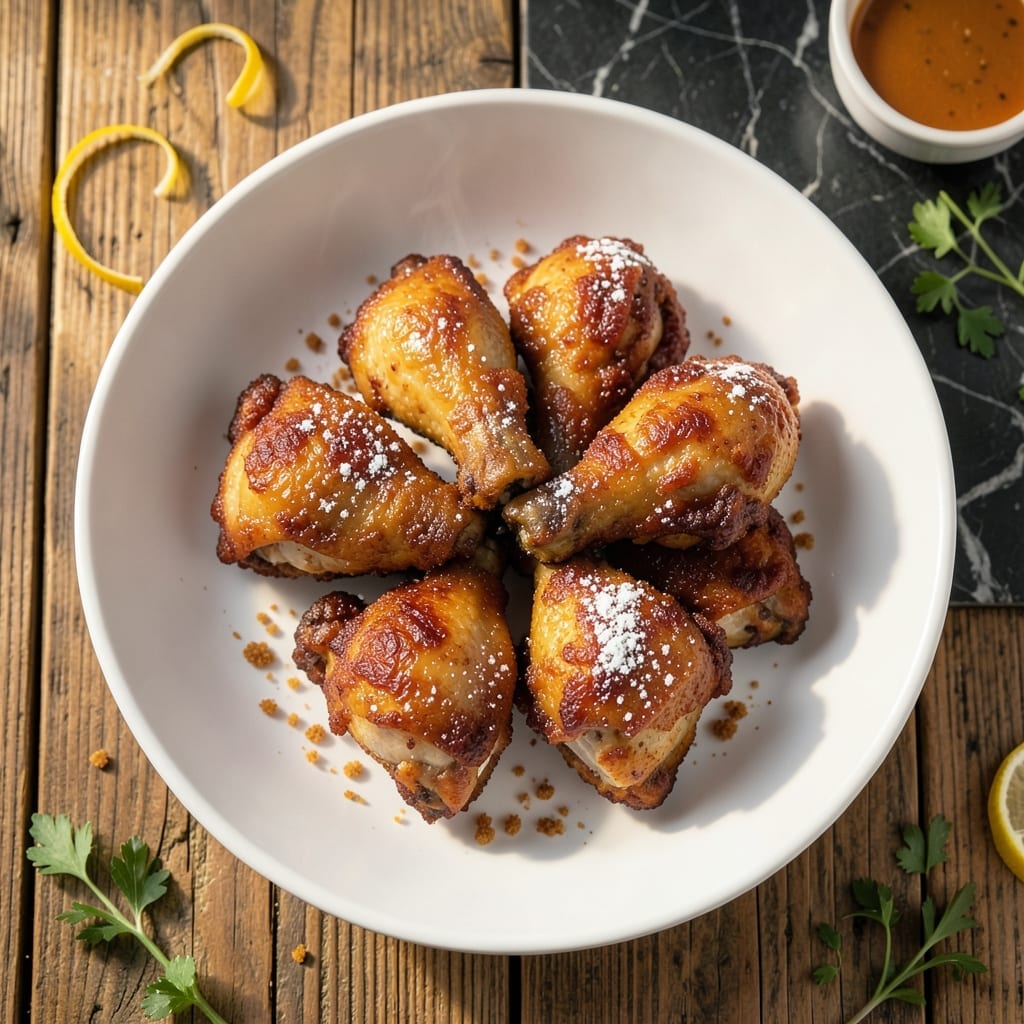
Grandma’s secret to perfect fried chicken was always Crisco—it delivers a crispy, golden crust that shatters with every bite. This traditional method has stood the test of time for a reason.
The key is maintaining the right oil temperature and using enough to fully submerge the chicken. Crisco’s high smoke point ensures even cooking without burning, while the flour coating locks in juices.
What you’ll get is tender meat inside a shatteringly crispy exterior, with that classic Southern flavor we all crave. The result is worth every minute of care.
Follow these steps carefully, and you’ll achieve professional-quality fried chicken that rivals any restaurant. Safety and precision make all the difference.
Ingredients for Fried Chicken Recipe with Crisco
Grandma’s pantry staples plus that one secret ingredient deliver golden, shatteringly crispy results every time.
| Ingredient | Amount | Notes |
|---|---|---|
| Chicken Thighs and Drumsticks 🍗 | 3 ½ lb | Bone-in, skin-on preferred |
| All-Purpose Flour 🌾 | 2 cups | Plus extra for dredging |
| Crisco All-Vegetable Shortening 🫒 | 4 cups | For frying, high smoke point |
| Buttermilk 🥛 | 2 cups | Full-fat for marinade |
| Large Eggs 🥚 | 2 whole | Beaten into buttermilk |
| Salt 🧂 | 2 tbsp | Diamond Crystal kosher preferred |
| Black Pepper 🌶️ | 2 tsp | Freshly ground for best flavor |
| Garlic Powder 🧄 | 2 tsp | Not garlic salt |
| Onion Powder 🧅 | 2 tsp | Fine grind preferred |
| Paprika 🌶️ | 1 tbsp | Sweet or smoked variety |
| Cayenne Pepper 🔥 | ½ tsp | Adjust for heat preference |
| Cornstarch 🌽 | ¼ cup | For extra crispiness |
The Crisco is non-negotiable here—its high smoke point gives you that even golden crust without burning. Bone-in, skin-on thighs and drumsticks stay juicier than breasts during frying. Grab Diamond Crystal kosher salt if you can find it (the flakes dissolve evenly). Most supermarkets carry Crisco in the baking aisle, but Walmart usually has the best price for the big cans.
No buttermilk? Whole milk with 1 tbsp vinegar or lemon juice works in a pinch. Swap the paprika for smoked if you want a deeper flavor. The cornstarch might seem optional but don’t skip it—it’s the difference between good and Grandma-level crispy. Freshly ground black pepper is worth the extra minute (pre-ground loses its punch fast).
Marinated chicken keeps in the fridge for 24 hours (actually improves flavor). Leftover fried chicken stays crispy in the oven at 200°F for up to 30 minutes—microwaving ruins the crust. Use remaining Crisco for pie crusts or biscuits.
Why You’ll Love This Recipe
- One-Pan Magic: I just melt the Crisco in my cast iron, no deep fryer needed—cleanup is a breeze.
- That Crispy Crunch: The buttermilk soak keeps the chicken juicy while the Crisco gives it that golden, shatter-in-your-mouth crust.
- Feeds My Crew: Between the thighs and drumsticks, I’ve got enough for Sunday supper and Monday leftovers.
- Pantry Staples: All-purpose flour, eggs, and Crisco—things I always have on hand, so fried chicken is never out of reach.
Step-by-Step Instructions for Fried Chicken With Crisco
Here’s my tested method that guarantees that signature crunch and golden color every time.
Step 1: Marinate the Chicken in Buttermilk
In a large bowl, whisk together the 2 cups buttermilk and the 2 whole large eggs until fully combined. Add the 3.5 lb chicken thighs and drumsticks and turn to coat evenly. The buttermilk’s acidity tenderizes the meat while the fat ensures a juicy result.
Cover the bowl and refrigerate for at least 4 hours, or overnight for maximum flavor penetration. I’ve found this step is non-negotiable for that melt-in-your-mouth texture. When ready to cook, remove the chicken from the fridge and let it sit at room temperature for 30 minutes while you prepare the coating.
Step 2: Prepare the Seasoned Flour Coating
In a shallow dish, combine the 2 cups all-purpose flour, 0.25 cup cornstarch, 2 tbsp salt, 2 tsp black pepper, 2 tsp garlic powder, 2 tsp onion powder, 1 tbsp paprika, and 0.5 tsp cayenne pepper. Whisk thoroughly to distribute the spices evenly.
The cornstarch is my secret weapon for that extra-crispy coating that stays crunchy even after cooling. This blend creates a perfectly balanced flavor profile—savory, slightly spicy, with a hint of sweetness from the paprika.
Step 3: Dredge and Rest the Chicken
Remove each piece of chicken from the buttermilk mixture, letting any excess drip off. Dredge it in the flour mixture, pressing firmly to ensure the coating adheres completely. For extra crunch, I like to double-dip: back into the buttermilk, then into the flour mixture one more time.
Place the coated chicken on a wire rack set over a baking sheet. Let it rest for 15-20 minutes—this crucial step allows the coating to set, which prevents it from sliding off during frying. You’ll notice the coating becomes slightly tacky, which is exactly what you want.
Step 4: Fry to Golden Perfection in Crisco
In a deep, heavy-bottomed pot or Dutch oven, melt the 4 cups Crisco all-vegetable shortening over medium-high heat until it reaches 350°F. Use a deep-fry or candy thermometer to monitor the temperature accurately. The high smoke point of Crisco makes it ideal for this application.
Working in batches to avoid crowding (which lowers the oil temperature), carefully lower the chicken into the hot shortening. Fry for 12-15 minutes, turning occasionally, until the coating is deep golden brown and the internal temperature reaches 165°F. The chicken should sizzle steadily but not violently—adjust the heat as needed to maintain 350°F.
Transfer the fried chicken to a wire rack or paper towels to drain. The coating should be shatteringly crisp with a beautiful golden hue. Let it rest for 5 minutes before serving to allow the juices to settle.
Pro Tips For Making Fried Chicken Recipe With Crisco
- Heat the Crisco First: I learned this the hard way—cold shortening makes greasy chicken. Get your Crisco to 350°F before adding the chicken, and you’ll get that perfect golden crust every time.
- Soak Overnight: Give your chicken a long buttermilk bath, at least 12 hours. Sounds tedious, but it actually changes the outcome—juicier meat and better flavor penetration.
- Skip the Crowding: Resist the urge to cram the pan full. Too many pieces at once drops the oil temp, and you’ll end up with soggy, unevenly cooked chicken.
- Double Dip: After the first flour coating, let the chicken rest 5 minutes, then dip again in buttermilk and flour. My grandmother swore by this, and she was right: it makes a real difference in crust thickness.
Troubleshooting This Recipe
Oil Temperature Issues
If your chicken isn’t crispy, the oil temperature likely dropped below 325°F. I always use a candy thermometer clipped to the pot. Too many pieces at once will cool the Crisco too much—fry in small batches instead. 🌡️
Soggy Coating
This usually happens when the chicken isn’t rested after dredging. Let it sit on a rack for 15-20 minutes so the coating sets. Also, drain on a wire rack, not paper towels—this keeps steam from making the crust soggy.
Uneven Cooking
If some pieces are browning too fast while others stay pale, your Crisco isn’t at a consistent temperature. Stir the oil gently and adjust the heat to maintain 350°F. Dark meat needs 12-15 minutes total.
Greasy Results
Greasy chicken often means the oil wasn’t hot enough at the start. Bring the Crisco to 350°F before adding the first piece. If oil looks cloudy, it’s ready. Let excess drip off for 30 seconds after removing from oil. 🔥
Coating Falls Off
This usually means the chicken was too wet when dredged. Pat pieces dry with paper towels before the buttermilk bath. Press the flour mixture firmly onto the meat. The double-dip method (buttermilk-flour-buttermilk-flour) helps it adhere.
Burnt Exterior
If the outside burns before the inside cooks, your oil is too hot. Lower the heat to maintain 350°F. Also, use a heavy-bottomed pot to distribute heat evenly. Crisco has a high smoke point, but it can still overheat.
Nutrition Facts
Frequently Asked Questions
Can I use vegetable oil instead of shortening?
Yes, but Crisco has a higher smoke point and creates a crispier crust. If substituting, use an oil with a smoke point above 400°F like peanut or sunflower oil. The flavor and texture will differ slightly.
How do I know when the oil is hot enough?
Use a thermometer to check for 350°F. Without one, drop a pinch of flour in—if it sizzles immediately, it’s ready. Never guess, as incorrect temps cause greasy or burnt results.
Why does my coating fall off during frying?
This usually means the chicken was too wet or didn’t rest after dredging. Pat pieces dry, press flour firmly, and let coated chicken rest for 15-20 minutes before frying.
Can I bake this instead of frying?
Baking won’t give the same crispy texture. For an oven method, use 400°F and a wire rack, but expect a slightly different result. Frying in Crisco is best for authenticity.

- BBQ Sausage Recipe Oven: Smoky Depth Without the Grill - September 28, 2026
- BBQ Chicken Bowl Recipe Rice: Smoky Sweetness Over Fluffy Grains - September 28, 2026
- Beef Cutlet Recipe Ideas: Crispy Breaded Patties With Bold Seasonings - September 28, 2026