
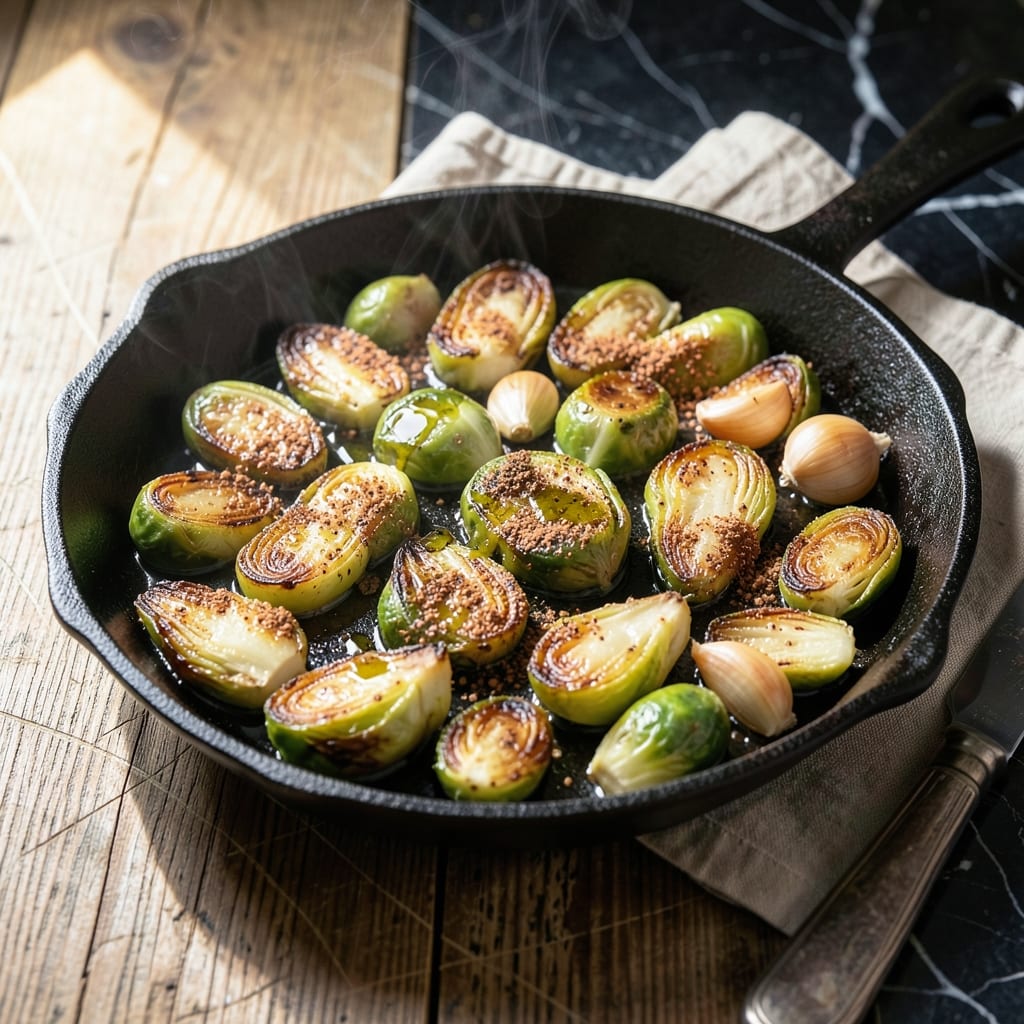
Transforming frozen Brussels sprouts into a crispy, flavorful dish is easier than you think. This skillet method delivers restaurant-quality results with minimal effort.
The key is high heat and patience. By cooking the sprouts in a single layer and resisting the urge to stir too often, you achieve tender centers with perfectly caramelized edges.
No thawing required—just toss the frozen sprouts directly into the hot skillet. A touch of oil and your choice of seasonings bring out their natural sweetness.
You’ll end up with a side dish that’s simple yet impressive, proving that frozen vegetables can be just as delicious as fresh.
Ingredients for Frozen Brussel Sprouts Recipe Skillet
Frozen Brussels sprouts, a few pantry staples, and high heat create magic in minutes.
| Ingredient | Amount | Notes |
|---|---|---|
| Frozen Brussels Sprouts 🥬 | 1 ½ lb | No thawing required, keep frozen |
| Extra-Virgin Olive Oil 🫒 | 3 tbsp | Divided for cooking and finishing |
| Garlic Cloves 🧄 | 4 cloves | Minced for even distribution |
| Smoked Paprika 🌶️ | 1 tsp | Adds depth and smokiness |
| Ground Cumin 🌿 | ½ tsp | Enhances earthy flavors |
| Kosher Salt 🧂 | 1 tsp | Diamond Crystal preferred |
| Freshly Ground Black Pepper 🌶️ | ½ tsp | Coarsely ground for texture |
| Maple Syrup 🍁 | 1 tbsp | Balances bitterness with sweetness |
| Balsamic Vinegar 💧 | 1 tbsp | Adds tangy brightness |
| Red Pepper Flakes 🔥 | ¼ tsp | Optional for heat |
| Fresh Parsley 🌿 | ¼ cup | Chopped, for garnish |
The Brussels sprouts must stay frozen—thawing ruins the texture. Trader Joe’s or Whole Foods have great organic options. Look for uniform size so they cook evenly. The olive oil should be something you’d drizzle on bread—California Olive Ranch or Colavita are solid choices. Smoked paprika from Penzeys adds that extra depth worth seeking out.
No smoked paprika? Regular paprika plus a pinch of chipotle powder works. Out of maple syrup? Agave nectar or date syrup at the same amount. Don’t have balsamic? Apple cider vinegar with a teaspoon of brown sugar gets close. The garlic can be granulated at half the amount if fresh isn’t available. Fresh parsley is ideal but dried works at one-third the quantity.
Leftovers keep 4-5 days in the fridge. Reheat in the skillet to revive crispiness—microwave makes them soggy. Freezes okay but best fresh. I always make extra for meal prep (the flavors deepen overnight).
Why You’ll Love This Recipe
- One Pan Wonder: No thawing, no fuss—just toss frozen sprouts with olive oil and spices straight into the skillet.
- Smoky & Warm: The smoked paprika and cumin turn simple Brussels into something deep and cozy, with garlic tying it all together.
- Weeknight Hero: I throw this together on busy nights and it pairs just as well with chicken as it does with eggs the next morning.
- Budget Keeper: Frozen sprouts cost pennies, and a little spice goes a long way—this feeds four for under five bucks. Honestly, can’t beat that.
Step-by-Step Instructions for Crispy Skillet Brussels Sprouts
Here’s the method that delivers perfectly crispy edges and tender centers every single time.
Step 1: Sear the Frozen Brussels Sprouts Undisturbed
Heat 2 tablespoons of the extra-virgin olive oil in a large skillet over medium-high heat until it shimmers. Add the 1.5 lb frozen Brussels sprouts in a single layer—don’t thaw them first. The ice on the sprouts will create steam that helps cook the centers while the outsides crisp.
Let them sear undisturbed for 5-6 minutes until the bottoms develop a deep golden brown crust. I press down gently with a spatula after the first 2 minutes to ensure maximum contact with the pan. This initial sear is what creates those addictive crispy edges.
Step 2: Add Aromatics and Spices for Depth
Reduce heat to medium and add the remaining 1 tablespoon extra-virgin olive oil, the 4 cloves minced garlic cloves, 1 teaspoon smoked paprika, and 0.5 teaspoon ground cumin. Stir everything together so the sprouts get coated in the oil and spices.
Cook for another 3-4 minutes, stirring occasionally, until the garlic turns light golden and the sprouts are mostly bright green with crispy bits. Watch carefully—the garlic can burn quickly. The smoked paprika and cumin will fill your kitchen with a warm, earthy aroma that signals they’re toasting properly.
Step 3: Season and Add the Finishing Touches
Sprinkle the 1 teaspoon kosher salt and 0.5 teaspoon freshly ground black pepper over the sprouts. Drizzle the 1 tablespoon maple syrup and 1 tablespoon balsamic vinegar evenly across the pan. The maple syrup will caramelize slightly, creating glossy, sticky bits that cling to the sprouts.
Add the 0.25 teaspoon red pepper flakes if using. Stir everything together and cook for 1-2 minutes until the sprouts are tender when pierced with a fork but still have some bite. The balsamic vinegar will reduce slightly, creating a tangy glaze that balances the sweetness perfectly.
Step 4: Garnish and Serve Immediately
Remove the skillet from heat and scatter the 0.25 cup chopped fresh parsley over the top. Give it one final toss to distribute the parsley and let the residual heat wilt it slightly. The parsley adds a fresh, bright contrast to the rich, smoky flavors.
Transfer to a serving dish while still hot—the crispy edges soften as they cool. Serve immediately for the best texture. Each bite should have a perfect balance of crispy exterior, tender interior, and that irresistible sweet-savory glaze that makes these sprouts disappear fast.
Pro Tips For Making Frozen Brussel Sprouts Recipe Skillet
- Thaw and Dry: Spread the frozen Brussels sprouts on a towel for 10 minutes to thaw, then pat them dry—this prevents steaming and helps them brown instead of boil in the skillet.
- Hot Pan First: Heat the olive oil in the skillet until it shimmers before adding the sprouts; I learned this the hard way after too many soggy batches from a lukewarm start.
- Skip the Crowding: Cook in a single layer with space between sprouts, even if it means two batches—overcrowding turns them mushy rather than crisp.
- Toast the Spices: Add the smoked paprika and cumin to the hot oil for 15-20 seconds before the garlic to wake up their flavors—sounds small, but it actually changes the outcome.
Health Benefits of This Dish
Rich in Antioxidants
Brussels sprouts pack a powerful antioxidant punch, with high levels of kaempferol and vitamin C that help combat oxidative stress. Frozen sprouts retain most of these nutrients, making them nearly as beneficial as fresh. I love knowing this dish supports my immune system. 💪
Fiber for Digestion
One serving provides about 4 grams of fiber, promoting healthy digestion and gut bacteria. The fiber in Brussels sprouts also helps regulate blood sugar levels, making this a smart choice for anyone watching their glucose. They keep me feeling full and satisfied for hours.
Vitamin K Powerhouse
A 1.5 lb batch delivers over 200% of your daily vitamin K needs, essential for bone health and blood clotting. This is especially valuable for those who don’t eat many leafy greens. The frozen versions maintain this nutrient exceptionally well.
Low-Calorie Density
With only about 50 calories per cup, you can enjoy a generous portion without guilt. The high water content and fiber make them filling while keeping calories low. Perfect for anyone looking to maintain a healthy weight without sacrificing flavor.
Heart Health Support
The folate and potassium in Brussels sprouts support cardiovascular health by helping to regulate blood pressure. These compounds work together to keep your heart functioning optimally. A simple way to show your heart some love. 💛
Anti-Inflammatory Benefits
The sulfur compounds in Brussels sprouts have natural anti-inflammatory properties that may help reduce chronic inflammation. Regular consumption can contribute to long-term health benefits. I notice less bloating when I include them in my meals regularly.
Nutrition Facts
Frequently Asked Questions
Do I need to thaw the sprouts first?
No, cooking from frozen is key for crispy edges. The ice creates steam that cooks the centers while the outsides brown. Thawing makes them soggy.
Can I use a nonstick skillet?
Yes, but cast iron or stainless steel gives better browning. Nonstick works if that’s what you have—just avoid metal utensils. Preheat the pan well for best results.
How do I know when they’re done?
They’re ready when the edges are deep golden brown and the centers are tender when pierced with a fork. This takes about 10-12 minutes total.
What if my sprouts are still bitter?
Bitterness fades with cooking. For extra sweetness, add an extra 1 teaspoon maple syrup or a pinch of salt at the end. The balsamic glaze also helps balance any lingering bitterness.

- BBQ Sausage Recipe Oven: Smoky Depth Without the Grill - September 28, 2026
- BBQ Chicken Bowl Recipe Rice: Smoky Sweetness Over Fluffy Grains - September 28, 2026
- Beef Cutlet Recipe Ideas: Crispy Breaded Patties With Bold Seasonings - September 28, 2026