
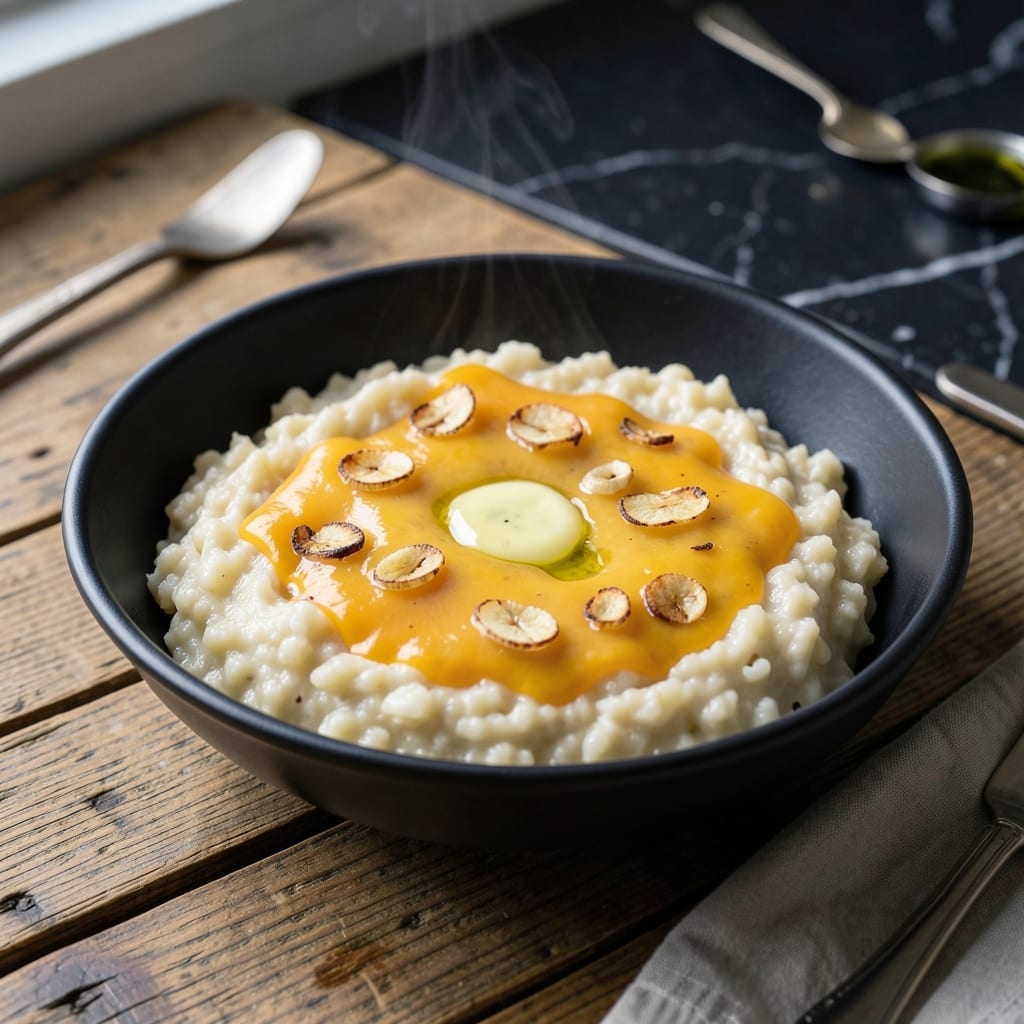
I’ve perfected this Southern classic through years of testing, and the result is creamy grits so smooth they practically melt on the tongue. The secret lies in slow cooking and a generous hand with sharp cheddar.
Garlic transforms the dish, adding depth without overpowering the cheese. I use stone-ground grits for texture, but instant works if you’re short on time. The key is patience—rushing leads to lumpiness.
By the time it’s done, you’ll have a bowl of grits that’s rich, velvety, and packed with cheesy, garlicky flavor. It’s comfort food at its finest, ready in under 30 minutes.
Serve as a standalone dish or pair with your favorite Southern staples. Here’s how to make it perfectly every time.
Ingredients for Garlic Cheese Grits
Stone-ground grits, sharp cheddar, and garlic create this Southern comfort classic.
| Ingredient | Amount | Notes |
|---|---|---|
| Stone-Ground Grits 🌾 | 1 cup | Uncooked, not instant |
| Water 💧 | 4 cups | For cooking grits |
| Whole Milk 🥛 | 1 cup | Full-fat for creaminess |
| Butter 🧈 | 4 tbsp | Unsalted preferred |
| Sharp Cheddar Cheese 🧀 | 2 cups | Freshly shredded from block |
| Garlic Cloves 🧄 | 4 cloves | Minced for maximum flavor |
| Salt 🧂 | 1 tsp | Kosher or sea salt |
| Black Pepper 🌶️ | ½ tsp | Freshly ground preferred |
| Chicken Broth 🍲 | 1 cup | Use vegetable broth for vegetarian |
| Heavy Cream 🥛 | ½ cup | Optional for extra richness |
| Parmesan Cheese 🧀 | ½ cup | Freshly grated for depth |
The grits are non-negotiable here. Stone-ground from a Southern brand like Anson Mills gives you that perfect texture—creamy but with a little bite. Most grocery stores stock them in the baking aisle or near the cornmeal. Instant grits work in a pinch (and the intro says so), but they just won’t be the same. The cheddar needs to be sharp and block form—pre-shredded melts weird and has anti-caking agents that make the sauce grainy.
No stone-ground grits? Polenta or coarse cornmeal gets you 80% there. Short on cheddar? Pepper Jack for a kick or Gruyère for a nuttier vibe. Vegetarian? Swap chicken broth for vegetable broth. If you’re out of fresh garlic, garlic powder at one-quarter the amount works, but fresh is so much better here. The milk can be 2% if that’s what you have (whole is ideal though).
Leftovers keep covered in the fridge for 4-5 days. Reheat with a splash of milk to bring back the creaminess. Freeze portions for up to 3 months—perfect for lazy mornings. The cheese might separate a bit when thawed, but a good stir brings it back together.
Why You’ll Love This Recipe
- One Pot Wonder: I love that I can make these creamy grits in a single pot—just stone-ground grits, water, milk, and a little patience.
- Sharp & Rich: The sharp cheddar melts into every bite, and the butter ties it all together with a velvety finish.
- Weeknight Hero: Honestly, it’s my go-to for busy evenings—filling enough for dinner but fancy enough for brunch.
- Leftovers Win: Between us, they thicken up overnight into the best cheesy grits cakes for breakfast the next day.
Step-by-Step Instructions for Garlic Cheese Grits
Here’s the method I use for ultra-creamy grits with bold garlic and cheese flavor every time.
Step 1: Toast the Stone-Ground Grits for Depth
Bring the 4 cups Water and 1 cup Chicken Broth to a boil in a medium saucepan over medium-high heat. While waiting, toast the 1 cup Stone-Ground Grits in a dry skillet over medium heat for 2-3 minutes, stirring constantly, until they become fragrant and just begin to brown.
This toasting step enhances the nutty flavor of the grits and prevents a raw, starchy taste. Watch closely—grits can go from toasted to burnt quickly. Transfer the toasted grits to the boiling liquid immediately after toasting.
Step 2: Cook Grits Low and Slow
Whisk the toasted grits into the boiling liquid, then reduce the heat to low. Stir in the 1 tsp Salt and cook, stirring frequently, for 20-25 minutes until the grits are thick and creamy. Stone-ground grits take longer to cook than instant, but they develop a far superior texture.
If the mixture becomes too thick before the grits are fully cooked, stir in ¼ cup of hot water at a time. You’ll know they’re done when they have the consistency of thick porridge and the individual grains are tender when tasted.
Step 3: Infuse with Garlic and Butter
While the grits cook, mince the 4 cloves Garlic Cloves finely. In a small pan, melt the 4 tbsp Butter over medium-low heat. Add the minced garlic and cook for 1-2 minutes, just until fragrant but not browned—burnt garlic tastes bitter.
Stir this garlic butter along with the 0.5 tsp Black Pepper into the cooked grits. This step layers in rich, aromatic flavor before adding the cheeses. The butter also adds a silky richness that complements the creaminess of the grits.
Step 4: Add Cheeses for Ultimate Creaminess
Reduce the heat to its lowest setting. Gradually add the 2 cups Sharp Cheddar Cheese, stirring constantly until fully melted. Then stir in the 1 cup Whole Milk and 0.5 cup Heavy Cream until smooth and creamy.
Finally, add the 0.5 cup Parmesan Cheese and stir until melted. The combination of sharp cheddar and nutty parmesan creates a deep, complex cheese flavor. Taste and adjust seasoning if needed—you may want a pinch more salt depending on the saltiness of your cheeses.
Let the grits sit for 2-3 minutes off the heat before serving. This resting time allows the flavors to meld and the texture to become even creamier. The finished grits should be smooth, rich, and luxuriously thick.
Pro Tips For Making Garlic Cheese Grits
- Whisk Constantly: Stone-ground grits love to clump—stir vigorously while they cook, especially in the first 10 minutes, or you’ll end up with a lumpy mess. I learned this the hard way after scraping a pot of cement-like grits into the trash.
- Toast the Grits: Before adding liquid, dry-toast the grits in the pot for 2-3 minutes over medium heat. Sounds weird, but it works: it deepens their nutty flavor and prevents that raw corn taste.
- Use Room-Temp Cheese: Skip the cold cheese straight from the fridge—shred your sharp cheddar and let it sit out for 20 minutes first. Cold cheese seizes up and turns your grits gloppy instead of silky.
- Finish with Butter: After the cheese melts, stir in that butter off the heat. It adds a glossy finish and rich depth that just doesn’t happen if you dump it in too early.
Health Benefits of garlic cheese grits
Calcium Powerhouse
The combination of sharp cheddar and Parmesan delivers a serious calcium boost—about 60% of your daily needs per serving. This mineral is vital for bone health and muscle function. I notice my energy levels stay steady after eating this dish. 💪
Protein Rich Comfort
With 18 grams of protein per serving from the cheeses and milk, this dish supports muscle repair and keeps you full for hours. The protein quality is excellent since dairy contains all essential amino acids. It’s comfort food that actually fuels your body.
B Vitamin Boost
Dairy products like those in this dish provide B12 and riboflavin, which help convert food into energy. A single serving covers about 20% of your daily B12 needs. I feel more alert when I include dairy in my meals.
Low Glycemic Impact
Stone-ground grits have a lower glycemic index than instant varieties, providing steady energy without blood sugar spikes. The fat from cheese and butter further slows digestion, helping maintain stable glucose levels. Perfect for sustained energy.
Antioxidant Properties
Garlic contains allicin and other antioxidants that support immune function. Cooking it gently, as in this recipe, preserves these beneficial compounds. The combination with dairy creates a nutrient-dense meal that supports overall health. 🥗
Heart Healthy Fats
While rich, the fats in this dish come from quality sources like whole milk and cheese. These provide essential fatty acids that support heart health when consumed as part of a balanced diet. The key is moderation and quality ingredients.
Nutrition Facts
Frequently Asked Questions
Can I use instant grits instead?
Yes, but texture will differ. Instant grits cook in 5-7 minutes but lack the creamy depth of stone-ground. For best results, add an extra ¼ cup milk to compensate for the faster absorption.
Why toast the grits first?
Toasting enhances their nutty flavor and prevents a raw taste. It takes just 2-3 minutes over medium heat and makes a noticeable difference in the final dish.
How do I prevent lumps?
Whisk constantly while adding grits to boiling liquid. Use a heavy saucepan and maintain low heat after toasting. Stirring frequently during the 20-25 minutes cook time ensures smoothness.
Can I make this vegetarian?
Simply swap chicken broth for vegetable broth. The cheesy, garlicky flavor remains just as rich and satisfying.

- BBQ Sausage Recipe Oven: Smoky Depth Without the Grill - September 28, 2026
- BBQ Chicken Bowl Recipe Rice: Smoky Sweetness Over Fluffy Grains - September 28, 2026
- Beef Cutlet Recipe Ideas: Crispy Breaded Patties With Bold Seasonings - September 28, 2026