
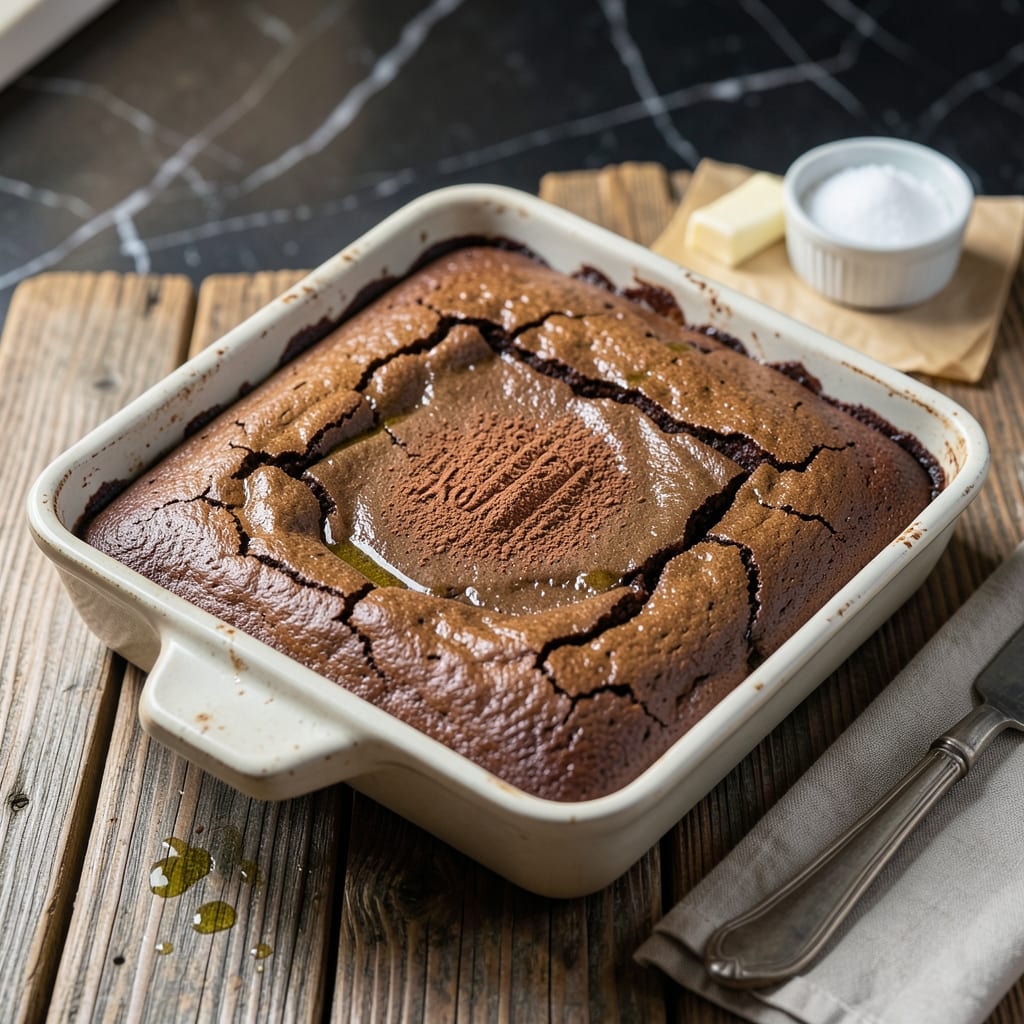
This classic brownie recipe delivers rich chocolate flavor and a perfect fudgy texture in every bite. The crackly top forms naturally during baking, creating a professional-quality finish without extra effort.
Using Hershey’s cocoa as the base ensures deep, consistent chocolate taste. The 8×8 pan size produces thick, square brownies that bake evenly in 30-35 minutes at 350°F. No special equipment is required—just a mixing bowl and whisk.
What makes this version special is the balance between dense, moist centers and that signature shiny crust. The recipe comes together quickly with pantry staples, making it ideal for last-minute desserts.
Whether served warm with ice cream or packed for lunchboxes, these brownies satisfy every chocolate craving. The results are consistently impressive.
Ingredients for Hershey’s Cocoa Brownie Recipe 8×8
Pantry staples combine for rich, fudgy brownies with crackly tops in every batch.
| Ingredient | Amount | Notes |
|---|---|---|
| Hershey's Cocoa Powder 🍫 | ¾ cup | Unsweetened, natural or Dutch-process |
| Unsalted Butter 🧈 | ½ cup | Melted and cooled slightly |
| Granulated Sugar 🥄 | 1 ½ cups | White granulated preferred |
| Large Eggs 🥚 | 3 whole | Room temperature for even mixing |
| Vanilla Extract 🌿 | 1 tsp | Pure vanilla for best flavor |
| All-Purpose Flour 🌾 | ¾ cup | Spoon and level for accuracy |
| Salt 🧂 | ½ tsp | Fine sea salt or table salt |
| Baking Powder 🥄 | ¼ tsp | Ensures proper rise and texture |
| Chopped Walnuts 🌰 | ½ cup | Optional, for added crunch |
| Semi-Sweet Chocolate Chips 🍫 | ½ cup | Optional, for extra richness |
The cocoa powder is non-negotiable for depth of flavor. Hershey’s natural or Dutch-process both work beautifully—just ensure it’s unsweetened. Land O’Lakes or Kerrygold unsalted butter melts evenly without added moisture. For sugar, Domino or C&H granulated dissolves consistently. The eggs should be fresh, but store-bought is perfectly fine if that’s what you have on hand.
No Dutch-process cocoa? Natural cocoa works identically here. Swapping in melted chocolate for half the cocoa adds richness (use 4 oz semi-sweet). Out of walnuts? Pecans or almonds offer similar crunch. For gluten-free, substitute 1:1 gluten-free flour blend. The vanilla extract can be imitation in a pinch, but pure vanilla provides superior depth.
Store cocoa powder in an airtight container for up to 2 years. Baked brownies keep at room temperature for 4 days or freeze for 3 months. Slice only after completely cooled to prevent crumbling—this also helps the crackly top set properly.
Why You’ll Love This Recipe
- One Bowl Wonder: I just melt the butter, stir in the cocoa and sugar, then add eggs and vanilla—no mixer, no fuss.
- Rich Chocolate Fix: Hershey’s cocoa gives that deep, fudgy flavor without the price of fancy chocolate.
- Crowd Pleaser: Honestly, it’s my go-to for potlucks, birthdays, or a random Tuesday craving.
- Budget Friendly: Five ingredients I always have on hand, and an 8×8 pan means just the right amount.
Step-by-Step Instructions for Hershey’s Cocoa Brownies
Master these precise steps to achieve dense, fudgy brownies with that signature crackly top.
Step 1: Melt and Combine Butter, Cocoa, and Sugar
Begin by melting the 0.5 cup Unsalted Butter in a medium saucepan over low heat. Once melted, remove from heat and immediately whisk in the 0.75 cup Hershey’s Cocoa Powder until completely smooth—this blooms the cocoa for maximum flavor.
Add the 1.5 cups Granulated Sugar and continue whisking for 1-2 minutes until the mixture is glossy and slightly warm to the touch. This step dissolves the sugar and creates the foundation for that coveted crackly crust. Don’t rush; the sugar should be fully incorporated with no visible grains.
Step 2: Incorporate Eggs and Vanilla for Structure
Let the cocoa mixture cool for 5 minutes (it should feel warm but not hot to the touch). Then, whisk in the 3 whole Large Eggs, one at a time, ensuring each is fully incorporated before adding the next. The eggs will lighten the mixture slightly and provide the necessary structure.
Stir in the 1 tsp Vanilla Extract. At this stage, the batter should be thick, glossy, and dark—almost like a rich chocolate pudding. This is where the deep flavor develops, so take a moment to appreciate the aroma. The eggs should be room temperature to prevent seizing the cocoa mixture.
Step 3: Fold in Dry Ingredients Gently
In a separate bowl, sift together the 0.75 cup All-Purpose Flour, 0.5 tsp Salt, and 0.25 tsp Baking Powder. This ensures even distribution of the leavening agents and eliminates any lumps. Add the dry ingredients to the wet mixture in two additions, folding gently with a spatula just until no streaks of flour remain.
Overmixing at this stage develops gluten, which would make the brownies cakey rather than fudgy. The batter will be quite thick—this density is key to the final texture. Stop folding as soon as the last bits of flour disappear.
Step 4: Add Mix-Ins and Bake to Perfection
Gently fold in the 0.5 cup Chopped Walnuts and 0.5 cup Semi-Sweet Chocolate Chips (if using) until evenly distributed. Pour the batter into a prepared 8×8-inch baking pan lined with parchment paper, spreading it evenly with a spatula.
Bake at 350°F for 25-30 minutes until a toothpick inserted in the center comes out with a few moist crumbs. The edges should be set, but the center should still have a slight jiggle—this ensures fudgy, not dry, brownies. Avoid overbaking; carryover heat will finish the cooking process as they cool.
Step 5: Cool Completely Before Slicing
Remove the pan from the oven and let the brownies cool completely in the pan on a wire rack for at least 1 hour. This cooling period is crucial—it allows the structure to set properly and makes for clean, neat slices. The top will develop that characteristic crackly finish as it cools.
Once fully cooled, lift the brownies from the pan using the parchment paper overhang and transfer to a cutting board. Slice into squares with a sharp knife, wiping the blade clean between cuts for precise edges. Serve at room temperature for the best texture.
Pro Tips For Making Hershey’S Cocoa Brownie Recipe 8×8
- Preheat the Pan: Place your 8×8 pan in the oven while it preheats to 350°F. I learned this the hard way—cold pans make the edges too dense while the center stays gooey.
- Melt Butter Slowly: Use low heat when melting the butter to avoid scorching. After burning three batches, I finally figured out that browned butter tastes great, but burnt butter ruins the whole batch.
- Sift the Cocoa: Always sift the Hershey’s cocoa powder before mixing. My grandmother swore by this, and she was right: it prevents those little dry pockets that no one wants in their brownie.
- Pull Early: Take the brownies out when the edges are set but the center still looks slightly underdone—they’ll finish cooking as they cool. I was skeptical until I tried it, but it’s the only way to get that perfect fudgy texture.
Serving Suggestions for Leftovers
Warm Dessert Pairings
Serve these brownies warm with a scoop of vanilla ice cream for a classic sundae. The contrast between the cool, creamy ice cream and the warm, fudgy brownie is irresistible. I like Ben & Jerry’s or Häagen-Dazs for their rich texture. 💛
Beverage Accompaniments
A cold glass of milk is the traditional choice—the sweetness complements the deep chocolate flavor beautifully. For adults, a cup of coffee or espresso enhances the cocoa notes. I often brew a fresh pot of Starbucks House Blend when serving these.
Fruit Enhancements
Fresh raspberries or strawberries add a bright, tangy contrast that cuts through the richness. A light dusting of powdered sugar on the berries makes them look extra special. I arrange them in a circular pattern around the brownies for an elegant presentation.
Garnish Ideas
Sprinkle with powdered sugar or cocoa powder for a simple yet effective garnish. A drizzle of chocolate syrup or caramel sauce adds visual appeal and extra flavor. I keep Hershey’s Chocolate Syrup on hand for this exact purpose.
Plating Tips
Cut into 2-inch squares for perfect portion control. Use parchment paper to lift the entire batch out of the pan for clean, even slices. I always wipe my knife between cuts for those sharp, professional-looking edges.
Make It Special
For birthdays or celebrations, add candles or a sprinkle of colorful nonpareils. Serve on a pretty platter with a side of whipped cream for an extra-indulgent treat. My family always requests this for special occasions. ✨
Nutrition Facts
Frequently Asked Questions
Can I use a different pan size?
An 8×8-inch pan yields thick squares. For thinner brownies, use a 9×13-inch pan and reduce baking time to 20-25 minutes. Adjust based on your preferred thickness.
What if I don’t have parchment paper?
Grease the pan thoroughly with butter or nonstick spray and dust with flour. This helps prevent sticking, though parchment makes removal easier. Avoid skipping this step entirely.
How do I know when they’re done?
Insert a toothpick into the center—it should come out with a few moist crumbs, not wet batter. The edges will pull away slightly. Overbaking results in dry brownies.
Can I substitute oil for butter?
Yes, use ½ cup of neutral oil like vegetable or canola. The texture will be slightly different but still fudgy. Melted coconut oil works too for a subtle flavor twist.

- Blue Zone Recipe Ideas: Longevity-Boosting Meals for Vibrant Living - September 28, 2026
- Beefaroni Recipe With Tomato Soup: One-Pot Nostalgic Comfort - September 28, 2026
- Bread Recipe KitchenAid Mixer: Foolproof Loaf With Perfect Rise - September 28, 2026