
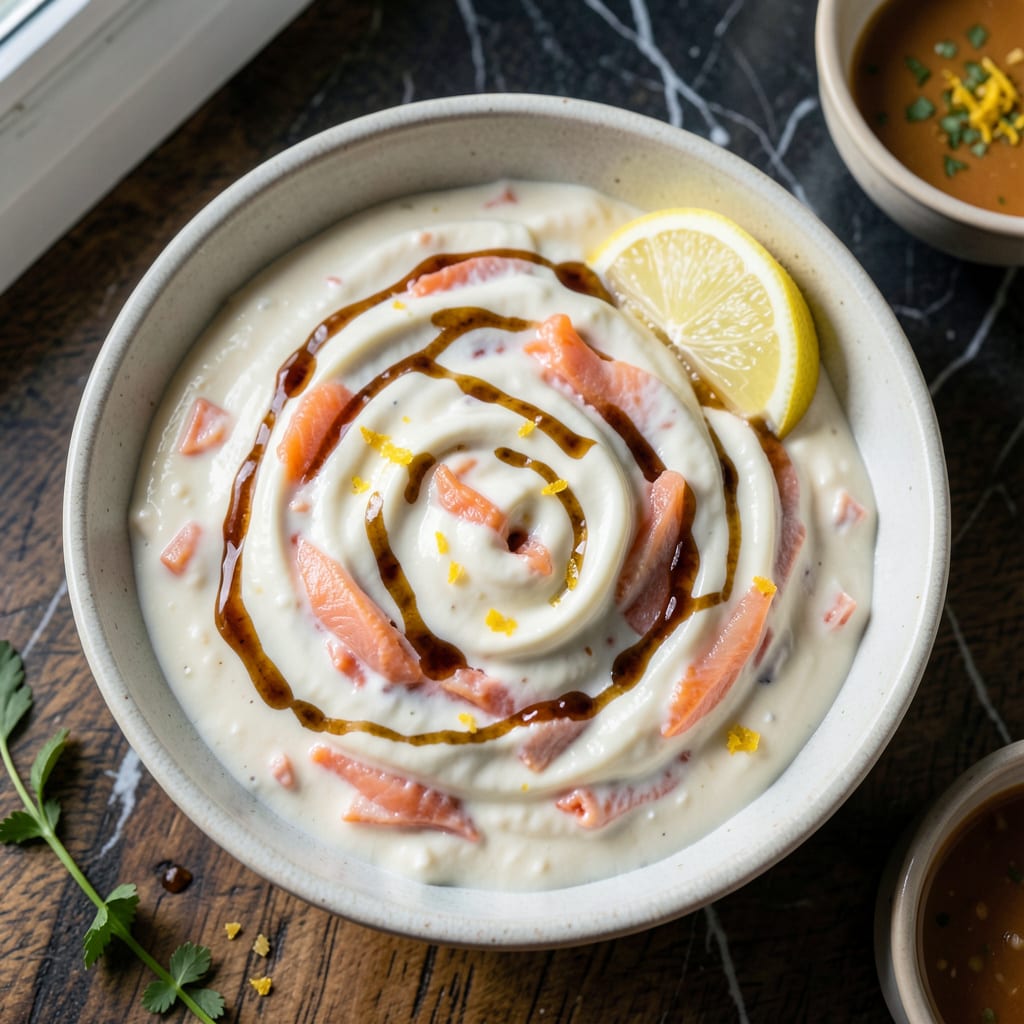
This creamy salmon dip captures the signature smoky flavor of J. Alexander’s version with a smooth, spreadable texture that’s perfect for entertaining.
Simple ingredients come together quickly, and a brief chill enhances the flavors. Serve with crackers, bread, or fresh vegetables for an effortless appetizer.
Ingredients for J Alexander’s Salmon Dip
These carefully selected ingredients recreate that signature smoky cream spread everyone loves at gatherings.
| Ingredient | Amount | Notes |
|---|---|---|
| Canned Salmon 🐟 | 14 ¾ oz | Boneless, skinless, drained well |
| Cream Cheese 🧀 | 8 oz | Full-fat, softened to room temperature |
| Sour Cream 🥛 | ½ cup | Full-fat for creaminess |
| Mayonnaise 🥄 | ¼ cup | Duke's or Hellmann's preferred |
| Lemon Juice 🍋 | 1 tbsp | Freshly squeezed for brightness |
| Worcestershire Sauce 💧 | 1 tsp | Anchovy-based for depth |
| Liquid Smoke 🔥 | ½ tsp | Hickory flavor for authenticity |
| Dried Dill 🌿 | 1 tsp | Or 1 tbsp fresh chopped dill |
| Garlic Powder 🧄 | ½ tsp | Not garlic salt |
| Onion Powder 🧅 | ½ tsp | For savory base notes |
| Kosher Salt 🧂 | ½ tsp | Diamond Crystal preferred |
| Freshly Ground Black Pepper 🌶️ | ¼ tsp | Coarse grind for texture |
The salmon is non-negotiable for authentic flavor—wild-caught canned salmon from Alaska or Vital Choice brands delivers the best texture and taste. Cream cheese must be full-fat; reduced-fat versions produce a grainy dip. Philadelphia is the gold standard here. Sour cream adds tang, but Greek yogurt can substitute if you prefer a lighter option.
No canned salmon? Fresh poached salmon works—flake 8 oz cooked salmon as a replacement. Liquid smoke is key to the signature taste; Wright’s is the most widely available. For the Worcestershire, Lea & Perrins is traditional. Dried dill can be swapped for 1 tbsp fresh, but adjust to taste. Mayonnaise should be full-fat—light versions dilute the richness.
This dip keeps 3-4 days in an airtight container in the fridge. For longer storage, freeze without the cream cheese and sour cream, then fold them in after thawing. Always chill at least 1 hour before serving to let flavors meld (trust me on this).
Why You’ll Love This Recipe
- No Cook Needed: I just dump the canned salmon, cream cheese, and sour cream in a bowl—no stove, no stress.
- Bright & Zesty: The lemon juice cuts through the richness, making every bite taste fresh.
- Party or Lunchbox: I’ve served it at brunch and packed it for work—equally good on crackers or in a wrap.
- Budget Keeper: One can of salmon stretches into a crowd-pleasing dip without breaking the bank.
Step-by-Step Instructions for Smoky Salmon Dip
This method ensures a perfectly balanced spread with rich, smoky depth and creamy texture.
Step 1: Drain and Prepare the Salmon
Open the 14.75 oz canned salmon and drain it thoroughly in a fine-mesh strainer, pressing gently with a spoon to remove excess liquid. This step is crucial—any residual moisture will thin out your dip and compromise the texture.
Transfer the drained salmon to a mixing bowl and use a fork to break it into small, even flakes. I find this creates a more uniform spread while maintaining the salmon’s natural texture. You should have no large chunks remaining.
Step 2: Blend the Cream Base
In a separate bowl, combine the 8 oz cream cheese, 0.5 cup sour cream, and 0.25 cup mayonnaise. Use a hand mixer or stand mixer on medium speed for 1-2 minutes until the mixture is completely smooth and free of lumps.
The cream cheese must be fully softened to room temperature first—cold cream cheese will leave streaks in your dip. Scrape down the sides of the bowl halfway through mixing to ensure everything incorporates evenly.
Step 3: Incorporate Seasonings and Aromatics
Add the 1 tbsp lemon juice, 1 tsp Worcestershire sauce, 0.5 tsp liquid smoke, 1 tsp dried dill, 0.5 tsp garlic powder, 0.5 tsp onion powder, 0.5 tsp kosher salt, and 0.25 tsp freshly ground black pepper to the cream mixture.
Mix on low speed for 30 seconds until all the seasonings are distributed. The lemon juice should brighten the flavor while the Worcestershire sauce adds umami depth. Taste at this stage—you should detect a subtle smokiness with a hint of tang.
Step 4: Combine and Chill for Optimal Flavor
Fold the flaked salmon into the seasoned cream base using a silicone spatula. Stir gently but thoroughly until the salmon is evenly distributed with no dry spots. The dip should have a cohesive, spreadable consistency without being too thick or runny.
Transfer the mixture to an airtight container and refrigerate for at least 1 hour. This chilling time allows the flavors to meld together—skip it and you’ll miss out on the full depth this dip can offer. The texture will also firm up slightly, making it easier to serve.
Before serving, give it one final stir and adjust seasoning if needed. The dip should taste rich, smoky, and slightly tangy with a creamy, luxurious mouthfeel.
Pro Tips For Making J Alexander’S Salmon Dip
- Chill the Dip: After mixing, refrigerate the dip for at least 1 hour—this lets the flavors meld and the cream cheese firm up so it doesn’t turn into a runny mess.
- Drain the Salmon: Press the canned salmon in a fine-mesh strainer for a minute to remove excess liquid, or your dip will taste watery instead of rich.
- Skip the Cold Cream Cheese: Let the cream cheese sit out for 30 minutes first, otherwise you’ll end up with lumps no amount of stirring can fix.
- Add Lemon Last: Stir in the lemon juice at the very end and taste as you go—too much too soon can make the dip bitter and thin.
Serving Suggestions for Leftovers
Classic Pairings
For an authentic J. Alexander’s experience, serve this dip with buttery Ritz crackers or toasted baguette slices. The saltiness of the crackers enhances the smoky-sweet salmon flavor beautifully. I also love it with pita chips for extra crunch.
Fresh Veggie Platter
Balance the richness with crisp, fresh vegetables. Cucumber slices, celery sticks, and bell pepper strips add refreshing contrast. For color, include radishes or cherry tomatoes on the side. 🥗
Bread Selection
Warm sourdough bread or pretzel bread takes this spread to another level. Slice into ½-inch thick pieces and toast lightly. The chewy texture of pretzel bread pairs wonderfully with the creamy dip.
Garnish Ideas
Sprinkle with chopped fresh dill or minced chives just before serving for a pop of color. A drizzle of extra virgin olive oil adds sheen and richness. For heat lovers, a pinch of smoked paprika on top works perfectly. ✨
Party Presentation
Serve in a shallow bowl surrounded by your dippers. I use a wooden serving board for rustic presentation. Keep a small spoon or spreader handy—the dip is thick and needs a little help.
Make It a Meal
Turn this into a light lunch by adding hard-boiled eggs and pickled onions to your spread. The acidity from pickles cuts through the creaminess, while eggs add protein for a satisfying bite.
Nutrition Facts
Frequently Asked Questions
Can I use fresh salmon instead of canned?
Yes! Use 8 oz of cooked, flaked fresh salmon as a substitute. Poach it gently in water with a splash of lemon juice for 8-10 minutes until just done.
How long does this dip keep in the fridge?
It stays fresh for 3-4 days in an airtight container. For longer storage, freeze the salmon mixture without cream cheese, then add fresh dairy after thawing.
Why is my dip grainy?
This usually happens if the cream cheese wasn’t fully softened. Always bring it to room temperature first and mix until completely smooth before adding salmon.
Can I make this ahead of time?
It actually tastes better after chilling at least 1 hour. Prepare it up to 2 days ahead for optimal flavor development.

- BBQ Sausage Recipe Oven: Smoky Depth Without the Grill - September 28, 2026
- BBQ Chicken Bowl Recipe Rice: Smoky Sweetness Over Fluffy Grains - September 28, 2026
- Beef Cutlet Recipe Ideas: Crispy Breaded Patties With Bold Seasonings - September 28, 2026