
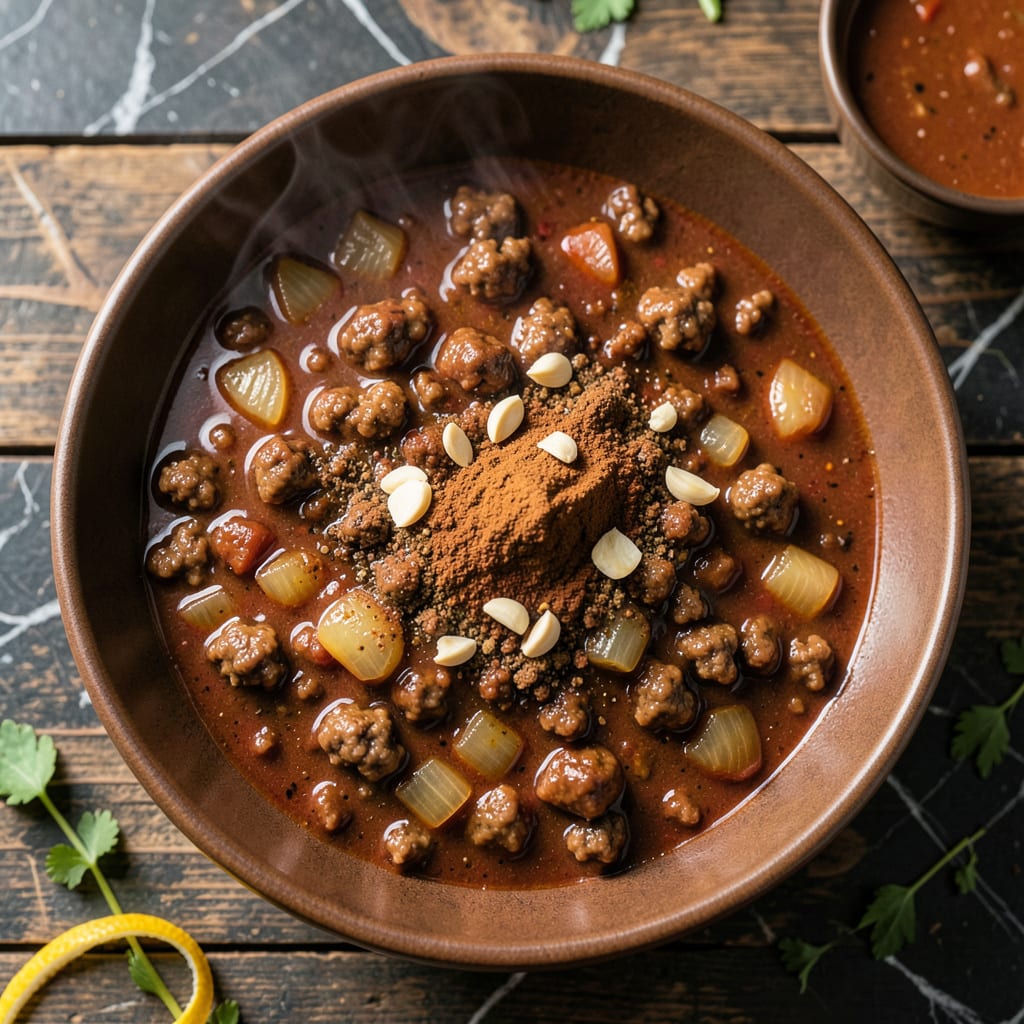
This chili delivers the classic smoky flavor that defines backyard hot dog toppings. I developed it to capture that nostalgic taste without complicated techniques.
With simple ingredients and straightforward prep, you’ll achieve a rich, meaty sauce that clings perfectly to hot dogs. The balance of spices and texture makes it a crowd-pleaser every time.
Ingredients for Jeff’s Hot Dog Chili
Ground beef, spices, and a few pantry staples create this nostalgic backyard favorite.
| Ingredient | Amount | Notes |
|---|---|---|
| Ground Beef 🥩 | 1 lb | 80/20 blend for richness |
| Yellow Onion 🧅 | 1 whole | Medium, finely diced |
| Garlic Cloves 🧄 | 3 cloves | Minced for depth |
| Tomato Paste 🍅 | 2 tbsp | For concentrated flavor |
| Chili Powder 🌶️ | 2 tbsp | Smoked variety preferred |
| Ground Cumin 🌿 | 1 tsp | Toasted for warmth |
| Paprika 🌶️ | 1 tbsp | Sweet or smoked |
| Brown Sugar 🍚 | 1 tbsp | Balances acidity |
| Cider Vinegar 🍏 | 1 tbsp | Adds tangy brightness |
| Beef Broth 🥩 | 1 cup | Low-sodium preferred |
| Diced Tomatoes 🍅 | 1 can | 14.5 oz, undrained |
| Salt 🧂 | 1 tsp | Adjust to taste |
| Black Pepper 🌶️ | ½ tsp | Freshly ground |
| Cayenne Pepper 🔥 | ¼ tsp | Optional for heat |
The beef is key here—80/20 blend gives you that juicy, rich texture without drying out. Costco or Sam’s Club are great for bulk ground beef if you’re making a big batch. For the chili powder, Penzeys or McCormick smoked varieties add that classic backyard depth. Don’t skip the tomato paste (the tube kind at Trader Joe’s is perfect for this).
No ground beef? Ground turkey or plant-based crumbles work fine (just drain excess fat). Short on chili powder? Half the amount of cayenne plus cumin gets you close. The brown sugar can be swapped for maple syrup or honey if that’s what you’ve got. Cider vinegar is best, but white vinegar in a pinch won’t ruin it.
This keeps beautifully—tastes even better the next day. Good for 5 days in the fridge or 3 months frozen. I always double the batch and freeze half for later (it’s a game-saver).
Why You’ll Love This Recipe
- One Pan Wonder: I brown the beef, toss in the onions, garlic, and tomato paste, then let the chili powder do its magic—minimal dishes, maximum flavor.
- Rich and Smoky: The chili powder and tomato paste create this deep, hearty base that clings to every bite of hot dog.
- Weeknight Hero: I’ve served this at backyard BBQs and rushed weeknight dinners—it’s just as good on paper plates as it is on fine china.
- Budget Stretcher: A pound of ground beef and a few pantry staples feed my family for days, and it tastes even better reheated.
Step-by-Step Instructions for Jeff’s Hot Dog Chili
This is the method I use every time—simple, flavorful, and perfect for topping hot dogs.
Step 1: Brown the Ground Beef with Aromatics
Heat a large pot or Dutch oven over medium-high heat. Add the 1 lb Ground Beef and cook, breaking it apart with a wooden spoon, until it’s no longer pink and starts to develop a rich brown crust. This takes about 5-7 minutes.
Once the beef is browned, push it to one side of the pot. Add the finely diced Yellow Onion and minced Garlic Cloves to the empty space. Cook for 2-3 minutes until the onion softens and becomes translucent. Stir everything together to combine the flavors.
Draining excess fat at this stage is optional. I often leave it for extra richness, but if you prefer a leaner chili, spoon off and discard any visible fat before proceeding.
Step 2: Build the Flavor Base with Spices and Tomato
Reduce the heat to medium. Stir in the 2 tbsp Tomato Paste, 2 tbsp Chili Powder, 1 tsp Ground Cumin, 1 tbsp Paprika, 1 tbsp Brown Sugar, 1 tsp Salt, 0.5 tsp Black Pepper, and 0.25 tsp Cayenne Pepper. Cook for 1-2 minutes, stirring constantly, to toast the spices and deepen their flavors.
This step is crucial—blooming the spices in the hot fat releases their essential oils and creates a robust foundation for the chili. You’ll notice the mixture darken slightly and become incredibly fragrant. Don’t let it burn; if it starts to stick, add a splash of the Beef Broth to deglaze.
Step 3: Add Liquids and Simmer to Perfection
Pour in the 1 cup Beef Broth, 1 can Diced Tomatoes (with juices), and 1 tbsp Cider Vinegar. Stir well to combine all the ingredients and scrape up any browned bits from the bottom of the pot—those are packed with flavor.
Bring the mixture to a boil, then reduce the heat to low. Let it simmer uncovered for 30-40 minutes, stirring occasionally. You want the chili to thicken slightly but still have enough liquid to spoon over hot dogs generously.
As it simmers, the flavors will meld together beautifully. Taste and adjust the seasoning if needed, though I find the initial amounts hit the mark perfectly for a balanced, smoky-sweet profile.
Step 4: Cool Slightly and Serve
Once the chili has thickened and the flavors have developed, remove it from the heat. Let it cool for 5-10 minutes before serving—this allows the mixture to set slightly so it stays on top of your hot dogs instead of running off.
The chili should be rich, thick, and deeply aromatic with a perfect balance of heat, sweetness, and smokiness. Spoon it generously over grilled or steamed hot dogs and serve immediately. Leftovers keep well in the refrigerator for up to 5 days and taste even better the next day.
Pro Tips For Making Jeff’S Hot Dog Chili
- Brown the Beef Well: Cook the ground beef until deeply browned, not just gray—this builds the rich flavor base that makes Jeff’s chili taste like it simmered all day. I learned this the hard way after serving bland chili to skeptical friends.
- Bloom the Spices: After adding tomato paste, let the chili powder cook in the pot for 1-2 minutes until fragrant. Sounds weird, but it works—this wakes up the spices and removes any raw, bitter edge.
- Skip the Crowding: Don’t dump all the beef in at once if your pan isn’t big enough. Overcrowding steams the meat instead of browning it, and you’ll end up with a watery, sad chili. Use two batches if needed.
- Use Fresh Garlic: Swap pre-minced jarred garlic for fresh cloves—it’s non-negotiable here. The fresh stuff has a sharper, brighter punch that actually changes the outcome, especially with the tomato paste and beef.
Make-Ahead Tips for Leftovers
Overnight Flavor Boost
I always make this chili the day before serving. The flavors meld overnight in the fridge, creating a deeper, more complex profile that’s worth the wait. Just 30 minutes of simmering the next day brings it back to perfection. 💡
Double Batch Strategy
Since this recipe scales beautifully, I double the ingredients and cook in my 7-quart Dutch oven. Portion into 16-oz mason jars for easy storage—each holds enough to top 4-5 hot dogs generously.
Freezer Prep
For long-term storage, ladle cooled chili into quart-size freezer bags. Lay flat to save space and freeze for up to 3 months. Thaw overnight in the fridge before reheating.
Reheating Method
My go-to is stovetop reheating over medium-low heat. Add 2 tbsp water or broth to loosen if needed. Stir occasionally until it reaches 165°F, about 10-15 minutes. 🔥
Microwave Shortcut
For quick meals, microwave single portions in 30-second bursts, stirring between each. Cover with a damp paper towel to prevent drying. It’s ready when bubbling hot throughout.
Pro Tip
Label everything with dates—I use masking tape and marker on jars. This chili tastes even better the second day, so plan accordingly for your next backyard gathering.
Nutrition Facts
Frequently Asked Questions
Can I use ground turkey instead of beef?
Yes, ground turkey works perfectly as a leaner alternative. Use the same 1 lb amount and follow the recipe as written. The flavor will be slightly milder, so consider adding an extra 1/2 tsp of smoked paprika for depth.
How do I adjust the spice level?
For milder chili, omit the cayenne pepper entirely. For more heat, double it or add a pinch of red pepper flakes. Taste before serving and adjust—remember the flavors intensify as it sits.
What’s the best way to store leftovers?
Transfer cooled chili to an airtight container and refrigerate for up to 5 days. For longer storage, freeze in portions for up to 3 months. Thaw overnight in the fridge before reheating.
Can I make this in a slow cooker?
Brown the beef and onions first, then transfer everything to the slow cooker. Cook on low for 4-6 hours or high for 2-3 hours, stirring occasionally. The flavors develop beautifully this way.

- BBQ Sausage Recipe Oven: Smoky Depth Without the Grill - September 28, 2026
- BBQ Chicken Bowl Recipe Rice: Smoky Sweetness Over Fluffy Grains - September 28, 2026
- Beef Cutlet Recipe Ideas: Crispy Breaded Patties With Bold Seasonings - September 28, 2026