
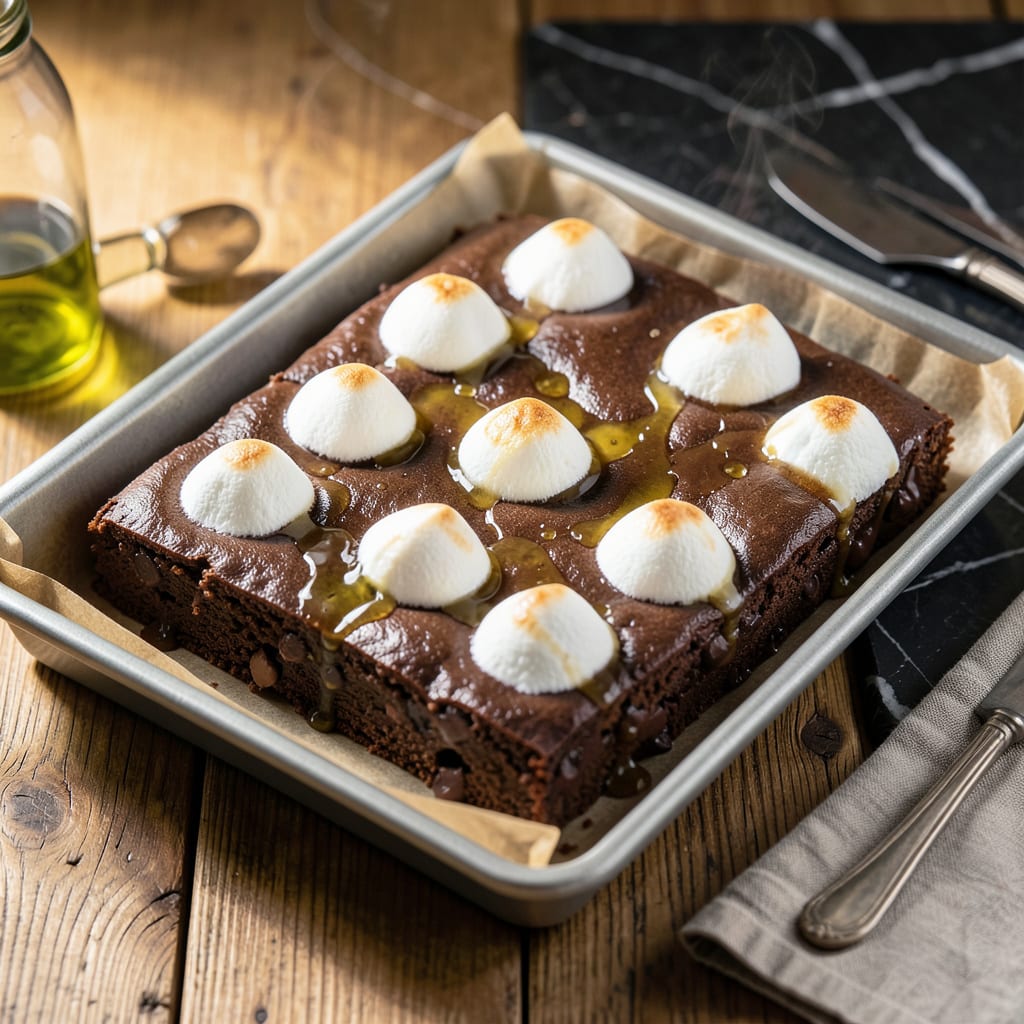
This recipe transforms simple ingredients into decadent fudge with minimal effort. The marshmallows create a smooth, creamy texture that blends perfectly with rich chocolate.
Ready in just 15 minutes, this treat requires no baking and sets beautifully in the fridge. The result is velvety fudge with a melt-in-your-mouth finish.
Ingredients for Jet Puffed Marshmallow Fudge
Rich chocolate, marshmallows, and a few pantry staples create this velvety treat effortlessly.
| Ingredient | Amount | Notes |
|---|---|---|
| Semi-Sweet Chocolate Chips 🍫 | 3 cups | High-quality for best melt |
| Jet-Puffed Marshmallows 🍬 | 10 oz | Regular or mini size |
| Unsalted Butter 🧈 | ½ cup | Cut into cubes for even melting |
| Sweetened Condensed Milk 🥛 | 14 oz | One standard can |
| Vanilla Extract 🌿 | 2 tsp | Pure extract for best flavor |
| Sea Salt 🧂 | ¼ tsp | Fine grain for even distribution |
| Heavy Cream 🥛 | ¼ cup | Optional for extra creaminess |
| Powdered Sugar 🍚 | ½ cup | For dusting if desired |
| Cocoa Powder 🌶️ | 2 tbsp | Unsweetened for depth |
| Pecans 🌰 | ½ cup | Chopped, optional for crunch |
The chocolate quality matters here. Ghirardelli or Guittard semi-sweet chips melt smoothly and deliver that deep cocoa flavor. Jet-Puffed marshmallows are ideal for their consistent texture and sweetness—found in the baking aisle at any Walmart or Target. For the butter, always use unsalted so you can control the salt content. A standard can of sweetened condensed milk (like Eagle Brand) is perfect for this.
No Jet-Puffed marshmallows? Kraft marshmallows work just as well. Swap the semi-sweet chips for bittersweet if you prefer less sweetness. The heavy cream can be omitted, but it adds a luxurious texture. For a nut-free version, skip the pecans or substitute with toasted walnuts or almonds. Vanilla extract is non-negotiable—use the real stuff, not imitation.
This sets in the fridge in about 2 hours, but overnight is even better. Store in an airtight container at room temperature for up to 1 week, or freeze for 3 months. Cut into squares once fully set for easy serving.
Why You’ll Love This Recipe
- No-Fuss Melting: I just dump the chocolate chips, butter, and condensed milk in a pot—no fancy steps, just melt and mix.
- Marshmallow Magic: That first bite with gooey Jet-Puffed marshmallows and rich chocolate? Ridiculously good.
- Holiday Lifesaver: I bring this to every cookie swap and it’s always the first to disappear.
- Stays Fresh: Honestly, it keeps for a week in the fridge, so I can make it ahead and still have leftovers.
Step-by-Step Instructions for Jet Puffed Marshmallow Fudge
This method ensures smooth, rich fudge with perfect marshmallow swirls every time.
Step 1: Prepare the Chocolate Base
Line an 8×8-inch baking pan with parchment paper, leaving an overhang on the sides for easy removal. This prevents sticking and ensures clean cuts later.
In a heavy saucepan, combine the 3 cups Semi-Sweet Chocolate Chips, 0.5 cup Unsalted Butter, and 14 oz Sweetened Condensed Milk. Melt over low heat, stirring constantly with a silicone spatula until the mixture is completely smooth and glossy.
This gentle melting process prevents scorching and ensures a velvety texture. The mixture should look like thick, pourable chocolate pudding when properly combined.
Step 2: Add Flavorings and Create Swirls
Remove the saucepan from heat and immediately stir in the 2 tsp Vanilla Extract and 0.25 tsp Sea Salt. The vanilla enhances the chocolate depth while the salt balances the sweetness.
Pour half of the chocolate mixture into your prepared pan, spreading it evenly with the spatula. Then scatter the 10 oz Jet-Puffed Marshmallows over the surface, pressing them lightly into the chocolate. These will create the signature swirls as they melt.
Carefully pour the remaining chocolate mixture over the marshmallows, using the spatula to gently swirl the marshmallows into the chocolate without fully incorporating them.
Step 3: Optional Enhancements and Setting
For extra richness, warm the 0.25 cup Heavy Cream in a small saucepan until just steaming, then drizzle it over the fudge surface. This adds a silky quality to the finished texture.
If desired, sprinkle the 0.5 cup Pecans over the top, pressing them lightly into the surface. For a decorative finish, dust with 0.5 cup Powdered Sugar or sift 2 tbsp Cocoa Powder over the top for contrast.
Allow the fudge to set at room temperature for 2 hours or refrigerate for 1 hour until firm to the touch. The marshmallows will soften and create beautiful ribbons throughout the chocolate base.
Step 4: Cut and Serve
Once fully set, use the parchment overhang to lift the fudge from the pan. Place on a cutting board and use a sharp knife dipped in hot water to make clean cuts. Wipe the knife between cuts for perfect squares.
The fudge should have a smooth, dense texture with visible swirls of melted marshmallow throughout. Each piece should hold its shape when cut but remain tender when bitten.
Store in an airtight container at room temperature for up to 5 days, or refrigerate for up to 2 weeks for extended freshness. Bring to room temperature before serving for optimal texture.
Pro Tips For Making Jet Puffed Marshmallow Fudge
- Melt Slowly: Use low heat when melting the chocolate chips and butter—rushing it with high heat can scorch the chocolate. I learned this the hard way after two batches turned grainy.
- Fresh Marshmallows: Check the expiration date on your Jet-Puffed marshmallows; stale ones won’t puff properly and can make the fudge dense. Sounds weird, but it works.
- Skip the Microwave: Avoid melting ingredients in the microwave—it heats unevenly and can make the fudge seize up. A heavy saucepan on low is the way to go.
- Line the Pan: Grease your pan and line it with parchment paper before pouring in the fudge. My grandmother swore by this, and she was right—it makes cutting so much easier.
Pro Cooking Tips for Great jet puffed marshmallow fudge
Perfect Melting Technique
Use a heavy-bottomed saucepan to prevent scorching. Melt the 3 cups Semi-Sweet Chocolate Chips and 0.5 cup Unsalted Butter over low heat, stirring constantly. I use a silicone spatula for smooth blending. 🔥
Swirl Mastery
Pour half the chocolate mixture into your pan, then scatter the 10 oz Jet-Puffed Marshmallows on top. Press them lightly into the chocolate before adding the remaining mixture. Use gentle swirls to create ribbons without fully blending.
Temperature Control
Never rush the melting process. Keep the heat on low and remove from heat immediately after adding 2 tsp Vanilla Extract and 0.25 tsp Sea Salt. High heat can separate the mixture, ruining the texture.
Setting Success
For the smoothest finish, let the fudge set at room temperature for 2 hours before refrigerating. This gradual cooling prevents graininess. If using 0.25 cup Heavy Cream, warm it gently before drizzling over the top.
Clean Cutting
Use a sharp knife dipped in hot water for perfect squares. Wipe the blade between cuts to prevent sticking. The parchment overhang makes removal from the pan effortless. 💡
Storage Tips
Store in an airtight container at room temperature for up to 5 days. For longer storage, refrigerate for up to 2 weeks. Bring to room temperature before serving for the best texture.
Nutrition Facts
Frequently Asked Questions
Can I use mini marshmallows instead of regular?
Yes, mini marshmallows work perfectly and create even more swirls! Use the same 10 oz weight. They melt faster, so work quickly when adding the second layer of chocolate.
Why did my fudge turn out grainy?
Graininess usually means the chocolate seized from high heat or moisture. Always melt over low heat and avoid water contact. Stir constantly for a smooth, glossy finish.
How long does it need to chill?
For best results, let it set at room temperature for 2 hours, then refrigerate for 1 hour. Rushing can cause uneven texture, but overnight chilling yields the firmest slices.

- Beyond Burger Recipe Ideas: Plant-Based Creativity for Every Meal - September 28, 2026
- BBQ Bison Recipe Steaks: Smoky Grill Mastery with Bold Flavor - September 28, 2026
- Chicken Breast Recipe Tender: Brine-Soaked Juiciness Without Overcooking - September 28, 2026