
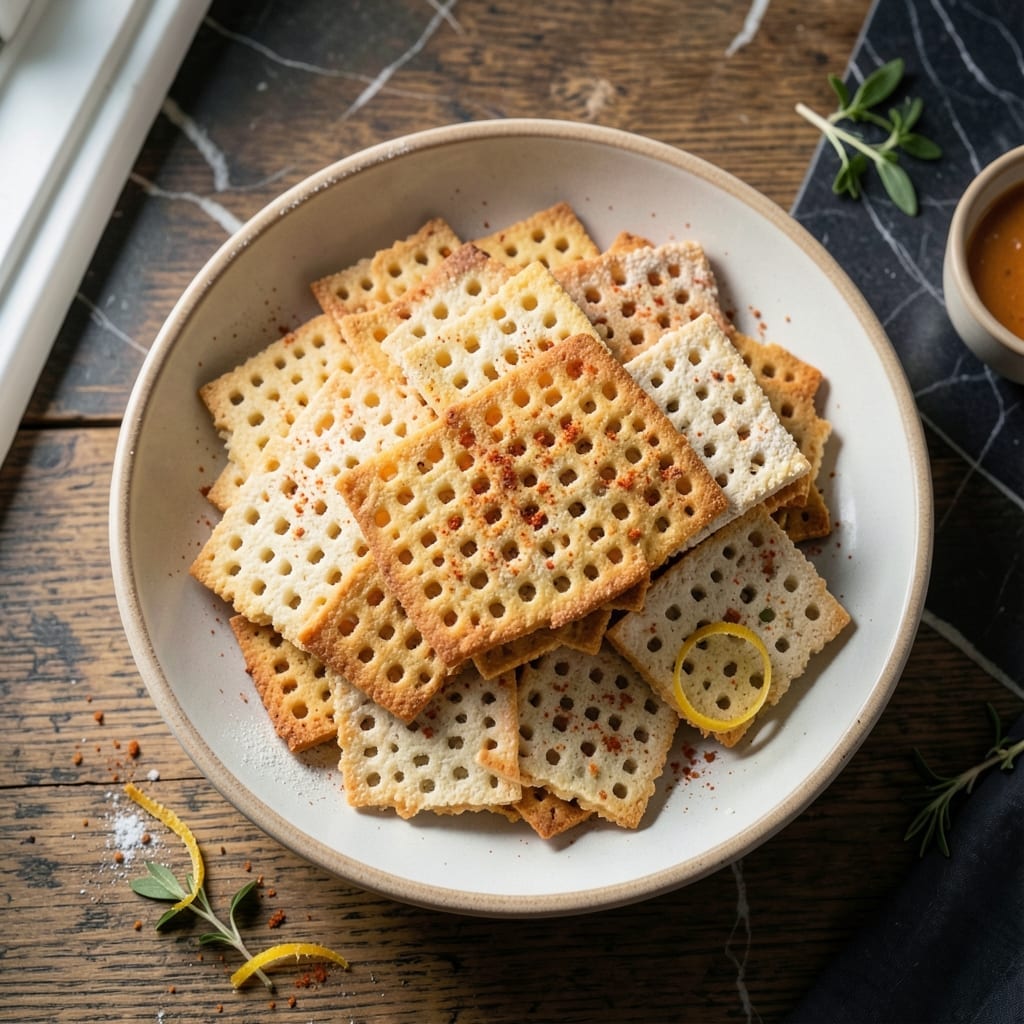
There’s a reason Mamie’s cheese wafers have been a Southern staple for generations. This recipe transforms simple ingredients into crispy, melty bites that disappear faster than you can bake them.
The secret lies in the sharp cheddar and a precise baking method that ensures every wafer is perfectly golden and delicate. No fancy equipment—just a bowl, a baking sheet, and a little patience.
What you’ll get are light, airy crackers with a rich cheesy flavor and a satisfying crunch. They’re ideal for snacking, pairing with soups, or serving at gatherings.
Once you try them, you’ll understand why this recipe has stood the test of time.
Ingredients for Mamie’s Cheese Wafers
Transform simple pantry staples into these beloved Southern crispy bites everyone reaches for repeatedly.
| Ingredient | Amount | Notes |
|---|---|---|
| Sharp Cheddar Cheese 🧀 | 2 cups | Freshly shredded from block |
| All-Purpose Flour 🌾 | 1 cup | Sifted for lightness |
| Unsalted Butter 🧈 | ½ cup | Cold, cubed for flakiness |
| Salt 🧂 | ½ tsp | Fine sea salt preferred |
| Cayenne Pepper 🌶️ | ¼ tsp | Optional for subtle heat |
| Baking Powder ⚗️ | ¼ tsp | Ensures light texture |
| Ice Water 💧 | 2 tbsp | As needed for dough consistency |
| Worcestershire Sauce 🫒 | 1 tsp | Anchovy-free vegetarian version |
| Paprika 🌶️ | ½ tsp | Sweet or smoked variety |
| Black Pepper 🌶️ | ¼ tsp | Freshly ground preferred |
The sharp cheddar is non-negotiable here—Cabot or Tillamook deliver the bold, tangy flavor that defines these wafers. Always shred from a block (the good stuff, not the pre-shredded kind) for proper melt and texture. King Arthur flour is my go-to for consistent results, but any all-purpose works. The butter should be high-quality, like Plugrá or Kerrygold, for that rich, flaky finish.
No sharp cheddar? Aged Gouda offers similar depth, but avoid mild cheeses—they’ll lack the punch. For a gluten-free version, 1:1 gluten-free flour blend works seamlessly. Out of Worcestershire? Soy sauce plus a pinch of sugar mimics the umami. The cayenne can be omitted if heat isn’t desired, and the paprika is flexible—smoked paprika adds a nice depth if you have it.
Dough can be made ahead and refrigerated for up to 24 hours. Baked wafers keep in an airtight container at room temperature for 1 week—though they rarely last that long. Freeze the dough balls for up to 3 months (thaw before rolling) for freshly baked wafers anytime.
Why You’ll Love This Recipe
- 5-Minute Mix: I just dump, stir, and bake—no fancy steps, just sharp cheddar, butter, and a pinch of cayenne.
- Cheesy Crunch: That first bite with the crispy edges and the kick from the cayenne? Ridiculously good.
- Party Starter: I bring these to book club and they vanish before I can even grab one. (Yes, even on a Tuesday night)
- Budget Friendly: A block of cheddar and flour I already have in the pantry—no extra grocery runs, no waste.
Step-by-Step Instructions for Cheese Wafers
Master these steps to achieve perfectly crisp, cheesy wafers with an irresistible Southern crunch.
Step 1: Prepare the Dry Ingredients
In a medium mixing bowl, whisk together the 1 cup All-Purpose Flour, 0.5 tsp Salt, 0.25 tsp Cayenne Pepper, 0.25 tsp Baking Powder, 0.5 tsp Paprika, and 0.25 tsp Black Pepper until evenly combined. Sifting the flour first ensures a light, airy texture in the finished wafers.
This dry mixture forms the structural base for the wafers. The baking powder provides lift, while the cayenne and paprika add subtle warmth and color. Work quickly to maintain the flakiness of your final product.
Step 2: Cut in the Cold Butter
Add the 0.5 cup Unsalted Butter (cold and cubed) to the dry ingredients. Using a pastry cutter or your fingertips, work the butter into the flour mixture until it resembles coarse crumbs with pea-sized butter pieces visible. This technique creates flaky layers in the dough.
Keep the butter cold throughout this process—warm butter will melt and create a dense, tough texture rather than the desired crispness. The mixture should look slightly shaggy; this indicates proper butter distribution.
Step 3: Incorporate Cheese and Liquid Ingredients
Stir in the 2 cups Sharp Cheddar Cheese (freshly shredded) until evenly distributed. Then add the 1 tsp Worcestershire Sauce and 2 tbsp Ice Water, mixing just until the dough comes together. The Worcestershire adds depth without overpowering the sharp cheddar flavor.
The dough will be slightly crumbly but should hold together when pressed. If it’s too dry, add ice water 1 teaspoon at a time until it reaches the proper consistency. Overmixing will develop gluten, resulting in tough wafers instead of crisp ones.
Step 4: Roll, Cut, and Chill the Dough
Turn the dough onto a lightly floured surface and roll it to ⅛-inch thickness. Use a 2-inch round cutter to stamp out wafers, rerolling scraps as needed. For uniform baking and crispness, ensure all pieces are the same thickness.
Transfer the cut wafers to a parchment-lined baking sheet and prick each one with a fork to prevent puffing. Chill the dough on the baking sheet for 20-30 minutes—this solidifies the butter and helps maintain shape during baking.
Step 5: Bake to Golden Perfection
Preheat your oven to 375°F. Bake the chilled wafers for 12-15 minutes until the edges are deep golden brown and the cheese is bubbling. Rotate the baking sheet halfway through for even browning.
Remove from the oven and let cool on the baking sheet for 2-3 minutes before transferring to a wire rack. The wafers will crisp up as they cool. Serve warm or at room temperature for the ultimate crunch.
Pro Tips For Making Mamie’S Cheese Wafers
- Chill the Dough: After mixing, refrigerate the dough for at least 30 minutes—I learned this the hard way when my first batch spread into a single cheesy blob.
- Grate Cold Cheese: Use a box grater on that block of sharp cheddar and keep it cold; pre-shredded cheese has anti-caking agents that make the wafers less crispy.
- Watch the Oven: These go from golden to burnt in under a minute at 350°F, so set a timer for 8 minutes and check early.
- Add Extra Cayenne: My grandmother swore by this: double the cayenne for a kick that actually cuts through the richness of the cheese and butter.
Essential Equipment for Perfect Results
Baking Sheet Essentials
Use a heavy-gauge aluminum baking sheet for even heat distribution—I swear by Nordic Ware for consistent results. A dark nonstick sheet may cause over-browning, so stick to light-colored pans. Always line with parchment paper to prevent sticking and simplify cleanup.
Mixing Bowls
A medium stainless steel mixing bowl (about 3-quart capacity) gives you plenty of room to work the butter into the flour without spills. I prefer Cuisinox bowls—their weight and durability make them perfect for this kind of hands-on mixing. 💪
Pastry Tools
A pastry cutter is ideal for cutting cold butter into flour, but your fingertips work just as well. For rolling, a French rolling pin without handles gives you better control for achieving that critical ⅛-inch thickness. I keep mine in the freezer for 10 minutes before use to stay cool.
Cutting and Shaping
A 2-inch round cutter creates uniform wafers that bake evenly. If you don’t have one, the rim of a glass works in a pinch. Prick each wafer with a fork to prevent puffing—I do this right on the baking sheet before chilling. 💡
Cooling Equipment
A wire cooling rack is essential for achieving maximum crispness. Transfer wafers after 2-3 minutes on the baking sheet to prevent sogginess. I use a 3-tier rack from OXO to cool multiple batches efficiently.
Measurement Tools
Accurate measurements matter—use dry measuring cups for flour and measuring spoons for spices. A kitchen scale can be helpful for the cheese if you want to be precise with your 2 cups. I always level off my measurements for consistency.
Nutrition Facts
Frequently Asked Questions
Can I use pre-shredded cheese?
No, always shred from a block for best results. Pre-shredded cheese contains anti-caking agents that prevent proper melting. Sharp cheddar from a block gives the authentic flavor and texture these wafers are known for.
Why chill the dough before baking?
Chilling for 20-30 minutes solidifies the butter, which creates flaky layers and prevents spreading. This step ensures your wafers maintain their shape and develop that perfect crisp texture.
How do I store leftovers?
Keep cooled wafers in an airtight container at room temperature for up to 1 week. For longer storage, freeze the dough balls for up to 3 months and bake fresh as needed.
Can I make these gluten-free?
Yes! Substitute a 1:1 gluten-free flour blend for the all-purpose flour. The texture and flavor remain nearly identical, and the baking time stays the same.

- BBQ Sausage Recipe Oven: Smoky Depth Without the Grill - September 28, 2026
- BBQ Chicken Bowl Recipe Rice: Smoky Sweetness Over Fluffy Grains - September 28, 2026
- Beef Cutlet Recipe Ideas: Crispy Breaded Patties With Bold Seasonings - September 28, 2026