
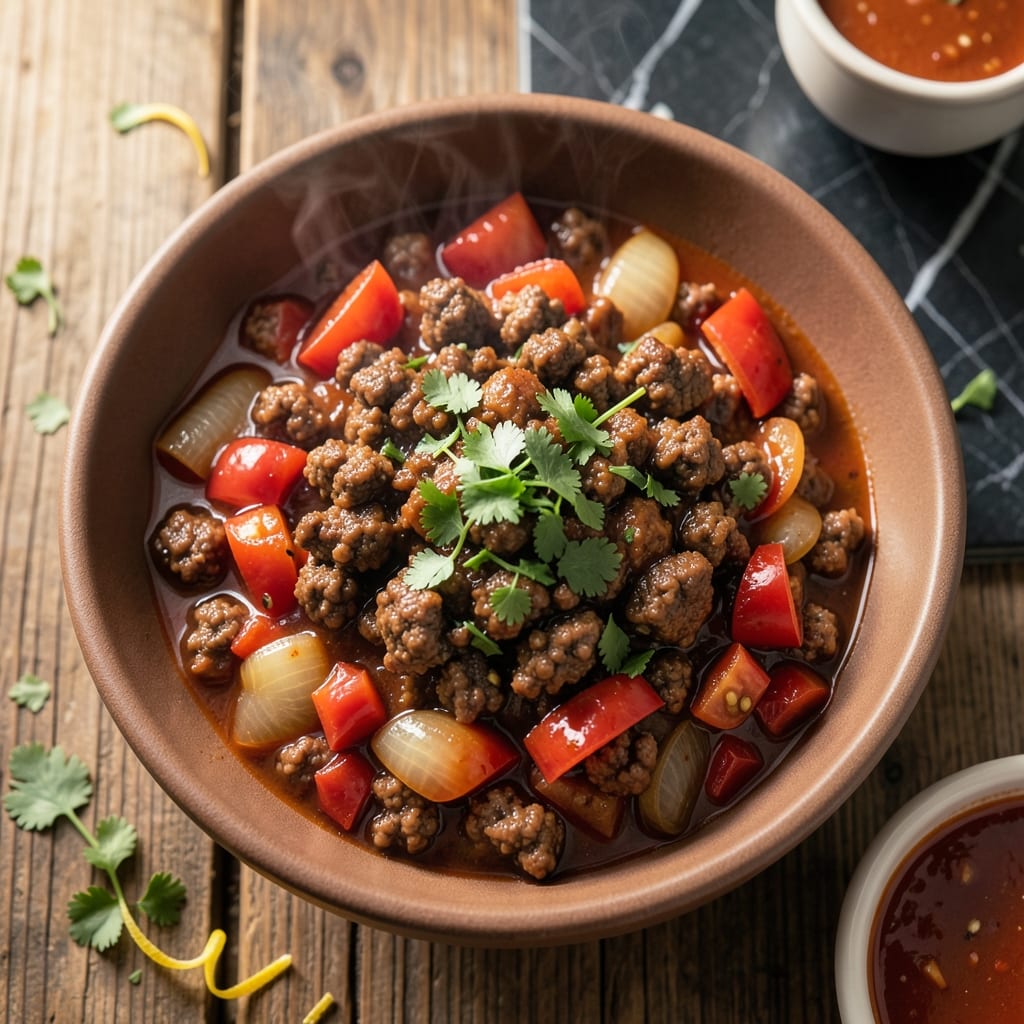
There’s something deeply satisfying about a slow-simmered chili that fills your home with bold aroma. I developed this method after years of testing different spice blends and cooking times.
The beauty of this approach is its simplicity. Just brown your meat, combine all ingredients in the slow cooker, and let it work its magic on low for 6-8 hours. The spices meld together beautifully during the long cook time.
What you’ll end up with is a hearty, deeply flavored chili with tender meat and a rich, thick sauce. The slow cooking process allows all the flavors to develop fully, creating a dish that tastes like it simmered all day.
Perfect for feeding a crowd or meal prepping for the week ahead.
Ingredients for Mccormick Chili Recipe Slow Cooker
Pantry staples and a slow cooker turn simple ingredients into bold chili. Nothing complicated here.
| Ingredient | Amount | Notes |
|---|---|---|
| Ground Beef 🥩 | 2 lb | 80/20 lean-to-fat ratio preferred |
| Onion 🧅 | 1 whole | Medium, finely diced |
| Bell Pepper 🌶️ | 1 whole | Green or red, diced |
| Garlic Cloves 🧄 | 4 cloves | Minced for bold flavor |
| Canned Tomatoes 🍅 | 2 cans | 15 oz each, diced or crushed |
| Tomato Sauce 🍅 | 1 can | 15 oz can, plain |
| Kidney Beans 🌱 | 2 cans | 15 oz each, drained and rinsed |
| McCormick Chili Seasoning 🌶️ | 1 package | Original blend, 1.27 oz |
| Beef Broth 💧 | 2 cups | Low-sodium preferred |
| Olive Oil 🫒 | 2 tbsp | For browning meat |
| Salt 🧂 | 1 tsp | Adjust to taste |
| Black Pepper 🌶️ | ½ tsp | Freshly ground preferred |
| Cumin 🌿 | 1 tsp | Ground, for extra depth |
| Brown Sugar 🍚 | 1 tbsp | Optional, balances acidity |
The beef is key—80/20 ground chuck gives you the best flavor and texture. I grab mine from Costco for big batches, but any grocery store works. The McCormick seasoning packet is the star here (find it in the spice aisle), but if you can’t find it, Walmart or Target always have it. Use diced tomatoes with juices for extra richness (San Marzano if you’re feeling fancy).
No ground beef? Ground turkey or venison work just as well. Swap kidney beans for pinto or black beans if that’s what’s in the cupboard. For extra heat, toss in a diced jalapeño or half a tsp of cayenne. If you’re out of tomato sauce, 1 cup of crushed tomatoes gets you close. The cumin is a must—don’t skip it (freshly ground is best).
This keeps 4-5 days in the fridge and freezes like a dream for 3 months. Portion into containers for easy lunches—tastes even better the next day. Leftovers reheat in minutes on the stovetop (add a splash of broth if it’s too thick).
Why You’ll Love This Recipe
- Set It and Forget: I toss in the beef, peppers, and McCormick seasoning before work and come home to a ready-to-eat chili.
- Rich and Hearty: The garlic and tomatoes blend into this deep, savory flavor that makes every bite satisfying.
- Feeds My Crew: Between us, it stretches easily for a family dinner or a casual get-together with friends.
- Budget Friendly: Ground beef and canned tomatoes keep costs low while still delivering a meal that feels indulgent.
Step-by-Step Instructions for McCormick Chili Slow Cooker
Here’s how I make this hearty chili with minimal effort and maximum flavor.
Step 1: Brown the Ground Beef
Heat the 2 tbsp Olive Oil in a large skillet over medium-high heat. Add the 2 lb Ground Beef and cook, breaking it up with a wooden spoon, until it’s no longer pink and starts to develop a nice brown crust, about 6-8 minutes.
I always drain off most of the fat at this point, leaving just a tablespoon or so for flavor. This step is crucial – it builds a depth of flavor that you can’t get from raw meat going straight into the slow cooker. The beef should look deep brown and slightly crispy in spots.
Season the browned beef with the 1 tsp Salt and 0.5 tsp Black Pepper while it cooks. These seasonings will amplify as the chili simmers all day.
Step 2: Sauté the Vegetables
In the same skillet (no need to clean it), add the diced 1 whole Onion and 1 whole Bell Pepper. Cook for 4-5 minutes until they start to soften and the onion becomes translucent.
Add the minced 4 cloves Garlic Cloves and cook for another 30 seconds until fragrant. Be careful not to let the garlic burn – it should smell amazing but not bitter. This vegetable base will sweeten as it cooks in the slow cooker.
Stir in the 1 tsp Cumin at this stage. Toasting the cumin with the vegetables brings out its warm, earthy notes that complement the chili seasoning so well.
Step 3: Combine Everything in the Slow Cooker
Transfer the browned beef and sautéed vegetables to your slow cooker. Add the 2 cans Canned Tomatoes, 1 can Tomato Sauce, drained and rinsed 2 cans Kidney Beans, and 2 cups Beef Broth.
Sprinkle the 1 package McCormick Chili Seasoning evenly over the top. I don’t stir it in right away – I let it sit on top for a minute to bloom in the heat. Then add the 1 tbsp Brown Sugar – this balances the acidity of the tomatoes beautifully.
Stir everything together until well combined. Make sure to scrape up any browned bits from the bottom – that’s pure flavor waiting to infuse your chili.
Step 4: Cook Low and Slow
Cover the slow cooker and cook on low for 7-8 hours or on high for 4-5 hours. The low and slow method really lets the flavors meld together beautifully.
About halfway through the cooking time, I like to give it a good stir. This helps redistribute the ingredients and prevents anything from sticking to the bottom. The chili is ready when the beans are tender and the sauce has thickened slightly.
You’ll know it’s done when the kitchen smells incredible and the beef is so tender it falls apart with a gentle stir. The liquid should have reduced enough to coat the back of a spoon but still be soupy enough to ladle easily.
Pro Tips For Making Mccormick Chili Recipe Slow Cooker
- Brown the Beef: I learned this the hard way—skip the slow cooker for raw ground beef. Brown it first in a skillet with onions and peppers to drain excess fat and lock in flavor.
- Drain Those Tomatoes: Sounds weird, but it works: drain and rinse the canned tomatoes to cut down on excess liquid, so your chili isn’t watery after hours in the slow cooker.
- Skip Pre-Crushed Garlic: Fresh garlic cloves, minced right before adding, taste far better than the jarred stuff. It takes 2 minutes and actually changes the outcome.
- Wait to Season: Hold off on adding the full McCormick seasoning packet until the last hour—this prevents the spices from turning bitter over long cooking times.
Essential Equipment for Perfect Results
Slow Cooker Essentials
I swear by my 6-quart Hamilton Beach slow cooker with a programmable timer—it’s the perfect size for this chili and most family meals. The ceramic insert distributes heat evenly and is easy to clean. Look for one with a tight-fitting lid to trap all that delicious aroma. 🔥
Skillet for Browning
A heavy-bottomed 12-inch stainless steel skillet is my go-to for browning the beef. I use Cuisinart MultiClad Pro—it handles high heat beautifully without warping. Cast iron works too, but requires more maintenance.
Cutting Tools
Invest in a sharp 8-inch chef’s knife for dicing onions and peppers efficiently. I keep mine from Victorinox razor-sharp with a ceramic honing rod. A good cutting board (I prefer bamboo) protects both your knives and countertops.
Measuring Accuracy
For spices and seasonings, I use a set of stainless steel measuring spoons from OXO. The McCormick seasoning packet is pre-measured, but for the cumin and brown sugar, precise measurements make a difference in flavor balance.
Serving in Style
This chili deserves a proper presentation. I serve mine in deep stoneware bowls from Le Creuset—they retain heat beautifully. Have a ladle ready for easy serving and wooden spoons for stirring while it cooks. 💛
Optional Upgrades
For serious chili lovers, consider a slow cooker liner bag for easy cleanup. A fat separator helps if you want to skim excess grease from the browned beef. These small tools make the process even more enjoyable.
Nutrition Facts
Frequently Asked Questions
Can I use ground turkey instead of beef?
Ground turkey works perfectly and offers a leaner option. Use the same 2 lb amount and follow the recipe as written. The flavor will be slightly milder, so consider adding an extra 1/2 tsp of cumin for depth.
Do I need to brown the meat first?
This step is highly recommended. Browning the meat at medium-high heat for 6-8 minutes develops rich, caramelized flavors that can’t be achieved by adding raw meat directly. Skipping it may result in a less complex taste.
How can I thicken the chili if it’s too watery?
Remove the lid and cook on high heat for an additional 30-60 minutes. Alternatively, mash some beans with a fork to release their starch, or stir in 1 tbsp of cornstarch mixed with 2 tbsp cold water.
Can I make this chili ahead of time?
Yes! Chili actually tastes better the next day as flavors meld together. Store in an airtight container in the fridge for up to 4-5 days, or freeze for 3 months. Reheat gently on the stovetop.

- BBQ Sausage Recipe Oven: Smoky Depth Without the Grill - September 28, 2026
- BBQ Chicken Bowl Recipe Rice: Smoky Sweetness Over Fluffy Grains - September 28, 2026
- Beef Cutlet Recipe Ideas: Crispy Breaded Patties With Bold Seasonings - September 28, 2026