
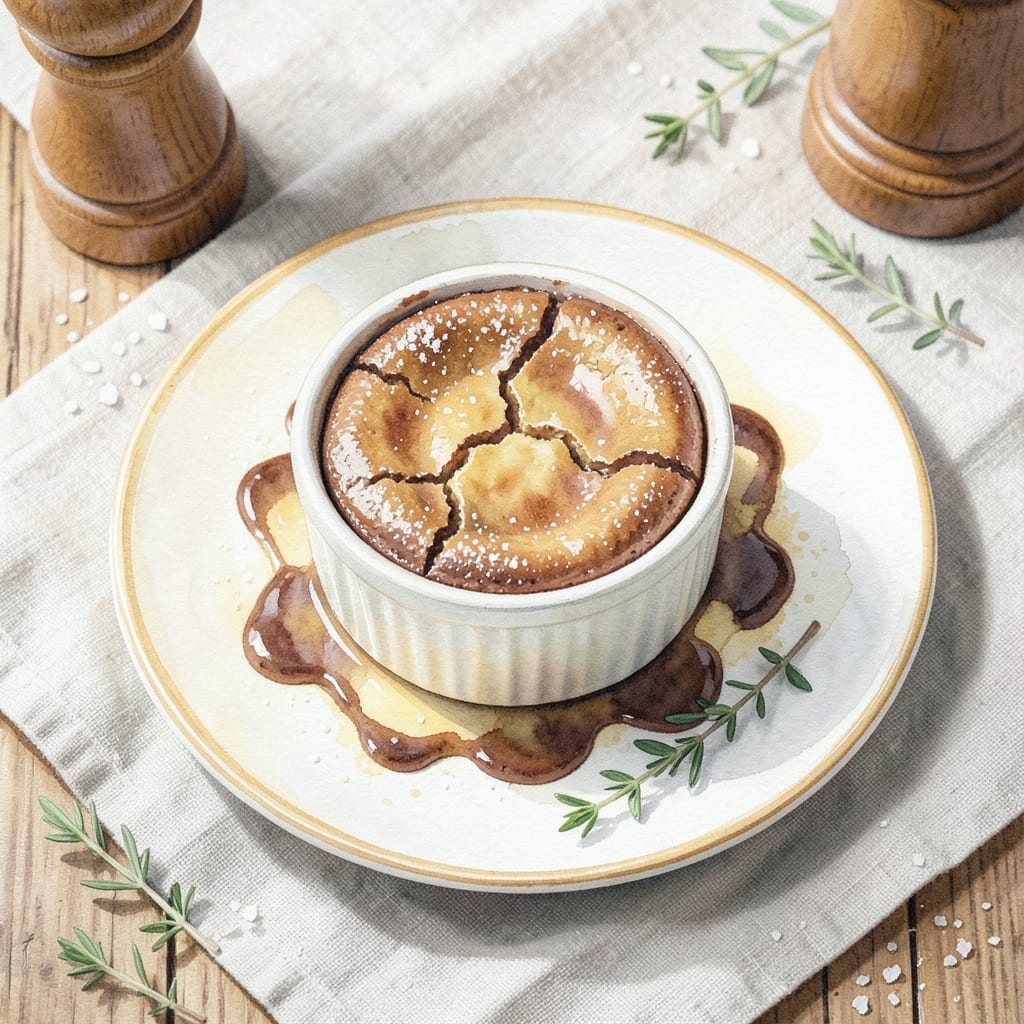
There’s a reason molten lava cake remains a restaurant classic—it delivers restaurant-quality decadence in minutes. This version captures the essence of professional techniques without the complexity.
The key lies in precise timing and temperature control. A 12-minute bake at high heat creates a crisp exterior while keeping the center luxuriously liquid. The result is a dessert that looks as impressive as it tastes.
Each bite reveals a warm, flowing chocolate heart that contrasts perfectly with the cake’s tender structure. The simplicity of the ingredients lets the chocolate shine, making every forkful a moment to savor.
Serve immediately for the full effect—this is one dessert that doesn’t wait for anyone.
Ingredients for Molten Lava Cake Recipe Gordon Ramsay
Decadent chocolate and precise measurements create this restaurant-quality dessert in minutes.
| Ingredient | Amount | Notes |
|---|---|---|
| Bittersweet Chocolate 🍫 | 8 oz | High-quality, 70% cacao preferred |
| Unsalted Butter 🧈 | ¾ cup | Plus extra for greasing ramekins |
| Granulated Sugar 🍚 | ¾ cup | Divided for batter and ramekin dusting |
| Large Eggs 🥚 | 4 whole | Room temperature for optimal volume |
| All-Purpose Flour 🌾 | ½ cup | Sifted for smooth texture |
| Vanilla Extract 🌿 | 1 tsp | Pure extract, not imitation |
| Pinch of Salt 🧂 | 1 pinch | Enhances chocolate flavor |
| Cocoa Powder 🍫 | 2 tbsp | Dutch-processed for richer color |
| Instant Espresso Powder ☕ | ½ tsp | Intensifies chocolate depth |
| Confectioners Sugar 🍚 | 2 tbsp | For dusting plates |
The chocolate is non-negotiable here. Valrhona or Guittard bittersweet bars deliver the depth and complexity this dish demands. Most Whole Foods or specialty grocers carry these brands. The butter must be unsalted to control the sodium content—Plugrá or Kerrygold are excellent choices. Room temperature eggs whip up better, so pull them out an hour before baking.
No bittersweet chocolate? Semi-sweet works at a 1:1 ratio, though the flavor will be slightly sweeter. Out of espresso powder? Instant coffee granules at half the amount will substitute. The cocoa powder can be natural if Dutch-processed isn’t available, but expect a lighter color. Never skip the ramekin greasing—use baking spray with flour for foolproof release.
Bake immediately after mixing for the best rise. Serve within 2 minutes of removing from the oven—the lava center waits for no one. Leftovers? Unlikely, but they reheat in 20 seconds in the microwave (though the texture changes slightly).
Why You’ll Love This Recipe
- One Bowl Wonder: I love that this comes together in a single bowl—melt the chocolate and butter, whisk in the rest, and you’re done.
- Decadent Core: That first spoonful into the warm center, with the bittersweet chocolate oozing out? Pure indulgence every time.
- Date Night Ready: Honestly, it’s my secret for impressing guests with minimal effort—looks fancy, tastes like a restaurant dessert.
- No Leftovers: Between us, these disappear fast. But if by some miracle one lingers, it reheats beautifully for a late-night treat.
Step-by-Step Instructions for Molten Lava Cake
Master the technique for a perfect warm chocolate center with these precise, chef-tested steps.
Step 1: Prepare the Ramekins and Preheat
Generously butter four 6-ounce ramekins with some of the extra unsalted butter, ensuring every crevice is coated. Then dust the interiors evenly with 2 tablespoons confectioners sugar, tapping out any excess. This creates a non-stick barrier and adds a delicate sweetness to the finished cakes.
Place the prepared ramekins on a baking sheet for stability. Preheat the oven to 425°F—this high temperature ensures the outside bakes quickly while the center remains molten. The oven must be fully preheated before baking; otherwise, the cakes won’t develop their signature gooey centers.
Step 2: Melt Chocolate and Butter
In a heatproof bowl set over a saucepan of barely simmering water (double boiler), melt the 8 oz bittersweet chocolate and 0.75 cup unsalted butter together, stirring occasionally with a silicone spatula. The mixture is ready when it’s completely smooth and glossy, with no visible pieces of chocolate remaining.
Remove the bowl from the heat and let it cool for 2-3 minutes—it should still be warm but not hot to the touch. This slight cooling prevents the eggs from cooking when added later. I always use high-quality chocolate here; its superior flavor and meltability are non-negotiable for true lava cake excellence.
Step 3: Whisk in Remaining Ingredients
Add 0.75 cup granulated sugar to the chocolate mixture and whisk until fully incorporated. Then add the 4 whole large eggs, one at a time, whisking vigorously after each addition until the mixture is smooth and slightly thickened. The eggs should be at room temperature to maximize volume and create a lighter texture.
Next, whisk in the 1 tsp vanilla extract, 1 pinch of salt, 2 tbsp cocoa powder, and 0.5 tsp instant espresso powder. The espresso powder intensifies the chocolate flavor without making the cakes taste like coffee. Finally, sift in the 0.5 cup all-purpose flour and fold gently until just combined—overmixing develops gluten, which makes cakes dense.
Step 4: Fill and Bake the Ramekins
Divide the batter evenly among the prepared ramekins, filling each about three-quarters full. The batter will be thick but pourable. Tap each ramekin gently on the counter to remove any air bubbles and ensure even baking.
Bake on the center rack for 11-12 minutes. The edges should be set and slightly puffed, while the centers remain soft. You’ll know they’re done when the tops look dry but a toothpick inserted into the center comes out with thick, wet batter clinging to it. This is the hallmark of a perfect lava cake.
Step 5: Unmold and Serve Immediately
Remove the cakes from the oven and let them rest for 1 minute—this brief pause allows them to set just enough for clean unmolding. Run a small offset spatula or butter knife around the edge of each cake to loosen it from the ramekin.
Invert each ramekin onto a serving plate and tap the bottom gently. The cake should slide out effortlessly, revealing its glossy exterior. Serve immediately, as the molten center begins to solidify within minutes. The contrast between the warm, flowing chocolate heart and the delicate cake exterior is what makes this dessert extraordinary.
Pro Tips For Making Molten Lava Cake Recipe Gordon Ramsay
- Preheat the Ramekins: Place your ramekins in the oven while it preheats to 400°F—this prevents the batter from sticking and helps create that perfect crisp exterior. I learned this the hard way after losing half my first batch to the spoon.
- Melt Chocolate Slowly: Use a double boiler for the chocolate and butter, and keep the heat low. After burning one batch by rushing it over direct heat, I now know that patience here actually changes the outcome.
- Skip Overmixing: Fold the flour into the batter just until combined—overmixing develops gluten, which turns your lava cakes dense instead of tender. My grandmother swore by this, and she was right.
- Bake 10-12 Minutes: Pull the cakes out when the edges are set but the centers still jiggle slightly. Sounds weird, but it works: they’ll finish cooking while you plate, keeping that molten core intact.
Serving Suggestions for This Dish
Plating Perfection
Invert each cake onto a warm plate dusted with confectioners sugar. The sugar adds a delicate visual contrast and subtly sweet finish. I like using white plates to make the dark chocolate pop visually.
Ice Cream Pairing
A scoop of vanilla bean ice cream alongside each cake creates an irresistible hot-cold contrast. The creamy texture perfectly complements the warm chocolate lava. Use Haagen-Dazs or Ben & Jerry’s for quality.
Fresh Berries
Add a handful of fresh raspberries or strawberries for a bright, tangy counterpoint to the rich chocolate. About 4-5 berries per plate provides the right balance without overwhelming the dessert. 💫
Sauce Drizzle
For extra decadence, drizzle 1-2 tablespoons of warm chocolate sauce or caramel sauce around the plate. Use a squeeze bottle for precision—I recommend Ghirardelli chocolate sauce.
Garnish Options
Sprinkle with flaky sea salt like Maldon to enhance the chocolate’s depth. A few mint leaves add a refreshing visual touch. Edible gold leaf makes it restaurant-worthy for special occasions.
Timing Tip
Serve within 2 minutes of unmolding—the lava center waits for no one. Have all your garnishes and sides ready before baking so you can plate immediately. This ensures that perfect molten surprise in every bite. ⏰
Nutrition Facts
Frequently Asked Questions
Can I use a different type of chocolate?
Yes, semi-sweet chocolate works as a 1:1 substitute, though the flavor will be sweeter. Avoid milk chocolate as it lacks the depth needed for the lava center. For best results, stick with 70% cacao or higher.
Why did my cakes stick to the ramekins?
This usually happens if the ramekins weren’t properly greased and dusted. Use butter and confectioners sugar for a foolproof non-stick barrier. Let the cakes rest for 1 minute before unmolding.
Can I make these ahead of time?
Prepare the batter and fill ramekins, then refrigerate for up to 2 hours. Bake directly from the fridge, adding 1-2 minutes to the baking time. Serve immediately for the best molten center.
What’s the secret to the perfect lava center?
Bake at 425°F for exactly 11-12 minutes. The high heat sets the edges quickly while keeping the center liquid. Overbaking is the most common mistake—watch for puffed edges with soft centers.

- BBQ Sausage Recipe Oven: Smoky Depth Without the Grill - September 28, 2026
- BBQ Chicken Bowl Recipe Rice: Smoky Sweetness Over Fluffy Grains - September 28, 2026
- Beef Cutlet Recipe Ideas: Crispy Breaded Patties With Bold Seasonings - September 28, 2026