
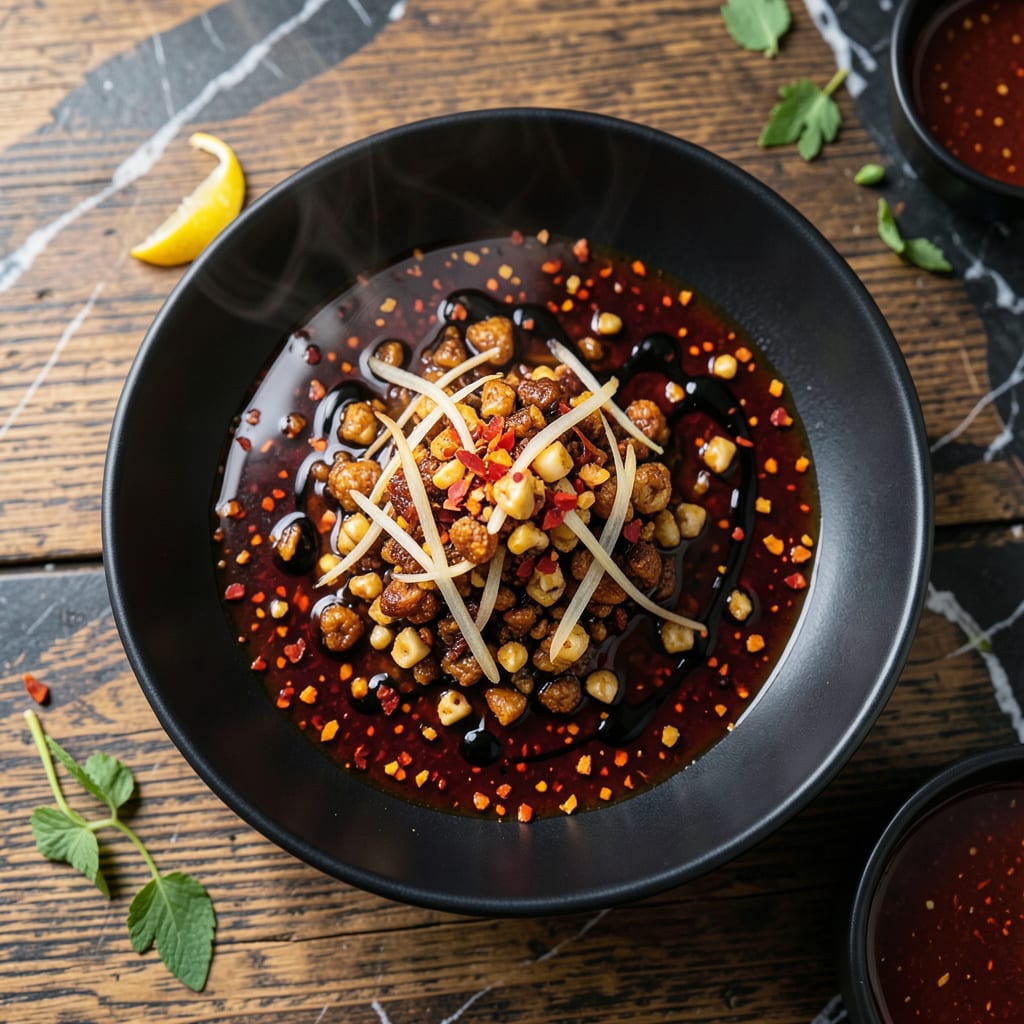
This homemade chili crunch delivers the same bold, spicy umami punch as the famous Momofuku version. A simple blend of chili flakes, garlic, and oil creates a versatile condiment that transforms any dish.
Store it in an airtight container for up to a month. The flavors deepen over time, making each use more complex and satisfying than the last.
Ingredients for Momofuku Chili Crunch
Nine simple ingredients for a bold, spicy, umami-packed condiment that rivals any store-bought version.
| Ingredient | Amount | Notes |
|---|---|---|
| Dried Chili Flakes 🌶️ | ¾ cup | Crushed red pepper or gochugaru |
| Garlic Cloves 🧄 | 8 cloves | Peeled and thinly sliced |
| Shallots 🧅 | 2 whole | Thinly sliced, about 1 cup |
| Ginger 🌿 | 1 whole | Peeled and minced, 2-inch piece |
| Neutral Oil 🫒 | 2 cups | Grapeseed or avocado oil preferred |
| Soy Sauce 💧 | 2 tbsp | Low-sodium for balance |
| Sesame Oil 🫒 | 1 tbsp | Toasted for depth |
| Sugar 🍚 | 1 tbsp | Coconut or granulated |
| Salt 🧂 | 1 tsp | Kosher or sea salt |
The chili flakes are the soul here. Gochugaru (Korean chili flakes) gives authentic Momofuku flavor, but crushed red pepper works too—just avoid the super-fine stuff. H Mart or Asian markets carry gochugaru in bulk. For the oil, grapeseed or avocado oil have the high smoke point needed. Skip the olive oil; its flavor competes with the chili.
No gochugaru? Crushed red pepper at 1:1 ratio. Short on shallots? Red onion at half the amount works, though shallots are sweeter. For a gluten-free version, tamari instead of soy sauce. The sugar balances the heat—maple syrup or agave can sub in, but cut the amount by 25%. Skip the sesame oil if needed, but it adds that signature nutty depth.
This keeps in an airtight jar for 1 month at room temperature. The flavors meld and intensify over time. If you notice the oil clouding or an off smell, it’s past prime. Refrigeration extends shelf life to 3 months, but it’s not necessary.
Why You’ll Love This Recipe
- Five-Ingredient Magic: I just dump chili flakes, garlic, shallots, ginger, and oil into a pan—no fancy prep, no fuss.
- Umami Bomb: Honestly, the garlic and shallots crisp up in the oil, creating this deep, savory crunch that’s ridiculously good.
- Endless Uses: I drizzle it on noodles, eggs, even plain rice. Between us, it’s my secret weapon for lazy meals.
- Lasts for Weeks: One batch fills a jar and keeps forever, so I always have that spicy, crunchy kick ready.
Step-by-Step Instructions for Chili Crunch
Here’s the method I use to create this aromatic, spicy condiment with perfect texture every time.
Step 1: Bloom Aromatics in Oil
Pour the 2 cups neutral oil into a medium saucepan and heat over medium-low heat until it reaches 250°F. This temperature is crucial—too hot and the aromatics will burn; too cool and they won’t crisp properly.
Add the 2 whole shallots, 8 cloves garlic cloves, and 1 whole ginger to the oil. Cook, stirring occasionally, for 8-10 minutes until the shallots and garlic are light golden brown and the ginger has turned slightly translucent around the edges.
Watch closely during this stage. The garlic will turn from white to golden quickly toward the end. Remove from heat immediately when you see the first pieces reaching golden brown—they’ll continue cooking in the hot oil.
Step 2: Toast the Chili Flakes
Carefully stir the 0.75 cup dried chili flakes into the hot oil. The oil should sizzle gently as the flakes hit it. Return the pan to medium-low heat and cook for 3-4 minutes, stirring constantly.
You’ll notice the chili flakes darken slightly and become fragrant. The oil will turn a beautiful deep red color as the chili infuses it. Stop cooking when the flakes are vibrant red and the oil has taken on a rich hue—overcooking can make the chili oil bitter.
This step builds the foundation of flavor and heat for your crunch. The aroma at this stage should be intoxicating and deeply spicy.
Step 3: Add Seasonings and Simmer
Stir in the 2 tbsp soy sauce, 1 tbsp sesame oil, 1 tbsp sugar, and 1 tsp salt. The mixture will bubble vigorously as the liquids hit the hot oil. Reduce heat to low and let it simmer gently for 5 minutes.
The soy sauce adds umami depth while the sugar balances the heat. The sesame oil contributes its nutty aroma that complements the chili perfectly. Stir occasionally to prevent anything from sticking to the bottom of the pan.
Step 4: Cool and Crisp
Remove the pan from heat and let the mixture cool at room temperature for 20-30 minutes. As it cools, the shallots, garlic, and chili flakes will crisp up in the oil, creating that signature crunch.
You’ll see the ingredients settle and the oil become clearer as it cools. The texture should be crispy when fully cooled—this is how you know it’s ready. Stir once or twice during cooling to ensure even crisping.
Transfer to a clean jar once completely cool. The crunch will intensify as it sits, and the flavors will meld together beautifully over the next few hours.
Pro Tips For Making Momofuku Chili Crunch
- Low and Slow Heat: Keep the oil at a gentle simmer—around 250°F—so the garlic, shallots, and ginger crisp up without burning. I learned this the hard way after scorching three batches.
- Dry Your Aromatics: Pat the minced garlic, shallots, and ginger dry with a paper towel before frying. Even a little moisture makes the oil splatter like a firecracker.
- Skip the Fresh Chilies: Stick to dried chili flakes—they fry up crispier and last longer in the jar. Fresh chilies add moisture and can turn your crunch into a sad, soggy mess.
- Double the Oil: Use more neutral oil than you think—enough to fully submerge the aromatics. Sounds wasteful, but it ensures even cooking and a shelf-stable result.
Dietary Considerations for This Dish
Gluten-Free Adaptation
For gluten-free chili crunch, simply swap the 2 tbsp soy sauce for tamari. I use San-J brand because it’s widely available and has a clean flavor. The rest of the ingredients are naturally gluten-free, so no other changes are needed. 💡
Vegan and Vegetarian
This creation is already 100% plant-based with no animal products. The umami depth comes from the soy sauce and sesame oil, so vegans and vegetarians can enjoy it without any modifications. I love how it adds richness to tofu and vegetable dishes.
Low-Sodium Option
To reduce sodium, use low-sodium soy sauce and cut the 1 tsp salt in half. You can also skip the added salt entirely since the soy sauce already contributes saltiness. Taste and adjust at the end—you might find you don’t need extra salt at all.
Nut-Free Version
Skip the 1 tbsp sesame oil to make this nut-free. The oil isn’t strictly necessary for flavor, though it does add a nice depth. A neutral oil like avocado or grapeseed can be used exclusively without compromising safety for those with nut allergies.
Sugar Alternatives
Replace the 1 tbsp sugar with maple syrup or agave—use about 2 tsp since these are sweeter. For a sugar-free option, a pinch of monk fruit sweetener works well. The sweetness balances the heat, so don’t skip it entirely unless you prefer a purely savory-spicy profile.
Allium-Free Adjustment
Omit the 2 whole shallots and 8 cloves garlic for an allium-free version. Increase the ginger to 3 inches to compensate for flavor depth. The chili flakes and oil will still deliver plenty of flavor, though it will taste more one-dimensional without the aromatics. 🌶️
Nutrition Facts
Frequently Asked Questions
Can I use olive oil instead of neutral oil?
No, olive oil has a strong flavor that can overpower the chili. Stick with grapeseed or avocado oil for a clean taste that lets the spice shine.
How do I know when the chili flakes are done toasting?
They’re ready when the oil turns deep red and the flakes become fragrant, usually after 3-4 minutes. Overcooking makes them bitter, so watch closely.
Why did my crunch turn out soggy?
This happens if the mixture wasn’t cooled completely before storing. Let it sit for 20-30 minutes so the ingredients crisp up fully in the oil.
Can I make this less spicy?
Yes! Reduce the chili flakes to 1/2 cup or use milder flakes like gochugaru. The flavor stays rich while the heat mellows.

- BBQ Sausage Recipe Oven: Smoky Depth Without the Grill - September 28, 2026
- BBQ Chicken Bowl Recipe Rice: Smoky Sweetness Over Fluffy Grains - September 28, 2026
- Beef Cutlet Recipe Ideas: Crispy Breaded Patties With Bold Seasonings - September 28, 2026