
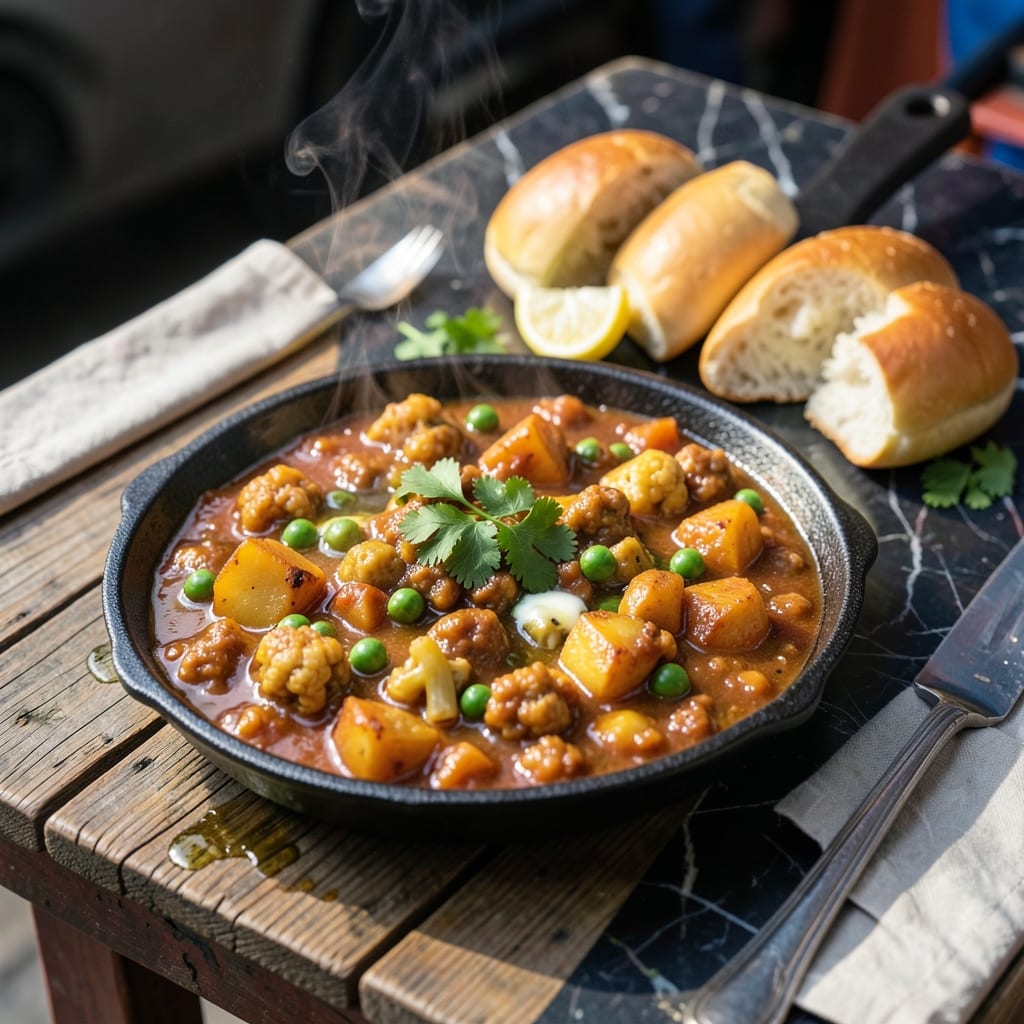
This Mumbai street food classic transforms humble vegetables into a rich, spiced medley that’s impossible to resist. The dish brings together potatoes, cauliflower, and peas in a buttery tomato gravy, creating layers of flavor that define authentic Indian comfort.
What makes this version special is the careful balance of spices—cumin, coriander, and garam masala—bloomed in hot oil to unlock their full potential. The vegetables are mashed just enough to keep some texture while soaking up the aromatic sauce.
The result is a vibrant, savory curry served with soft, buttered pav buns for the perfect bite every time. The combination of warm spices, tangy tomatoes, and creamy vegetables makes this dish a true crowd-pleaser.
Ready in under an hour, this recipe brings the bustling energy of Mumbai streets straight to your kitchen. Serve it hot with extra butter and a squeeze of lime for the full experience.
Ingredients for Pav Bhaji Recipe Street Food
Rich spices and fresh vegetables create this Mumbai street food classic with buttery pav buns.
| Ingredient | Amount | Notes |
|---|---|---|
| Potatoes 🥔 | 2 lb | Yukon Gold, peeled and cubed |
| Cauliflower 🥬 | 1 whole | Small head, cut into florets |
| Green Peas 🌱 | 1 cup | Fresh or frozen, thawed |
| Tomatoes 🍅 | 4 whole | Medium, finely chopped |
| Onion 🧅 | 1 whole | Large, finely chopped |
| Garlic Cloves 🧄 | 4 cloves | Minced for depth of flavor |
| Fresh Ginger 🌿 | 1 tbsp | Grated for freshness |
| Butter 🧈 | ¾ cup | Unsalted, divided for cooking and serving |
| Cumin Seeds 🌿 | 1 tsp | Toasted for aromatic base |
| Ground Coriander 🌿 | 1 ½ tbsp | Freshly ground preferred |
| Garam Masala 🌶️ | 1 ½ tsp | Warm spice blend for authenticity |
| Red Chili Powder 🌶️ | 1 tsp | Adjust to taste for heat |
| Turmeric Powder 🌿 | ½ tsp | For color and earthiness |
| Salt 🧂 | 1 ½ tsp | Adjust to preference |
| Pav Buns 🍞 | 8 whole | Soft dinner rolls, lightly buttered |
| Fresh Cilantro 🌿 | ¼ cup | Chopped for garnish |
| Lime 🍋 | 1 whole | Cut into wedges for serving |
The vegetables are key here. Yukon Gold potatoes give the creamiest texture, and fresh cauliflower has better flavor than frozen (though frozen works in a pinch). Look for bright red, firm tomatoes—they’ll break down perfectly into the gravy. For spices, Indian grocery stores have the freshest garam masala and cumin, but Penzeys is a solid backup for quality.
No garam masala? Mix equal parts cinnamon, cardamom, and cloves as a substitute. Fresh ginger and garlic are non-negotiable for the base flavor, but powdered at half the amount works if you’re desperate. Butter can’t be swapped here—it’s essential for authenticity. The pav buns can be any soft dinner rolls, but store-bought Hawaiian rolls are an easy shortcut.
The bhaji reheats well—store in the fridge for up to 3 days. Pav buns are best fresh, but can be toasted to revive. Leftovers taste even better the next day once the flavors meld. Freeze the bhaji for up to 3 months (the texture changes slightly, but it’s still delicious).
Why You’ll Love This Recipe
- One Pot Wonder: I just dump the potatoes, cauliflower, and peas in one pan, mash them up, and let the spices do the work.
- Buttery Spice Rush: The sizzling onions and tomatoes with that pav bhaji masala hit? Ridiculously good with every bite.
- Feeds a Hungry Crowd: I’ve served this at game nights and weeknight dinners—everyone ends up going back for seconds.
- Stretches for Days: Honestly, the leftovers taste even better the next day, and it’s so budget-friendly with simple veggies.
Step-by-Step Instructions for Mumbai-Style Spiced Vegetable Medley
Master the authentic street food technique with these precise steps for perfect results.
Step 1: Prepare and Cook the Vegetables
In a large pot, add the 2 lb Potatoes (peeled and cubed) and 1 whole Cauliflower (cut into florets) with enough water to cover. Boil over medium-high heat for 10-12 minutes until the potatoes are fork-tender and the cauliflower is soft.
Add the 1 cup Green Peas during the last 3 minutes of cooking. Drain the vegetables completely and set aside, but reserve about ½ cup of the cooking water. This starchy liquid will help create the perfect bhaji consistency later.
Step 2: Build the Spiced Base
Heat ¼ cup of the 0.75 cup Butter in a large, heavy-bottomed pan over medium heat. Add the 1 tsp Cumin Seeds and let them sizzle for 20-30 seconds until fragrant and slightly darker in color.
Immediately add the 1 whole Onion (finely chopped) and sauté for 4-5 minutes until translucent and lightly golden. Stir in the 4 cloves Garlic Cloves (minced), 1 tbsp Fresh Ginger (grated), and cook for another 1-2 minutes until the raw aroma disappears.
Add the 4 whole Tomatoes (finely chopped) and cook for 6-7 minutes until they break down into a thick, pulpy consistency. This forms the flavorful foundation of your bhaji.
Step 3: Combine and Season the Bhaji
Add the cooked vegetables to the spiced onion-tomato base. Mash everything together with a potato masher or the back of a spoon until you achieve a chunky yet cohesive texture. Pour in the reserved cooking water and stir well.
Sprinkle in the 1.5 tbsp Ground Coriander, 1.5 tsp Garam Masala, 1 tsp Red Chili Powder, 0.5 tsp Turmeric Powder, and 1.5 tsp Salt. Stir thoroughly and cook for 5-7 minutes on medium-low heat until the mixture thickens and the flavors meld together beautifully.
Taste and adjust the salt or chili powder if needed, but remember the pav buns will add their own subtle sweetness to balance the spices.
Step 4: Toast the Pav Buns and Finish
While the bhaji simmers, heat the remaining ½ cup Butter in a separate pan over medium heat. Split the 8 whole Pav Buns horizontally and lightly toast them in the butter for 1-2 minutes per side until golden brown and crisp on the edges.
Transfer the bhaji to a serving dish and garnish with the 0.25 cup Fresh Cilantro (chopped). Serve the hot bhaji with the buttered pav buns on the side. Accompany with 1 whole Lime (cut into wedges) for a bright, citrusy finish that cuts through the richness.
Pro Tips For Making Pav Bhaji Recipe Street Food
- Boil Potatoes Separately: I learned this the hard way—cook potatoes first until fork-tender, then add cauliflower and peas, or you’ll end up with mushy cauliflower and undercooked spuds.
- Mash While Hot: Don’t wait for the veggies to cool; mash them straight off the heat with a little water—this gives that signature creamy yet chunky street-food texture.
- Cook Onions Low: Caramelize the onions on medium-low for at least 8-10 minutes until deep golden; rushing this step leaves the bhaji tasting raw and harsh.
- Toast the Pav: Lightly butter and toast the pav buns on a hot griddle for 1-2 minutes per side—this keeps them from turning soggy when served with the saucy bhaji.
Serving Suggestions for This pav bhaji recipe street food
Traditional Presentation
Serve this dish on a large, shallow platter with the bhaji in the center and buttered pav buns arranged around it. I like to drizzle an extra 2 tbsp melted butter over the bhaji just before serving for that authentic Mumbai street food shine. 🔥
Garnish Essentials
Fresh cilantro and lime wedges are non-negotiable—they add brightness that cuts through the richness. Sprinkle 1 tbsp chaat masala on top for a tangy kick that takes it to the next level.
Side Pairings
A simple onion-tomato-cucumber salad on the side adds freshness. For extra heat, serve with green chutney or sev (crispy chickpea noodles) for crunch. These are classic Mumbai street food companions.
Family-Style Service
For gatherings, keep the bhaji warm in a slow cooker on low heat and let guests assemble their own pav sliders. Provide extra butter and lime wedges so everyone can customize to taste.
Beverage Pairings
Cold sweet lassi or masala chai balances the spices perfectly. For an adult version, a chilled Indian lager like Kingfisher cuts through the richness beautifully. 💛
Pro Tip
Toast the pav buns just before serving so they stay soft inside but crisp outside. If serving later, reheat bhaji with 2 tbsp water to restore its creamy texture.
Nutrition Facts
Frequently Asked Questions
Can I use frozen vegetables instead of fresh?
Yes, frozen works in a pinch. Thaw and drain well before cooking to avoid excess water. Fresh gives the best texture, but frozen maintains good flavor.
Why is butter so important in this dish?
Butter creates the authentic rich, creamy base that defines Mumbai-style bhaji. It carries the spices and coats the vegetables beautifully. Don’t substitute for full flavor.
How do I prevent the bhaji from becoming too mushy?
Mash the vegetables lightly with a potato masher, leaving some chunks. Cook potatoes until just tender, not falling apart. This keeps the texture perfect.
Can I make this ahead of time?
Prepare bhaji a day ahead—flavors deepen overnight. Store in fridge for up to 3 days or freeze for 3 months. Reheat with 2 tbsp water to restore creaminess.

- Pav Bhaji Recipe Food Lab: Mumbai Street Food Magic at Home - October 6, 2026
- Peach Jelly Recipe Without Pectin: Naturally Set Sweet Spread - October 6, 2026
- Pasta Salad Recipe With Zesty Italian Dressing: Bright Herb-Kissed Medley for Picnics - October 6, 2026