
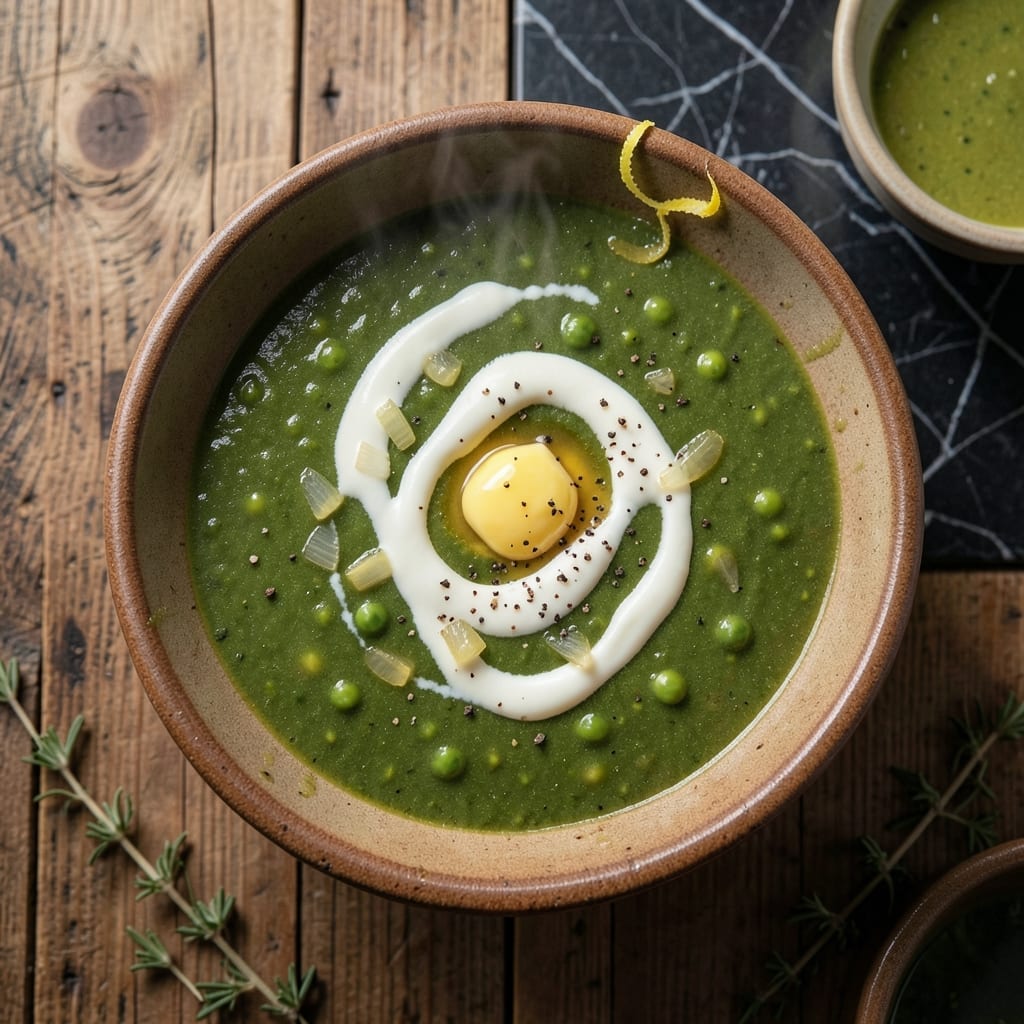
There’s nothing like a warm bowl of pea soup to bring the garden’s freshness straight to your table. This classic recipe captures the natural sweetness of peas in a creamy, comforting dish that feels both rustic and refined.
The key lies in balancing simple ingredients with the right technique. Fresh or frozen peas work beautifully, and a touch of mint adds a bright finish. The soup comes together in under 30 minutes, making it perfect for a quick yet satisfying meal.
You’ll end up with a velvety texture and a vibrant green color that’s as pleasing to the eye as it is to the palate. The flavors are clean and pure, letting the peas shine in every spoonful.
Serve with crusty bread for dipping or as a light starter to a hearty meal.
Ingredients for Pea Soup
Fresh peas, fragrant herbs, and a few pantry staples create this vibrant bowl.
| Ingredient | Amount | Notes |
|---|---|---|
| Frozen Green Peas 🌱 | 5 cups | Or use fresh shelled peas |
| Yellow Onion 🧅 | 1 whole | Medium, finely chopped |
| Garlic Cloves 🧄 | 3 cloves | Minced for depth |
| Vegetable Broth 🥣 | 4 cups | Low-sodium preferred |
| Heavy Cream 🥛 | ½ cup | Or substitute coconut milk |
| Unsalted Butter 🧈 | 2 tbsp | For sautéing aromatics |
| Fresh Mint Leaves 🌿 | ¼ cup | Chopped, for brightness |
| Kosher Salt 🧂 | 1 tsp | Adjust to taste |
| Ground Black Pepper 🌶️ | ½ tsp | Freshly cracked preferred |
| Fresh Lemon Juice 🍋 | 1 tbsp | Brightens the flavor |
| Olive Oil 🫒 | 1 tbsp | For garnish if desired |
The peas are the star here. Fresh shelled peas in spring are unbeatable, but frozen works year-round—just look for bright green, no ice crystals. The mint should be fresh and fragrant (dried won’t cut it). I grab my peas from Trader Joe’s—consistent quality, and their frozen section is always stocked. The onion and garlic form the flavor base, so don’t rush the sauté.
No heavy cream? Coconut milk or full-fat Greek yogurt add richness without the dairy. Vegetable broth can be swapped for water plus bouillon in a pinch. If mint isn’t your thing, fresh basil or dill work too. The lemon juice is non-negotiable though—it lifts all the flavors. Out of fresh? Bottled in a glass jar (not plastic) is acceptable.
Soup keeps 3-4 days in the fridge. Freeze without the cream for up to 3 months—add it fresh when reheating. The color dulls over time (normal), but the flavor stays bright. Always reheat gently to preserve that velvety texture.
Why You’ll Love This Recipe
- One Pot Wonder: I just dump frozen peas, onion, garlic, and broth in a pot—no thawing, no fuss.
- Velvety Richness: The heavy cream swirled in at the end makes it luxuriously smooth, and the garlic gives it that deep, cozy flavor.
- Meal Prep Hero: It tastes even better the next day, so I make a big batch for lunches all week.
- Budget Friendly: A bag of frozen peas and a few pantry staples stretch into a hearty meal that feeds my family for pennies.
Step-by-Step Instructions for Pea Soup
This method ensures a velvety texture and bright, garden-fresh flavor in every bowl.
Step 1: Sauté the Aromatics
Heat the 2 tbsp unsalted butter in a large pot over medium heat until melted. Add the 1 whole yellow onion, finely chopped, and cook for 5-6 minutes until translucent and soft. Stir frequently to prevent browning.
Add the 3 cloves garlic cloves, minced, and cook for an additional 1 minute until fragrant. Be careful not to let the garlic burn, as it will turn bitter. This base builds the foundation of flavor for the soup.
Step 2: Simmer the Peas
Pour in the 4 cups vegetable broth and bring to a gentle boil. Add the 5 cups frozen green peas and return to a simmer. Cook for 8-10 minutes until the peas are tender and heated through.
Season with 1 tsp kosher salt and 0.5 tsp ground black pepper. The peas will soften and absorb the flavors of the broth and aromatics, creating a rich, cohesive base for the soup.
Step 3: Blend Until Smooth
Remove the pot from heat and let it cool slightly for 2-3 minutes. Using an immersion blender, puree the soup until completely smooth. If you don’t have an immersion blender, carefully transfer the soup in batches to a regular blender.
For extra creaminess, stir in the 0.5 cup heavy cream after blending. The texture should be velvety and uniform, with no chunks remaining. This step transforms the mixture into a luscious, restaurant-quality soup.
Step 4: Finish with Fresh Flavors
Stir in the 1 tbsp fresh lemon juice and 0.25 cup fresh mint leaves, chopped. The lemon juice brightens the flavor, while the mint adds a refreshing, herbal note that complements the sweetness of the peas.
Taste and adjust the seasoning if needed, adding more salt or pepper to suit your preference. The soup should have a balanced, vibrant flavor profile with a hint of freshness from the mint and lemon.
Ladle the soup into bowls and drizzle with the 1 tbsp olive oil for a finishing touch, if desired. Serve immediately while hot.
Pro Tips For Making Pea Soup
- Thaw Peas First: I learned this the hard way—tossing frozen peas straight into hot broth makes them tough. Spread them on a tray for 10 minutes or run under cold water to soften before cooking.
- Sauté Onions Low: Cook your yellow onions on medium-low for at least 8-10 minutes until translucent—rushing this step leaves them raw and sharp in the final soup.
- Skip Boiling Broth: After adding vegetable broth, keep it at a gentle simmer. A rolling boil turns peas mushy and dulls the fresh flavor you want in this soup.
- Add Cream Last: Stir in the heavy cream only after turning off the heat to prevent curdling. Sounds fussy, but it keeps the soup silky smooth every time.
Storing and Reheating This Recipe
Refrigerator Storage
Let your soup cool for no more than 2 hours before transferring to airtight containers. I use glass jars with tight lids to preserve freshness. Store in the fridge at 40°F or below for up to 3-4 days. The flavors deepen overnight as the ingredients meld together. ❄️
Freezer Storage
For longer storage, freeze the soup without the cream for up to 3 months. Use quart-sized freezer bags to save space and lay them flat for efficient stacking. Leave 1 inch of headspace to allow for expansion during freezing.
Stovetop Reheating
Gently reheat the soup in a saucepan over medium-low heat for 8-10 minutes, stirring occasionally. If the soup is too thick, add a splash of vegetable broth to thin it out. Stir in the cream only after heating to maintain its smooth texture.
Microwave Reheating
For quick meals, microwave individual portions in 30-second intervals, stirring between each. Cover with a damp paper towel to prevent drying. Heat until it reaches 165°F—this usually takes about 2-3 minutes total. 🔥
Reviving the Color
The vibrant green may dull after storage, but a squeeze of fresh lemon juice and a sprinkle of chopped mint when reheating brings it back to life. This small touch restores the soup’s fresh, bright appearance.
Nutrition Facts
Frequently Asked Questions
Can I use fresh peas instead of frozen?
Use 5 cups fresh shelled peas. They may need 2-3 extra minutes of simmering to soften. Fresh peas often have a sweeter, more vibrant flavor.
Why does my soup turn grayish-green?
This happens when peas cook too long or at too high heat. Stick to the 8-10 minute simmer time and blend immediately to preserve the bright green color. Adding lemon juice at the end also helps.
Can I make this dairy-free?
Yes! Swap the heavy cream for coconut milk or cashew cream. Both add richness without dairy. Full-fat Greek yogurt also works in a pinch.
How can I make it thicker?
For a creamier texture, reduce the broth by 1 cup or stir in 1-2 tbsp cooked rice or mashed potato. Blending longer also increases thickness.

- BBQ Sausage Recipe Oven: Smoky Depth Without the Grill - September 28, 2026
- BBQ Chicken Bowl Recipe Rice: Smoky Sweetness Over Fluffy Grains - September 28, 2026
- Beef Cutlet Recipe Ideas: Crispy Breaded Patties With Bold Seasonings - September 28, 2026