
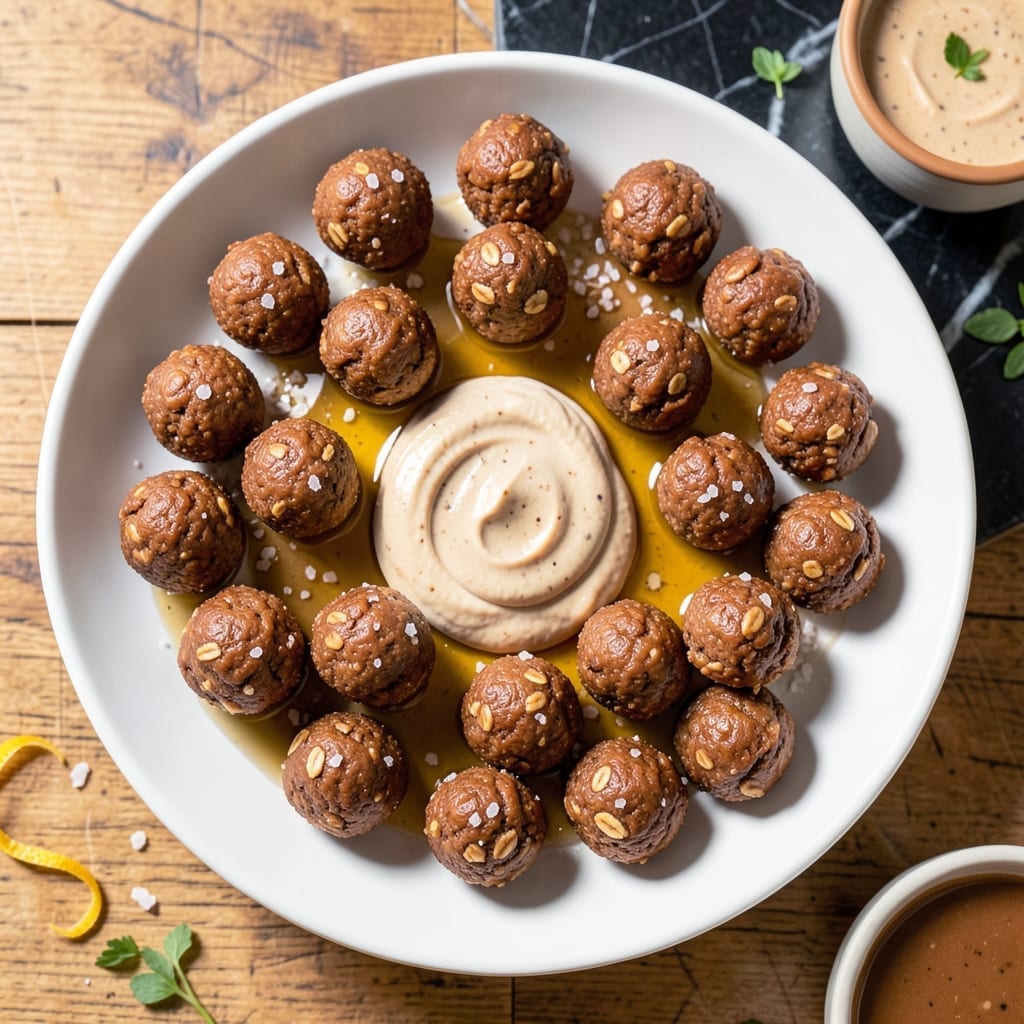
These sweet and salty clusters deliver all the satisfaction of classic peanut butter treats without a single chocolate chip. The combination of creamy peanut butter, hearty oats, and a touch of salt creates a perfectly balanced bite.
This no-bake recipe comes together in 15 minutes using just one bowl and simple pantry staples. The oats add chewy texture while the peanut butter provides rich, nutty flavor that’s hard to resist.
Each bite offers a delightful contrast between the natural sweetness and a hint of salt that makes them irresistibly moreish. They’re ideal for snacking, lunchboxes, or satisfying sweet cravings without the chocolate.
Store in an airtight container for up to a week, though they rarely last that long. The mixture holds its shape beautifully at room temperature.
Ingredients for Peanut Butter Balls Recipe No Chocolate
Just a handful of pantry staples for these irresistible sweet and salty clusters.
| Ingredient | Amount | Notes |
|---|---|---|
| Creamy Peanut Butter 🥜 | 1 cup | Natural or commercial variety |
| Old-Fashioned Rolled Oats 🌾 | 2 cups | Certified gluten-free if needed |
| Honey 🍯 | ⅓ cup | Maple syrup for vegan option |
| Vanilla Extract 🌿 | 1 tsp | Pure extract preferred |
| Sea Salt 🧂 | ½ tsp | Plus extra for sprinkling |
| Unsalted Butter 🧈 | 2 tbsp | Melted, or coconut oil |
| Ground Cinnamon 🌶️ | ½ tsp | Optional for warmth |
| Chia Seeds 🌿 | 1 tbsp | Optional for extra texture |
The peanut butter is the foundation here. Natural or commercial both work, but natural may need a good stir before measuring. For oats, old-fashioned rolled oats give the best chewy texture—quick oats get mushy. I grab mine from Quaker or the bulk bins at Whole Foods. The honey adds moisture and sweetness, but it must be liquid—crystallized honey won’t incorporate properly.
Need a vegan swap? Maple syrup or agave at a 1:1 ratio replaces honey perfectly. Out of vanilla? A pinch of ground cinnamon adds warmth. No chia seeds? Skip them or swap for flaxseeds. The butter can be coconut oil for dairy-free—just let it cool slightly before mixing to avoid melting the peanut butter.
These keep beautifully at room temperature for 1 week in an airtight container. For longer storage, freeze for up to 3 months—thaw at room temp for 30 minutes before serving. The mixture firms up as it cools, so don’t stress if it seems soft at first.
Why You’ll Love This Recipe
- Minimal Effort: I just mix, roll, and chill—no baking, no fancy tools, and honestly, my kids can help without making a mess.
- Sweet & Salty Bliss: The honey and sea salt make the peanut butter taste even richer, like a grown-up version of the snack I loved as a kid.
- Grab-and-Go Fuel: I toss a few in my bag for a post-gym boost or pack them in lunches—they hold up way better than cookies.
- Budget Stretcher: Oats and peanut butter are cheap staples, and one batch makes enough to last a week. Here’s what sold me—no waste, just pure, filling snacks.
Step-by-Step Instructions for Peanut Butter Oat Clusters
Here’s the method. Straightforward, tested, works every time.
Step 1: Melt Butter and Combine Wet Ingredients
In a microwave-safe bowl, melt the 2 tbsp Unsalted Butter in 20-second intervals until completely liquid. I like to use a large bowl because we’ll be adding all the other ingredients here.
Once melted, add the 1 cup Creamy Peanut Butter, 0.33 cup Honey, and 1 tsp Vanilla Extract. Stir until the mixture is smooth and fully combined. The peanut butter should blend easily into the warm butter, creating a glossy, thick mixture.
If using natural peanut butter, make sure to stir it well before measuring to incorporate the oil that separates to the top.
Step 2: Incorporate Dry Ingredients and Seasonings
Add the 2 cups Old-Fashioned Rolled Oats, 0.5 tsp Sea Salt, 0.5 tsp Ground Cinnamon, and 1 tbsp Chia Seeds to the wet mixture. Use a sturdy wooden spoon or silicone spatula to fold everything together until all the oats are evenly coated.
The mixture will be thick and slightly sticky—that’s exactly what we want. If it seems too dry, let it sit for 2-3 minutes to allow the oats to absorb some of the moisture from the wet ingredients before deciding to add anything.
This is the moment that matters: ensure every oat is well coated with the peanut butter mixture for consistent flavor in each bite.
Step 3: Chill the Mixture for Easy Handling
Cover the bowl with plastic wrap or a clean kitchen towel and refrigerate for 30 minutes. This chilling step is crucial for two reasons: it makes the mixture easier to handle, and it helps the clusters hold their shape when formed.
While waiting, line a baking sheet with parchment paper. You’ll also want to have a small bowl of water nearby to dip your fingers in when rolling the clusters—this prevents sticking and makes the process much smoother.
Don’t skip this step (I learned the hard way). Warm mixture will be too sticky to work with and won’t form proper clusters.
Step 4: Form and Set the Clusters
Using a tablespoon or small cookie scoop, portion out the chilled mixture into 1-inch balls. Roll each portion between your palms to create smooth, round clusters. You should get about 16-18 clusters from this recipe.
Place the formed clusters on your prepared baking sheet. If you want to add extra texture, you can press a few additional oats onto the surface of each cluster. Once all clusters are formed, refrigerate them for another 20 minutes to set completely.
Real talk: the mixture might seem a bit crumbly at first, but the warmth from your hands will help it come together as you roll.
Step 5: Store and Serve
Transfer the set clusters to an airtight container. They’ll keep in the refrigerator for up to 2 weeks or in the freezer for 3 months. I like to layer them between sheets of parchment paper to prevent sticking.
Serve at room temperature for the best texture. The clusters should be firm enough to hold their shape but still slightly chewy from the oats and peanut butter.
For presentation, arrange them on a serving platter and sprinkle with a tiny pinch of additional Sea Salt to enhance the sweet and salty contrast that makes these clusters so addictive.
Pro Tips For Making Peanut Butter Balls Recipe No Chocolate
- Chill the Mixture: Pop the bowl in the fridge for 20-30 minutes before rolling—this keeps the peanut butter from sticking to your hands and makes the balls hold their shape better.
- Toast the Oats: Lightly toast the rolled oats in a dry pan for 2-3 minutes until fragrant. It adds a nutty depth that raw oats just can’t deliver.
- Skip Runny Honey: Use thick, raw honey instead of the cheap liquid stuff. I learned this the hard way—runny honey makes the mixture too sticky to handle.
- Add Salt Last: Fold in the sea salt at the very end after tasting the mixture. The saltiness can vary, and you don’t want to overdo it.
Pro Cooking Tips for Perfect Results
Peanut Butter Selection
I always use Jif or Skippy creamy peanut butter for consistent texture and flavor. Natural peanut butter works but requires thorough stirring to reincorporate the oil. The oil separation can affect the binding, so I avoid it for this recipe. 🥜
Perfect Oat Consistency
Old-fashioned rolled oats are non-negotiable for the ideal chewy texture. Quick oats become mushy, and steel-cut stay too firm. I measure exactly 2 cups for the right ratio to the wet ingredients.
Honey Temperature Tip
If your honey is crystallized, warm it for 10-15 seconds in the microwave before mixing. This ensures it blends smoothly with the peanut butter. Cold honey creates a grainy texture that’s hard to fix.
Chilling Strategy
Don’t rush the 30-minute chill—this is key for easy rolling. I set a timer and prep my baking sheet during this time. The mixture should feel firm but still pliable when ready. ❄️
Rolling Technique
Keep a small bowl of water nearby to dip your fingers in while rolling. This prevents sticking and helps create smooth, uniform clusters. I use a 1-tbsp cookie scoop for consistent sizing.
Final Setting
The second 20-minute chill firms up the clusters completely. I check by pressing one lightly—if it holds shape, they’re ready. Skip this and they may crumble when stored.
Nutrition Facts
Frequently Asked Questions
Can I use crunchy peanut butter instead?
Yes, but the texture will be different. Crunchy peanut butter adds extra nuttiness and bite, but may make the clusters harder to hold together. For best results, stick with creamy.
Why do I need to chill the mixture?
Chilling firms up the mixture so it’s easier to roll into balls. Without it, the clusters may fall apart or stick to your hands. 30 minutes is the sweet spot.
Can I skip the honey?
Substitute with maple syrup or agave at a 1:1 ratio. These swaps keep the sweetness and binding properties intact while making the recipe vegan.
How do I store leftovers?
Keep in an airtight container at room temperature for up to 1 week. For longer storage, freeze for 3 months and thaw before serving.

- Pina Colada Dip Recipe Red Lobster: Tropical Creaminess With Toasted Coconut - October 12, 2026
- Pickled Sweet Cherry Peppers Recipe Canning: Tangy Heat for Pantry Staples - October 12, 2026
- Peppercorn Sauce Recipe Vegan: Rich Umami Depth Without Cream - October 12, 2026