
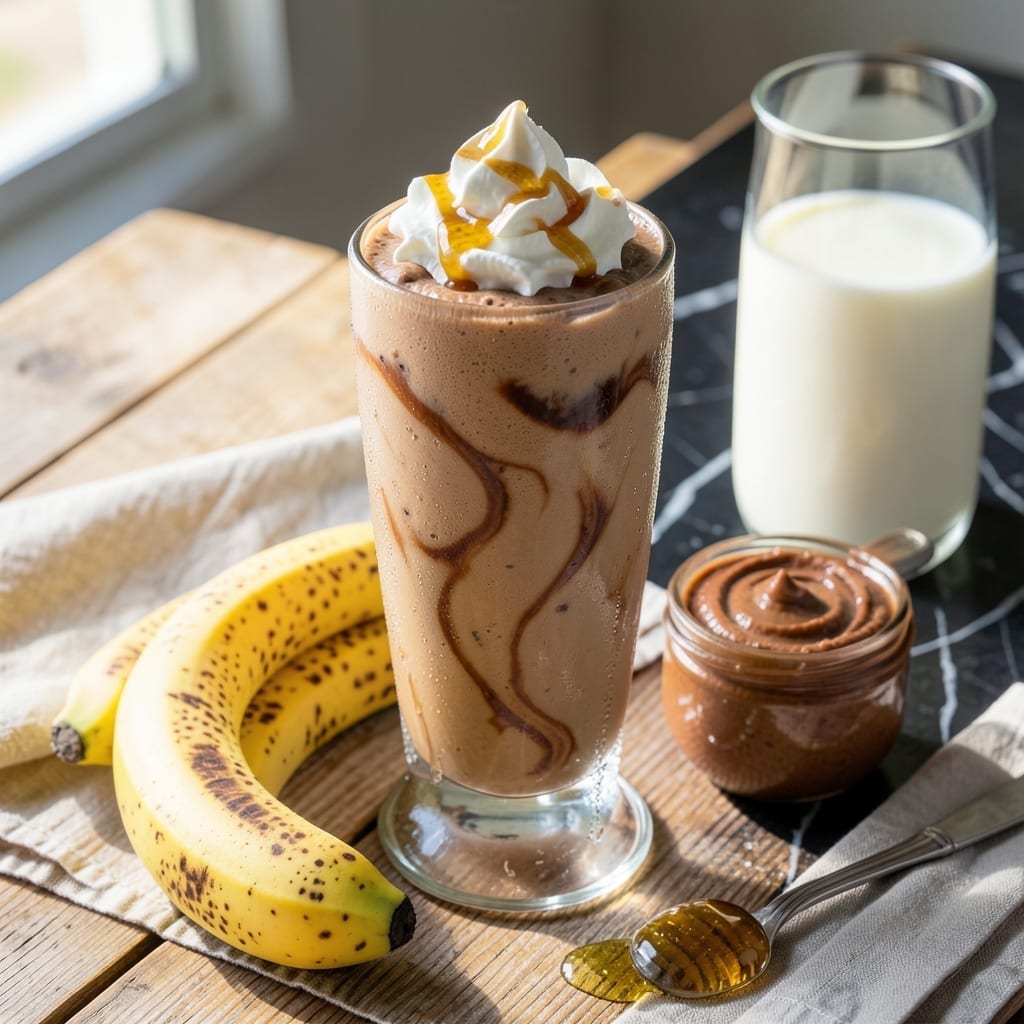
This milkshake delivers creamy indulgence without a scoop of ice cream in sight. I developed the recipe after realizing frozen bananas could replace ice cream’s texture perfectly. David, my taste-tester, was sold on the first sip.
The secret is using overripe bananas—their natural sweetness and softness create that thick, velvety consistency. A splash of milk and a spoonful of peanut butter transform simple ingredients into something extraordinary.
Each sip offers a balance of nutty richness and fruity sweetness, with no icy aftertaste. It’s a foolproof method that works with any milk you have on hand, dairy or plant-based.
Serve chilled for the best experience. This one’s a Peachtree Street diner trick I still use today.
Ingredients for Peanut Butter Banana Milkshake Recipe Without Ice Cream
Short list. Big flavor. Probably have most of this already.
| Ingredient | Amount | Notes |
|---|---|---|
| Ripe Bananas 🍌 | 3 whole | Frozen, overripe preferred |
| Peanut Butter 🥜 | ¼ cup | Creamy or crunchy works |
| Milk 🥛 | 1 cup | Any variety, dairy or plant-based |
| Vanilla Extract 🌿 | 1 tsp | Pure vanilla for best flavor |
| Honey 🍯 | 2 tbsp | Adjust to taste preference |
| Ice Cubes ❄️ | 1 cup | Optional for extra chill |
| Ground Cinnamon 🌶️ | ¼ tsp | Enhances banana flavor |
| Salt 🧂 | 0.125 tsp | Balances sweetness |
| Vanilla Greek Yogurt 🥛 | ½ cup | Adds creaminess and protein |
| Chia Seeds 🌾 | 1 tsp | Optional for extra thickness |
The bananas are non-negotiable here. Overripe, frozen solid—they’re the magic ingredient that replaces ice cream’s texture. I grab mine from Publix or Whole Foods when they’re on sale and going brown, then freeze them in chunks. The peanut butter? Jif or Skippy works fine, but I’m partial to the natural stuff from Trader Joe’s (stir it well first).
No honey? Maple syrup or agave does the trick. Using plant milk? Oat or soy gives the creamiest results—avoid almond if you want maximum richness. The Greek yogurt can be swapped for dairy-free vanilla yogurt. Want it thicker? Add a few more ice cubes or let it sit for 5 minutes before serving.
Best consumed immediately, but leftovers keep in the fridge for 1 day (stir well before drinking). Freeze extras in popsicle molds for a cool treat later. The bananas stay good in the freezer for 3 months.
Why You’ll Love This Recipe
- 5-Minute Blend: I dump everything in the blender and hit pulse—no chopping, no waiting, just creamy peanut butter banana goodness in minutes.
- Sweet & Nutty Heaven: The ripe bananas and honey make it naturally sweet, while the peanut butter adds that rich, salty depth I crave.
- Breakfast or Dessert: Honestly, I make this for a quick breakfast rush or as a post-dinner treat—it works for both.
- Pantry Staples Only: No special trips to the store. I always have bananas, peanut butter, and milk on hand, so it’s my go-to when I’m out of everything else.
Step-by-Step Instructions for Peanut Butter Banana Milkshake Without Ice Cream
Here’s the method for a velvety smooth shake that’s rich, thick, and totally satisfying.
Step 1: Prep and Freeze the Base Ingredients
Peel the 3 whole Ripe Bananas and slice them into ½-inch rounds. Spread the slices on a parchment-lined tray and freeze for at least 2 hours until solid and icy. This is non-negotiable for that ultra-creamy texture—fresh bananas just won’t cut it.
While the bananas freeze, measure out the 0.25 cup Peanut Butter, 1 cup Milk, 1 tsp Vanilla Extract, and 0.5 cup Vanilla Greek Yogurt. Having everything ready to go prevents the base from warming up once you start blending.
Step 2: Layer Ingredients for Optimal Blending
Add the frozen banana slices to the blender first—they’ll help break down the thicker ingredients. Next, add the 0.25 cup Peanut Butter, 0.5 cup Vanilla Greek Yogurt, 2 tbsp Honey, 1 tsp Vanilla Extract, 0.25 tsp Ground Cinnamon, and 0.125 tsp Salt.
Pour in ½ cup of the Milk to start—this gives the blades something to work with before adding the rest. If you’re using the 1 tsp Chia Seeds for extra thickness, sprinkle them in now. The order matters: liquids last to avoid overloading the blender.
Step 3: Blend to Silky Perfection
Secure the lid and start blending on low speed, then gradually increase to high. Use a tamper (if your blender has one) to push the mixture toward the blades. After 20-30 seconds, pause and check the consistency. It should be thick but pourable, with no visible chunks of banana or peanut butter.
If the mixture is too thick, add the remaining ½ cup Milk 1 tablespoon at a time until it reaches your desired texture. For an extra-chilled result, toss in the 1 cup Ice Cubes and blend for another 10-15 seconds until smooth. Stop as soon as it’s uniform—over-blending can make it thin.
Step 4: Taste and Adjust for Flavor Balance
Pour a small amount into a glass and taste. The shake should be sweet with a hint of saltiness from the peanut butter and 0.125 tsp Salt. If it needs more sweetness, drizzle in a bit more honey, but go slow—you can always add, but you can’t take away.
The 0.25 tsp Ground Cinnamon and 1 tsp Vanilla Extract should be subtle but present. If the flavors aren’t popping, let the shake sit for 2-3 minutes to meld. The Vanilla Greek Yogurt adds a tangy depth that balances the richness of the peanut butter.
Step 5: Serve Immediately for Maximum Creaminess
Pour the milkshake into chilled glasses—cold vessels keep it frosty longer. The texture is best right after blending, when it’s thick and velvety. If you’re using the 1 tsp Chia Seeds, you’ll notice it thickens slightly as it sits, so serve promptly.
Garnish with a drizzle of peanut butter or a sprinkle of cinnamon if you like, but it’s honestly perfect as is. Each sip should be smooth, creamy, and packed with banana-peanut butter flavor, with no icy or grainy bits. Makes 2 generous servings.
Pro Tips For Making Peanut Butter Banana Milkshake Recipe Without Ice Cream
- Chill the Bananas: Freeze your ripe bananas for at least 2 hours before blending—this gives the milkshake that thick, creamy texture you’d normally get from ice cream.
- Warm the Honey: Microwave the honey for 10-15 seconds to loosen it up, so it blends smoothly instead of sinking to the bottom.
- Use Room Temp Milk: Skip the cold milk straight from the fridge; room temperature blends better with peanut butter and prevents clumping.
- Add Peanut Butter Last: Blend the bananas, milk, and honey first, then add peanut butter—this prevents it from sticking to the bottom and ensures even mixing.
Storing and Reheating This Recipe
Fridge Storage
This shake is best fresh, but leftovers keep in an airtight jar for 24 hours. Stir well before drinking as the ingredients may separate. I use Ball mason jars from my Peachtree Street days—they seal perfectly. ❄️
Freezing for Later
Pour into popsicle molds for a cool treat that lasts 1 month. The texture changes slightly, becoming more like a smoothie pop. David’s kids love this version on hot Austin afternoons.
Reviving Leftovers
If stored in the fridge, give it a good shake or stir. For thicker consistency, add 2-3 ice cubes and re-blend for 10 seconds. This restores the creamy texture beautifully. 💡
Banana Prep Storage
Keep peeled, sliced bananas in a ziplock bag in the freezer for up to 3 months. They’re ready to blend anytime. I always have a stash from Central Market sales.
Equipment Cleanup
Rinse your blender immediately with warm water—peanut butter hardens quickly. A drop of dish soap and 30 seconds of blending with water cleans it effortlessly. This is a Nana Mae trick I still use.
Nutrition Facts
Frequently Asked Questions
Why do the bananas need to be frozen?
Frozen bananas create the thick, creamy texture that replaces ice cream. Fresh bananas make the shake too thin and watery. Freeze for at least 2 hours for best results.
Can I make this dairy-free?
Use almond, oat, or soy milk and dairy-free yogurt. Oat milk gives the creamiest texture. The flavor stays delicious.
How can I make it thicker?
Add 1-2 extra ice cubes or 1 tsp chia seeds before blending. Let it sit for 5 minutes after blending to thicken naturally.
What if I don’t have honey?
Maple syrup or agave work perfectly as 1:1 substitutes. Adjust to taste—start with 1 tbsp and add more if needed.

- Pina Colada Dip Recipe Red Lobster: Tropical Creaminess With Toasted Coconut - October 12, 2026
- Pickled Sweet Cherry Peppers Recipe Canning: Tangy Heat for Pantry Staples - October 12, 2026
- Peppercorn Sauce Recipe Vegan: Rich Umami Depth Without Cream - October 12, 2026