
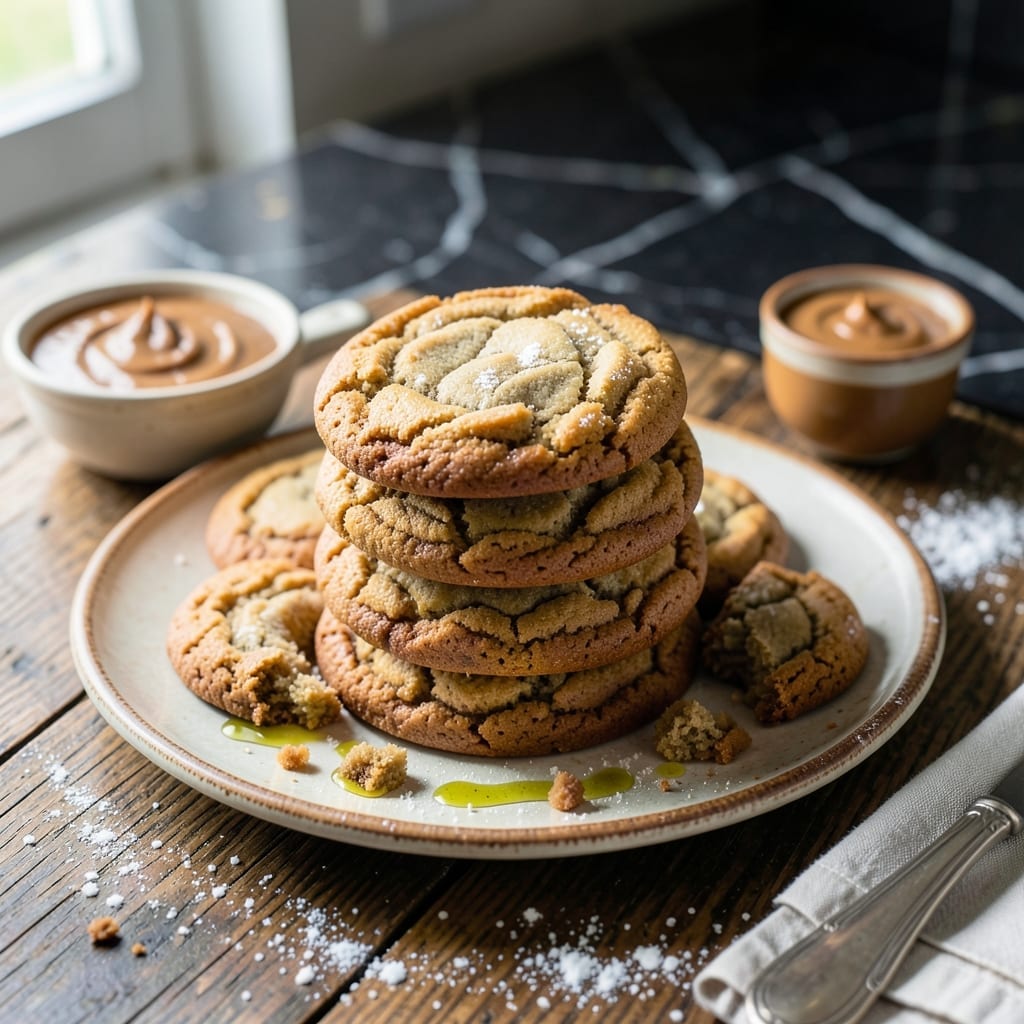
Natural peanut butter transforms these classic cookies, delivering a deeper, nuttier flavor that commercial versions can’t match. The oil separation in natural peanut butter is the secret to achieving chewy edges and a tender center that melts in your mouth.
This recipe requires one simple adjustment: stir the peanut butter thoroughly before measuring to ensure consistent texture and flavor distribution. The result is a cookie that’s rich with peanut flavor, without the added sugars or hydrogenated oils found in processed spreads.
You’ll notice the difference immediately—the cookies bake up golden with perfectly crisp edges and a soft, dense interior. The natural peanut oil creates a slightly crumbly texture that’s irresistibly satisfying.
Bake at 350°F for exactly 10-12 minutes for optimal results. The aroma alone will have everyone gathering in the kitchen.
Ingredients for Peanut Butter Cookie Recipe Using Natural Peanut Butter
Natural peanut butter plus pantry staples create cookies with rich, nutty depth and perfect texture.
| Ingredient | Amount | Notes |
|---|---|---|
| Natural Peanut Butter 🥜 | 1 cup | Stirred thoroughly before measuring |
| All-Purpose Flour 🌾 | 1 ¼ cups | Sifted for even texture |
| Granulated Sugar 🍚 | ¾ cup | Fine grain white sugar |
| Brown Sugar 🟤 | ¾ cup | Packed, light or dark |
| Large Egg 🥚 | 1 whole | Room temperature preferred |
| Vanilla Extract 🌿 | 1 tsp | Pure vanilla for best flavor |
| Baking Soda ⚗️ | 1 tsp | Fresh for optimal rise |
| Salt 🧂 | ½ tsp | Fine sea salt or table salt |
| Unsalted Butter 🧈 | ½ cup | Softened to room temperature |
| Chopped Roasted Peanuts 🥜 | ½ cup | Optional for added crunch |
The peanut butter is the star here. Natural, no-sugar-added brands like Smucker’s Natural or Crazy Richard’s work best—the oil separation is key for that signature chewy-crisp texture. Avoid processed spreads with hydrogenated oils, as they won’t deliver the same depth. Store-bought is fine, but check labels for added sugars. The flour should be all-purpose; no need for specialty types unless you’re gluten-free.
No natural peanut butter? Homemade works too—just blend roasted peanuts until smooth. Swap the butter for coconut oil if you prefer a dairy-free option, though the flavor will differ slightly. Brown sugar can be replaced with coconut sugar at a 1:1 ratio, but expect a deeper caramel note. For extra crunch, toast the chopped peanuts before adding (worth the extra minute).
Dough keeps in the fridge for 3 days or freezes beautifully for 3 months. Baked cookies stay fresh in an airtight container for 5 days. The natural oils mean they’ll soften over time—re-crisp in the oven if desired (5 minutes at 350°F).
Why You’ll Love This Recipe
- One Bowl Wonder: I mix everything right in one bowl—no creaming butter, just stir the natural peanut butter with the sugars and egg.
- Rich Nutty Bite: The natural peanut butter gives these cookies a deeper, toastier flavor than regular versions.
- Freezer Friendly: I always double the batch and freeze half—fresh cookies in 12 minutes whenever a craving hits.
- Pantry Staples: All-purpose flour, sugar, and an egg are things I already have, so these cost almost nothing to make.
Step-by-Step Instructions for Peanut Butter Cookies
Achieve bakery-quality results with this precise method for chewy, flavorful cookies.
Step 1: Cream Butter and Sugars with Peanut Butter
In a stand mixer with the paddle attachment, beat the 0.5 cup Unsalted Butter with the 0.75 cup Granulated Sugar and 0.75 cup Brown Sugar on medium speed for 3-4 minutes until light and fluffy. The mixture should triple in volume and turn pale.
Add the 1 cup Natural Peanut Butter and beat for another 2 minutes until fully incorporated. Natural peanut butter can be denser, so scrape the bowl halfway through. This step creates the base for that signature nutty depth.
Step 2: Incorporate Wet and Dry Ingredients
Beat in the 1 whole Large Egg and 1 tsp Vanilla Extract on medium speed for 30 seconds until emulsified. The batter will look slightly curdled at first but will smooth out as the egg integrates.
In a separate bowl, whisk together the 1.25 cups All-Purpose Flour, 1 tsp Baking Soda, and 0.5 tsp Salt. Gradually add this to the wet mixture on low speed, mixing just until combined. Overmixing develops gluten, which makes cookies tough.
Step 3: Fold in Peanuts and Chill Dough
Using a spatula, fold in the 0.5 cup Chopped Roasted Peanuts by hand. The dough will be thick and slightly sticky. If the chopped roasted peanuts were omitted, the cookies will still be delicious but with less crunch.
Cover the bowl and refrigerate for at least 30 minutes (or up to 24 hours). Chilling solidifies the fat, which prevents excessive spreading during baking and intensifies the flavor. This step is non-negotiable for achieving the promised chewy edges.
Step 4: Shape, Bake, and Cool
Preheat the oven to 350°F and line two baking sheets with parchment paper. Scoop the dough into 1.5-tablespoon portions (about the size of a golf ball) and roll into balls. Place them 2 inches apart on the prepared sheets—they’ll spread.
Bake for 10-12 minutes until the edges are golden brown but the centers still look slightly underdone. They’ll continue cooking on the hot pan after removal. Let them cool on the baking sheet for 5 minutes before transferring to a wire rack to cool completely.
Pro Tips For Making Peanut Butter Cookie Recipe Using Natural Peanut Butter
- Chill the Dough: Natural peanut butter makes dough stickier, so refrigerate it for 30 minutes before baking. I learned this the hard way—my first batch spread like pancakes.
- Stir the Peanut Butter: The oil separates in natural peanut butter, so stir it thoroughly before measuring. Skipping this leaves cookies greasy in spots.
- Watch the Bake Time: These cookies burn fast—pull them at 10-12 minutes when edges are just golden. After burning three batches, I finally figured out they keep cooking on the tray.
- Use Room-Temp Egg: A cold egg seizes the peanut butter, making mixing a struggle. Let it sit out for 15 minutes—sounds weird, but it works.
Wine and Beer Pairings for This Recipe
Dessert Wines
A glass of Moscato d’Asti with its light fizz and honeyed stone fruit notes pairs beautifully with the rich, nutty depth here. The effervescence cuts through the cookie’s richness while complementing the natural peanut flavor. I love how the low alcohol content keeps the pairing light. 🍷
Coffee Pairings
A medium roast coffee works wonderfully—try Starbucks Breakfast Blend for its bright acidity and caramel notes that mirror the cookie’s sweetness. The bitterness balances the sugar in the recipe, creating a perfect bite-and-sip harmony.
Stout Beers
For beer lovers, a milk stout like Left Hand Milk Stout brings chocolate and roasted malt flavors that echo the cookie’s depth. The creamy mouthfeel of the beer mirrors the cookie’s tender center. Serve slightly chilled for the best experience. 🍺
Port Wines
A tawny port with its caramel and nutty notes creates a sophisticated pairing. The 10-year aged versions offer complexity without overpowering the cookies. I find this works especially well for holiday gatherings.
Non-Alcoholic
For a non-alcoholic option, try cold brew coffee with a splash of vanilla syrup. The smooth, bold coffee flavor stands up to the peanut butter while the vanilla enhances the cookie’s sweetness. Serve over ice for a refreshing contrast.
Nutrition Facts
Frequently Asked Questions
Why stir natural peanut butter before using?
Stirring redistributes the separated oils for consistent texture and flavor. Without this, some cookies may be dry while others are greasy.
Can I skip chilling the dough?
No, chilling for at least 30 minutes prevents excessive spreading. Warm dough creates thin, flat cookies instead of the promised chewy texture.
How do I know when they’re done baking?
Look for golden edges at 10-12 minutes. The centers will look slightly underdone but firm up as they cool on the pan.
What if my cookies spread too much?
This usually means the dough was too warm. Next time, ensure butter is softened but not melted, and chill the dough longer.

- Pina Colada Dip Recipe Red Lobster: Tropical Creaminess With Toasted Coconut - October 12, 2026
- Pickled Sweet Cherry Peppers Recipe Canning: Tangy Heat for Pantry Staples - October 12, 2026
- Peppercorn Sauce Recipe Vegan: Rich Umami Depth Without Cream - October 12, 2026