
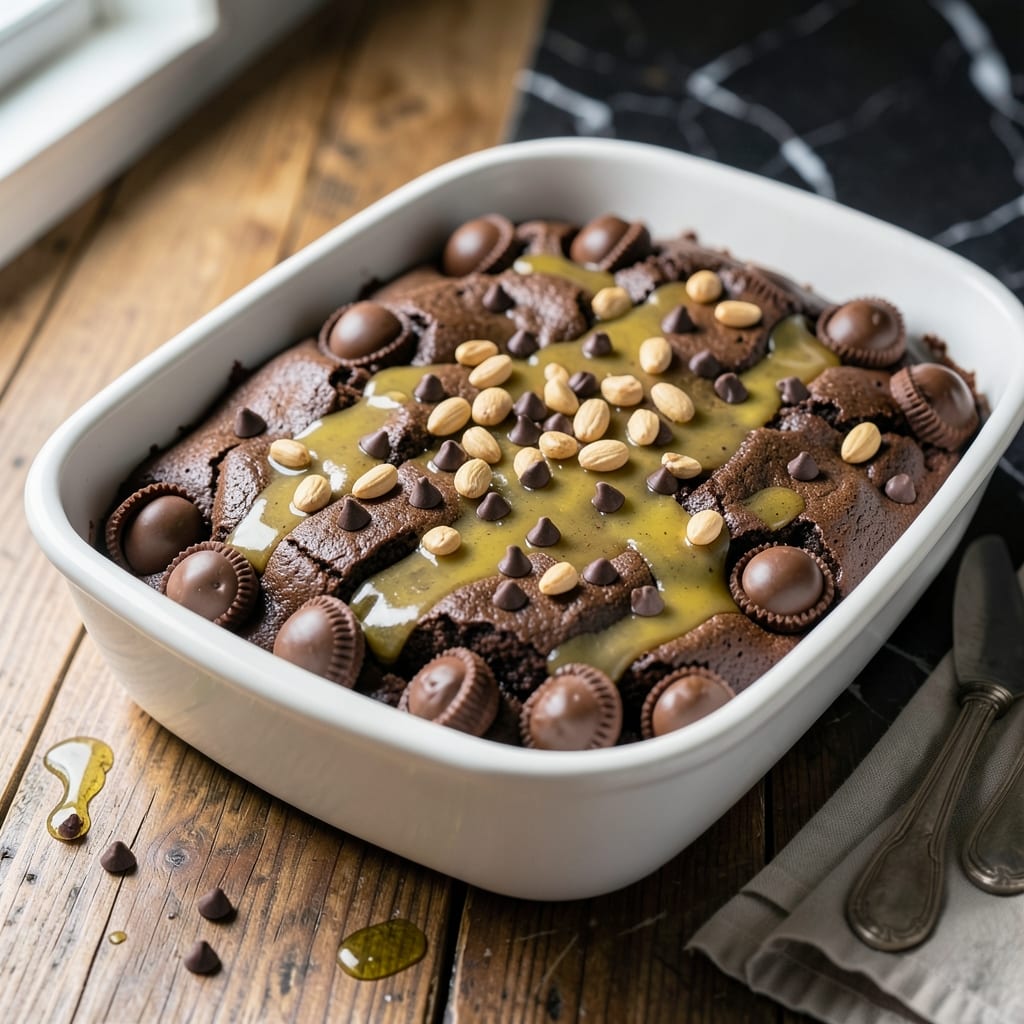
This layered dessert combines the ease of cake mix with the decadence of peanut butter cups for a treat that’s impossible to resist. David declared it my best creation after the first bite.
No mixing bowls required—just layer the ingredients in a pan and let the oven do the work. The result is a rich, fudgy base topped with melted peanut butter cups that create pockets of creamy, chocolatey goodness.
The beauty lies in its simplicity: a box of cake mix, a few pantry staples, and peanut butter cups transform into something extraordinary. It’s the kind of dessert that disappears fast at gatherings.
Perfect for potlucks or when you need a quick, crowd-pleasing sweet. Here’s how to make it.
Ingredients for Peanut Butter Cup Dump Cake Recipe with Cake Mix
A box of cake mix and peanut butter cups create this no-fuss layered dessert everyone loves.
| Ingredient | Amount | Notes |
|---|---|---|
| Chocolate Cake Mix 🍫 | 1 box | 15.25 oz or similar size |
| Peanut Butter Cups 🥜 | 24 pieces | Standard size, unwrapped |
| Unsalted Butter 🧈 | 1 cup | Melted for topping |
| Sweetened Condensed Milk 🥛 | 1 can | 14 oz size typically |
| Chocolate Chips 🍫 | 1 cup | Semi-sweet or milk chocolate |
| Chopped Peanuts 🥜 | ½ cup | For crunchy topping |
| Vanilla Extract 🌿 | 1 tsp | Pure extract recommended |
| Salt 🧂 | ¼ tsp | For flavor balance |
| Granulated Sugar 🍚 | ½ cup | Optional for sweeter taste |
| Heavy Cream 🥛 | 1 cup | For optional drizzle |
| Powdered Sugar 🍚 | ¼ cup | For optional dusting |
The cake mix is your base—any chocolate variety works, but devil’s food gives that extra-rich color. Reese’s peanut butter cups are the classic choice (the standard size, not minis). For the condensed milk, Eagle Brand is the most reliable at any grocery store. If you’re adding peanuts, get the dry-roasted kind in the baking aisle for best crunch.
No chocolate chips? Chop up a chocolate bar instead—it melts beautifully. Swap peanut butter cups for almond butter cups if you’re feeling fancy. The butter can be salted if that’s what you’ve got (just skip the added salt). Coconut oil works in a pinch for a dairy-free version, though the flavor changes slightly.
Store covered at room temp for 3 days, or refrigerate for up to 5 days. The flavors actually deepen overnight. Leftovers reheat beautifully—10 seconds in the microwave makes it taste fresh-baked. Freezes well too, 3 months if wrapped tight.
Why You’ll Love This Recipe
- Five Ingredients: I dump, melt, and bake—no mixing bowls, no fuss, just a box of chocolate cake mix and a handful of peanut butter cups doing all the work.
- Potluck MVP: I’ve brought this to three summer BBQs this month. Always the first thing gone.
- Stays Fresh: Honestly, it tastes even better the next day—if it lasts that long.
Step-by-Step Instructions for Peanut Butter Cup Dump Cake
Here’s how I layer this no-bake treat without turning on the oven.
Step 1: Prepare the Base Layer with Cake Mix
Start by spreading the 1 box Chocolate Cake Mix evenly across the bottom of a 9×13-inch baking dish. I press it down gently with the back of a spoon to create a uniform layer. This dry base will absorb the moisture from the layers above, transforming into a fudgy, cake-like texture as it sits.
Don’t pack it too tightly—just enough to remove any air pockets. The mix should look smooth and level, covering the entire bottom of the dish. This step sets the foundation for the entire dessert.
Step 2: Add the Peanut Butter Cup Layer
Unwrap all 24 pieces Peanut Butter Cups and arrange them in a single layer directly on top of the cake mix. I place them close together, slightly overlapping if needed, to ensure every bite has a gooey, chocolate-peanut butter surprise. The heat from the next layers will soften them into a rich, melted consistency.
If any peanut butter cups are larger or irregularly shaped, I break them into smaller pieces to fill gaps. This ensures even coverage and a consistent texture throughout the dish.
Step 3: Pour the Sweetened Condensed Milk Mixture
In a separate bowl, mix the 1 can Sweetened Condensed Milk, 1 tsp Vanilla Extract, and 0.25 tsp Salt until smooth. Pour this mixture evenly over the peanut butter cups, making sure it seeps into the cake mix layer below. The condensed milk acts as the glue, binding everything together.
Use a spatula to gently spread it around, ensuring it reaches all the edges and corners. You’ll notice the cake mix start to absorb the liquid almost immediately—that’s exactly what you want.
Step 4: Top with Chocolate Chips and Peanuts
Sprinkle the 1 cup Chocolate Chips evenly over the condensed milk layer. Then, add the 0.5 cup Chopped Peanuts on top for a satisfying crunch in every bite. These toppings will soften slightly but retain their texture, adding contrast to the creamy layers below.
Press down lightly on the chocolate chips and peanuts so they stick to the condensed milk layer. This prevents them from shifting around when you add the final butter layer.
Step 5: Drizzle with Melted Butter and Finish
Melt the 1 cup Unsalted Butter and drizzle it evenly over the entire dish. The butter will seep through all the layers, enhancing the flavors and creating a rich, decadent texture. I tilt the dish slightly to ensure the butter covers every spot.
Cover the dish and refrigerate for at least 4 hours, or overnight if possible. This chilling time allows all the layers to set and meld together. For an extra touch, I sometimes dust the top with 0.25 cup Powdered Sugar or drizzle with 1 cup Heavy Cream before serving.
Pro Tips For Making Peanut Butter Cup Dump Cake Recipe With Cake Mix
- Melt Butter Slowly: Use low heat to melt the butter before mixing—high heat can separate it, leaving your cake greasy instead of rich. I learned this the hard way after my first batch had an oily layer on top.
- Chop Peanut Butter Cups: Roughly chop the peanut butter cups into chunks instead of leaving them whole. This distributes the flavor better and prevents sinking to the bottom.
- Don’t Overmix: Stir the cake mix just until combined with the wet ingredients. Overmixing makes the cake dense—this isn’t a cake you beat for air, it’s a dump-and-go treat.
- Add Chips Last: Fold in the chocolate chips after everything else is mixed. This keeps them from melting into the batter and disappearing, so you get gooey pockets instead.
Storing and Reheating This peanut butter cup dump cake recipe with cake mix
Room Temperature Storage
Let this dessert set completely before covering with plastic wrap or aluminum foil. It stays fresh at room temperature for up to 3 days. I always keep it in a cool, dry spot away from direct sunlight. The flavors actually improve after 24 hours as everything melds together. ❄️
Refrigerator Storage
For longer storage, refrigerate in an airtight container for up to 5 days. David swears the chilled version tastes even better—the peanut butter cups firm up slightly, giving a nice contrast to the fudgy base. Just let it sit at room temp for 15-20 minutes before serving.
Freezing for Later
This freezes beautifully for up to 3 months. Wrap individual slices in plastic wrap, then place in a freezer-safe bag. I label with the date so I don’t forget. Thaw overnight in the fridge before serving. The texture stays surprisingly good after freezing.
Reheating Methods
For a warm treat, microwave individual portions for 10-15 seconds. The peanut butter cups will get gooey again, almost like fresh-baked. Avoid overheating—this dessert is best just slightly warmed. I sometimes add a scoop of vanilla ice cream on top for an extra indulgent treat.
Serving from Chilled
If serving straight from the fridge, let it sit at room temperature for 20-30 minutes first. This softens the layers just enough for easy serving. Use a sharp knife dipped in hot water for clean slices. The contrast between the cool, firm base and melted peanut butter is divine. 💛
Nutrition Facts
Frequently Asked Questions
Can I use white cake mix instead of chocolate?
You can, but the flavor will be much milder. For best results, add 1/4 cup cocoa powder to the white mix to deepen the chocolate taste. The contrast with peanut butter cups works best with a chocolate base.
How long does it need to chill before serving?
Refrigerate for at least 4 hours, but overnight is ideal. This gives the cake mix time to absorb the moisture and the layers to set properly. Don’t rush it—patience pays off!
Can I use mini peanut butter cups?
Yes, but you’ll need about 48 minis to match the coverage of 24 standard. They’ll melt faster, so press them lightly into the cake mix to keep them in place.
Why did my cake mix stay dry on top?
This usually means the butter or condensed milk didn’t distribute evenly. Next time, tilt the dish to ensure full coverage. Also, press the cake mix down gently to help it absorb the liquid.

- Pina Colada Dip Recipe Red Lobster: Tropical Creaminess With Toasted Coconut - October 12, 2026
- Pickled Sweet Cherry Peppers Recipe Canning: Tangy Heat for Pantry Staples - October 12, 2026
- Peppercorn Sauce Recipe Vegan: Rich Umami Depth Without Cream - October 12, 2026