
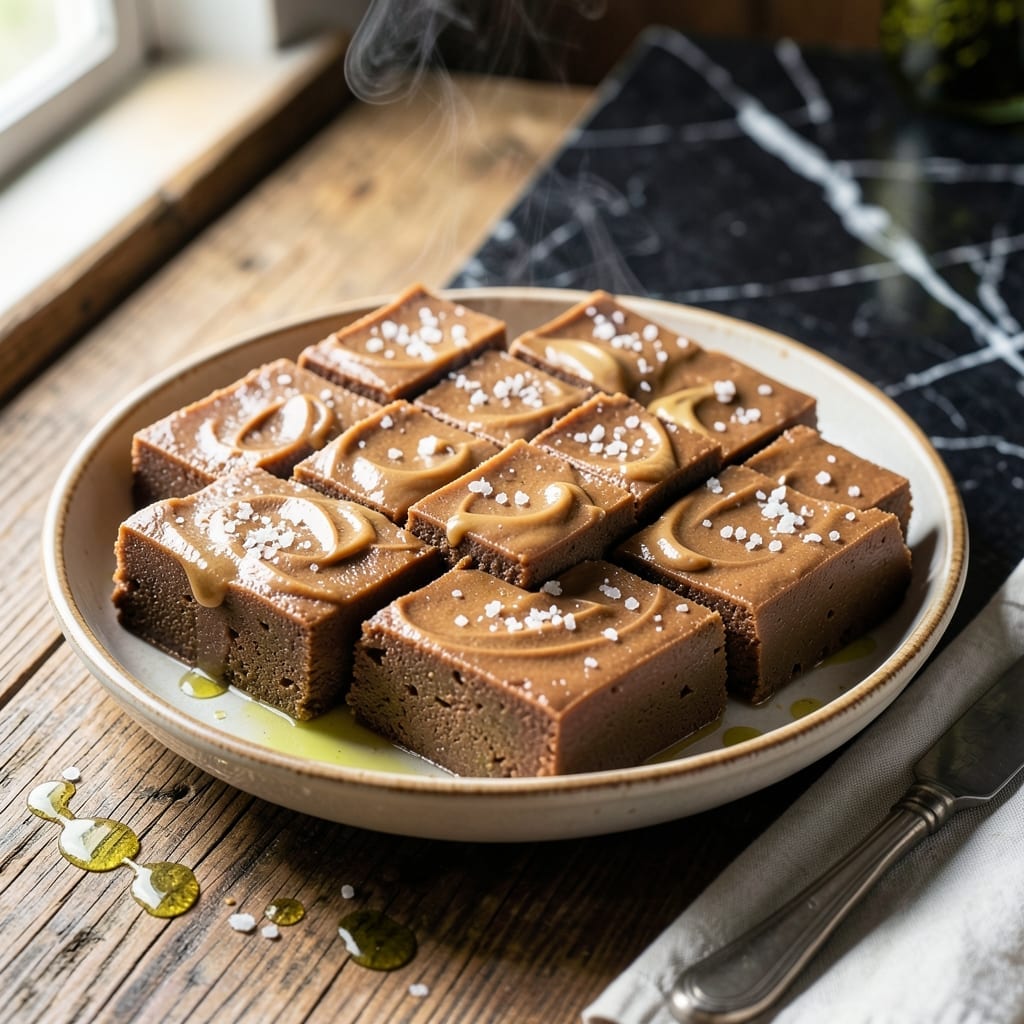
This no-bake fudge delivers ultra-creamy results with minimal effort and maximum flavor.
I developed this method after years of testing, and the evaporated milk creates a velvety texture that melts in your mouth. The process requires just a saucepan and patience as the mixture thickens to perfection.
What emerges is rich peanut butter fudge with a smooth, luxurious consistency that rivals any candy shop version. The evaporated milk ensures it stays soft and creamy, never grainy or crumbly.
Perfect for gifting or satisfying sweet cravings, this recipe proves that the best treats often require the least amount of oven time.
Ingredients for Peanut Butter Fudge Recipe Using Evaporated Milk
Just seven ingredients for ultra-creamy no-bake peanut butter fudge that melts in your mouth.
| Ingredient | Amount | Notes |
|---|---|---|
| Granulated Sugar 🍚 | 3 cups | Fine white sugar preferred |
| Creamy Peanut Butter 🥜 | 1 cup | Natural or commercial both work |
| Evaporated Milk 🥛 | 1 can | 12 oz can, undiluted |
| Unsalted Butter 🧈 | ½ cup | 1 stick, cut into pieces |
| Vanilla Extract 🌿 | 1 tsp | Pure extract recommended |
| Salt 🧂 | ¼ tsp | Fine grain for even distribution |
| Marshmallow Fluff 🧁 | 1 jar | 7 oz jar, for extra creaminess |
The evaporated milk is non-negotiable for that velvety texture—Carnation is the most reliable brand at any grocery store. Creamy peanut butter (Jif or Skippy) works better than natural here since it blends smoothly without separating. Unsalted butter lets you control the salt level, and Land O’Lakes is a safe bet. Don’t skimp on the vanilla; pure extract makes a noticeable difference in flavor depth.
No evaporated milk? Sweetened condensed milk changes the texture but works in a pinch—just reduce sugar by half. Natural peanut butter can substitute, but stir it well first (or the oil will separate). Marshmallow creme instead of fluff is identical—just a different brand name. For a lighter version, reduced-fat evaporated milk works but may yield slightly less creamy results.
Store fudge in an airtight container at room temperature for up to 1 week, or refrigerate for 2 weeks. Freezing is possible for 3 months, but thaw slowly to prevent condensation. Cut into squares only after fully set to avoid crumbling.
Why You’ll Love This Recipe
- One Pot Wonder: I love that I can make this fudge in a single saucepan—no fancy equipment, just melted butter, sugar, and evaporated milk simmering together.
- Rich & Creamy: The evaporated milk gives it this velvety texture that pairs perfectly with the deep peanut butter flavor.
- Holiday Staple: Between us, this is my go-to for cookie swaps and gift boxes—everyone always asks for the recipe.
- Budget Friendly: Five simple ingredients I already keep on hand, and it makes a big batch for pennies compared to store-bought.
Step-by-Step Instructions for Peanut Butter Fudge Using Evaporated Milk
This no-bake method delivers perfectly creamy, melt-in-your-mouth fudge with minimal effort.
Step 1: Combine and Boil the Sugar Mixture
In a heavy-bottomed saucepan, combine the 3 cups Granulated Sugar, 1 can Evaporated Milk, and 0.5 cup Unsalted Butter cut into pieces. Place over medium heat and stir constantly until the butter melts and the sugar begins to dissolve.
Once boiling, stop stirring and let the mixture reach a full rolling boil. Continue boiling for 4-5 minutes, undisturbed, until it reaches the soft-ball stage (234-240°F on a candy thermometer). Watch for the mixture to thicken slightly and turn a light caramel color.
Step 2: Incorporate Peanut Butter and Fluff
Remove the saucepan from heat and immediately stir in the 1 cup Creamy Peanut Butter and 1 jar Marshmallow Fluff. The peanut butter will begin to melt into the hot sugar mixture, creating a smooth, glossy base.
Use a wooden spoon or silicone spatula to fold the ingredients together until fully combined. The mixture will be thick and slightly sticky. This step ensures the fudge has that signature creamy texture and rich peanut butter flavor.
Step 3: Add Vanilla and Salt for Depth
Stir in the 1 tsp Vanilla Extract and 0.25 tsp Salt until evenly distributed. The vanilla adds warmth and balances the sweetness, while the salt enhances the peanut butter flavor.
At this point, the mixture should be thick, smooth, and pulling away slightly from the sides of the pan. If it seems too thin, let it sit for 1-2 minutes to cool and thicken slightly before proceeding.
Step 4: Pour, Set, and Cut into Squares
Line an 8×8-inch baking pan with parchment paper, leaving an overhang on the sides for easy removal. Pour the fudge mixture into the pan and spread it evenly with a spatula. The top should be smooth and glossy.
Let the fudge cool at room temperature for 1-2 hours until fully set. For faster results, refrigerate for 30-45 minutes. Once firm, use the parchment overhang to lift the fudge out of the pan and cut into 16 equal squares.
Pro Tips For Making Peanut Butter Fudge Recipe Using Evaporated Milk
- Boil to 235°F: Use a candy thermometer and cook the sugar-evaporated milk mixture to exactly 235°F—any lower and the fudge won’t set, any higher and it turns grainy. I learned this the hard way after scraping multiple failed batches out of the pan.
- Stir Constantly: Once the sugar and evaporated milk start heating, stir the pot nonstop with a wooden spoon to prevent scorching on the bottom. After burning one batch, I finally figured out this is the only way to guarantee even cooking.
- Use Fresh Evaporated Milk: Check the can’s expiration date—old evaporated milk can curdle when heated with sugar. My grandmother swore by this, and she was right: freshness actually changes the outcome.
- Add Butter Last: Wait until the sugar mixture reaches temperature before stirring in the butter and peanut butter. Sounds weird, but it works: adding them too early can cause separation.
Make-Ahead Tips for This peanut butter fudge recipe using evaporated milk
Prep Ahead Strategy
You can prep all dry ingredients the night before. Measure out the 3 cups Granulated Sugar, 1 cup Creamy Peanut Butter, and ¼ tsp Salt and store in separate containers. This saves 10 minutes on cooking day. 💡
Early Mixture Prep
Combine the sugar, evaporated milk, and butter in your saucepan ahead of time. Cover and refrigerate for up to 8 hours. Just warm slightly before starting to help the butter melt faster.
Pan Preparation
Line your 8×8-inch baking pan with parchment paper up to 24 hours in advance. I keep pre-cut parchment sheets ready to go. This ensures you can pour the hot mixture immediately without scrambling for supplies.
Make in Batches
Double the recipe and make two batches at once. The mixture keeps its texture beautifully when prepared simultaneously. Store one batch in the fridge for up to 2 weeks while gifting the other. 💛
Quick Setting Tip
If you’re short on time, spread the mixture in a shallow, wide container like a rimmed baking sheet. It’ll set in the fridge in just 20 minutes instead of 1-2 hours at room temperature.
Portion Control
For easy serving later, cut the fudge into squares immediately after setting but before it fully firms. Wrap individual pieces in wax paper and store in an airtight container for grab-and-go treats.
Nutrition Facts
Frequently Asked Questions
Can I use crunchy peanut butter instead?
Yes, but it will change the texture. Crunchy peanut butter adds bits of peanuts throughout, giving it a slightly grainy feel. For the smoothest result, stick with creamy.
Why do I need to boil the mixture to 234-240°F?
This temperature ensures the sugar reaches soft-ball stage, creating the right consistency. Too low and it won’t set; too high and it becomes hard and crumbly.
How do I fix fudge that didn’t set?
Reheat it gently over low heat while stirring, then boil again to 234-240°F. Pour into a clean pan and let it cool completely.
Can I skip the marshmallow fluff?
Not recommended. The fluff adds air and creaminess, balancing the density of the peanut butter. Without it, the texture may be too heavy.

- Pina Colada Dip Recipe Red Lobster: Tropical Creaminess With Toasted Coconut - October 12, 2026
- Pickled Sweet Cherry Peppers Recipe Canning: Tangy Heat for Pantry Staples - October 12, 2026
- Peppercorn Sauce Recipe Vegan: Rich Umami Depth Without Cream - October 12, 2026