
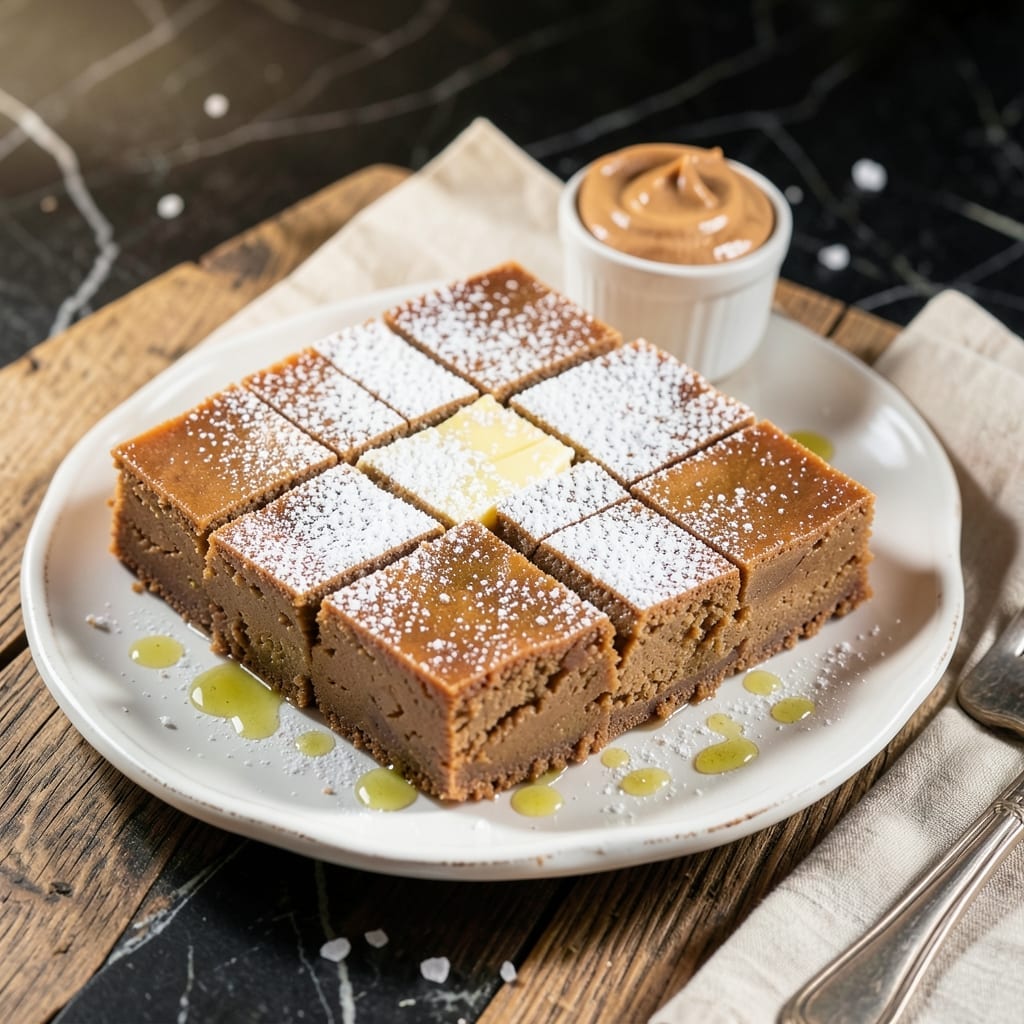
This no-bake fudge delivers rich peanut butter flavor with a velvety texture that melts in your mouth. I developed this recipe after years of testing, perfecting the balance between sweetness and nutty depth.
The secret lies in the combination of sweetened condensed milk and smooth peanut butter, creating a foolproof base that sets perfectly without baking. Just five minutes of prep and a few hours of chilling separate you from this indulgent treat.
Each square offers a dense, fudgy bite with no grainy aftertaste. The addition of vanilla enhances the peanut butter’s natural richness, while a pinch of salt keeps the sweetness from becoming overwhelming.
Ideal for gifting, holiday trays, or satisfying sudden sweet cravings. This method guarantees consistent results every time.
Ingredients for Peanut Butter Fudge Recipe Using Sweetened Condensed Milk
Six simple ingredients create this decadent no-bake treat with melt-in-your-mouth texture.
| Ingredient | Amount | Notes |
|---|---|---|
| Sweetened Condensed Milk 🥛 | 1 can | 14 oz size standard |
| Smooth Peanut Butter 🥜 | 2 cups | Creamy, no sugar added preferred |
| Unsalted Butter 🧈 | ¼ cup | Melted, for smooth texture |
| Pure Vanilla Extract 🌿 | 1 tsp | High-quality for best flavor |
| Fine Sea Salt 🧂 | ¼ tsp | Balances sweetness perfectly |
| Powdered Sugar 🍚 | 1 ½ cups | Sifted for lump-free texture |
The peanut butter is the star here—Jif or Skippy natural work great, but Trader Joe’s has a creamy version that’s perfect (just stir it well first). Sweetened condensed milk is non-negotiable for that signature texture. Eagle Brand is the classic choice, and any grocery store carries it. Butter should be unsalted so you control the salt content. Always use pure vanilla, not imitation (the flavor difference is night and day).
Out of peanut butter? Almond butter or cashew butter work in a pinch (though flavor changes slightly). No sweetened condensed milk? Evaporated milk plus sugar won’t give the same result—just grab a can. Powdered sugar can’t be skipped, but cornstarch in the mix helps prevent graininess. Need to make it gluten-free? Check your peanut butter label—some brands process in shared facilities.
This sets up beautifully at room temperature but firms fastest in the fridge. Keeps in an airtight container for 2 weeks at room temp or 1 month refrigerated. Freeze for up to 3 months (thaw overnight before serving). Cut into squares once fully set for easy portioning.
Why You’ll Love This Recipe
- 5-Minute Magic: I dump everything in one pot, stir, and it sets in the fridge—no candy thermometer, no stress.
- Rich & Creamy: That sweetened condensed milk makes it impossibly smooth with a melt-in-your-mouth peanut butter punch.
- Gift-Worthy Treat: I wrap these in little boxes for teachers, neighbors, or my kid’s soccer team—always a hit.
- Budget-Friendly Batch: Five ingredients, most I already have, and it makes enough to share (or hoard).
Step-by-Step Instructions for Peanut Butter Fudge
This no-bake method guarantees smooth, creamy results with minimal effort and maximum flavor.
Step 1: Melt and Combine the Base Ingredients
In a medium saucepan, melt the 0.25 cup Unsalted Butter over low heat. I keep the temperature gentle to prevent scorching—this is key for smooth texture. Once melted, add the 1 can Sweetened Condensed Milk and stir until fully combined.
Watch for the mixture to become glossy and slightly thickened—this usually takes 2-3 minutes. Don’t let it boil. You’re building the foundation for that signature velvety consistency everyone loves in this treat.
Step 2: Incorporate the Peanut Butter
Remove the saucepan from heat and immediately stir in the 2 cups Smooth Peanut Butter. I use a wooden spoon for this—it helps work the peanut butter into the warm mixture without introducing air bubbles.
Keep stirring until the mixture is completely smooth and uniform in color. This step transforms the liquid base into a thick, rich paste. If it seems too stiff, don’t worry—it’ll loosen slightly as you continue.
Real talk: this is where most people under-mix. Don’t stop until you see no streaks of peanut butter remaining.
Step 3: Add Flavor and Texture Enhancers
Stir in the 1 tsp Pure Vanilla Extract and 0.25 tsp Fine Sea Salt. The vanilla adds depth, while the salt cuts through the sweetness beautifully. I always use pure vanilla extract here—imitation just doesn’t deliver the same richness.
Now gradually add the 1.5 cups Powdered Sugar, about ½ cup at a time, stirring well after each addition. This prevents clumping and ensures an ultra-smooth final product. The mixture will become noticeably thicker as the sugar incorporates.
Step 4: Set and Cut the Fudge
Transfer the fudge mixture to a parchment-lined 8×8-inch baking dish. Use a spatula to press it into an even layer. Here’s the thing—I wet my spatula slightly with warm water to prevent sticking while smoothing the surface.
Let it set at room temperature for 2-3 hours (or 1 hour in the refrigerator if you’re impatient). You’ll know it’s ready when the top is firm to the touch and doesn’t leave an indent when pressed lightly.
Cut into 1-inch squares using a sharp knife. For clean cuts, I run the knife under hot water between each slice. Store in an airtight container at room temperature for up to 1 week—though it rarely lasts that long.
Pro Tips For Making Peanut Butter Fudge Recipe Using Sweetened Condensed Milk
- Stir Constantly: Once the condensed milk and butter hit the heat, don’t walk away—I learned this the hard way after scorching a batch that smelled like regret. Keep the mixture moving with a wooden spoon for 3-4 minutes to prevent hot spots.
- Use Room-Temp Butter: Sounds weird, but it works: let the unsalted butter sit out for 30 minutes before melting. Cold butter can seize up when mixed with peanut butter, leaving little lumps instead of that smooth, dreamy texture.
- Skip Low-Fat Peanut Butter: After burning three batches (okay, fine, it was just one but it felt like three), I realized low-fat peanut butter makes fudge that’s dry and crumbly. Stick with full-fat, smooth peanut butter for the creamiest result.
- Press Plastic Wrap: Before chilling, press plastic wrap directly onto the surface of the fudge in the pan. This keeps it from forming a skin and saves you from having to pick off a weird, dry top layer later.
Make-Ahead Tips for This Recipe
Prep Ahead Strategy
I always mix the dry ingredients—1.5 cups powdered sugar and 0.25 tsp sea salt—the night before. Store in a sealed container to keep it lump-free. This small step saves 5 minutes on busy days. 💡
Early Morning Mix
Combine the sweetened condensed milk and melted 0.25 cup butter first thing in the morning. Let it sit at room temperature while you prep other ingredients. The mixture stays stable for 2 hours before needing to be heated.
Fridge Setting Hack
If you’re short on time, spread the fudge in your 8×8-inch dish and refrigerate for just 1 hour. It’ll set faster than at room temperature. Just
Portion Before Chilling
For easy grab-and-go treats, line mini muffin tins with parchment squares. Spoon in the mixture and chill. These bite-sized portions set in 45 minutes and are perfect for lunchboxes. ✨
Gifting Prep
Cut the fudge into squares after 2 hours of setting, but leave it in the pan. Cover tightly and store at room temperature. The next day, it’ll be perfectly firm for packaging in wax paper-lined boxes.
Long-Term Storage
This treat freezes beautifully for up to 3 months. Wrap individual squares in plastic, then place in a freezer bag. Thaw at room temperature for 30 minutes before serving—no one will know it wasn’t fresh.
Nutrition Facts
Frequently Asked Questions
Can I use natural peanut butter instead of smooth?
Yes, but stir it very well first to incorporate the oils. Natural peanut butter can make the fudge slightly oilier, so press out excess oil before measuring.
Why does my fudge turn out grainy?
Graininess usually means the powdered sugar wasn’t fully dissolved. Gradually add it and stir thoroughly after each addition. Sifting helps too.
How can I make this recipe gluten-free?
Check your peanut butter label—some brands process in shared facilities. Bob’s Red Mill and Smucker’s offer certified gluten-free options.
What’s the best way to cut neat squares?
Use a sharp knife dipped in hot water and wiped clean between cuts. Chill the fudge completely first for cleanest edges.

- Pina Colada Dip Recipe Red Lobster: Tropical Creaminess With Toasted Coconut - October 12, 2026
- Pickled Sweet Cherry Peppers Recipe Canning: Tangy Heat for Pantry Staples - October 12, 2026
- Peppercorn Sauce Recipe Vegan: Rich Umami Depth Without Cream - October 12, 2026