
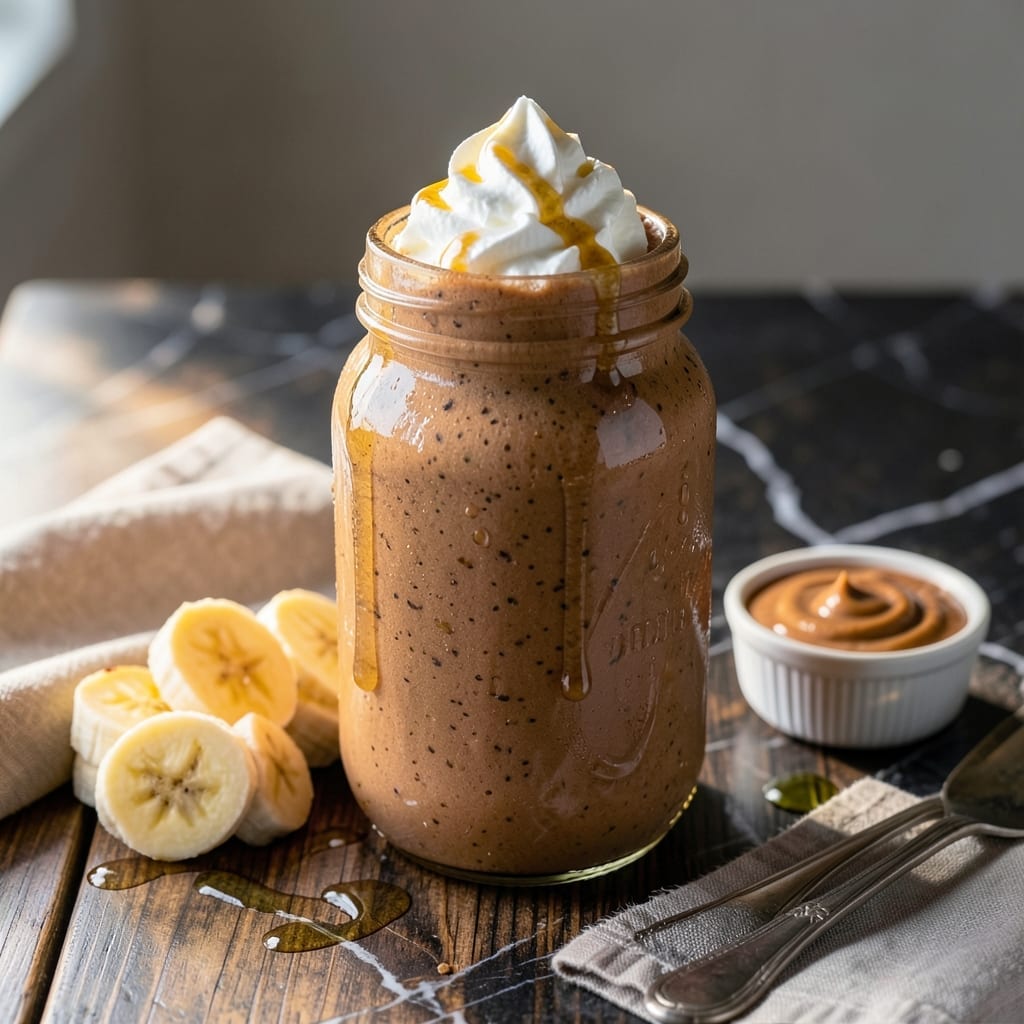
This peanut butter milkshake delivers creamy richness without a scoop of ice cream. The secret lies in frozen bananas, which blend into a velvety texture that rivals any diner version.
I developed this method after realizing most recipes rely too heavily on ice cream. By using ripe bananas, milk, and peanut butter, you achieve natural sweetness with a thick, milkshake-like consistency.
What you get is a thick, creamy shake with intense peanut butter flavor and a hint of banana. It’s satisfying enough to feel indulgent while being simpler than traditional versions.
The best part? It comes together in minutes with ingredients you likely already have on hand. No ice cream maker required.
Ingredients for Peanut Butter Milkshake Recipe No Ice Cream
Short list. Big flavor. Probably have most of this already.
| Ingredient | Amount | Notes |
|---|---|---|
| Ripe Bananas 🍌 | 2 whole | Frozen, sliced before freezing |
| Creamy Peanut Butter 🥜 | ½ cup | Natural or regular variety |
| Whole Milk 🥛 | 1 cup | Cold for best texture |
| Vanilla Extract 🌿 | 1 tsp | Pure vanilla preferred |
| Honey 🍯 | 2 tbsp | Adjust to taste preference |
| Ice Cubes ❄️ | 1 cup | For extra chill and thickness |
| Salt 🧂 | 0.125 tsp | Enhances peanut butter flavor |
| Ground Cinnamon 🌶️ | ¼ tsp | Optional, for warmth |
The bananas are everything here. Frozen ripe bananas (the ones with brown spots) blend up creamiest—peel and slice them before freezing so they’re ready to go. The peanut butter? Smucker’s Natural or Jif Creamy both work great. I always keep a bag of frozen banana slices in the freezer (worth the extra minute to prep them ahead).
No honey? Maple syrup or agave at the same amount works fine. Want it thicker? Add a few more banana slices (or a splash more milk if it’s too thick). Vanilla extract is non-negotiable though—it’s the magic that makes it taste like a real milkshake. The cinnamon is optional but trust me on the pinch (adds a nice warmth).
Best consumed right away, but leftovers keep 1 day in the fridge. Give it a good stir before drinking since it separates. Double the batch if sharing—2 servings disappear fast.
Why You’ll Love This Recipe
- Blender Magic: I toss in bananas, peanut butter, and milk—no ice cream needed—and it’s ready in 60 seconds flat.
- Crave-Worthy Creaminess: The ripe bananas blend into this rich, velvety texture that tastes like dessert but feels like a hug in a glass.
- Breakfast or Dessert: Honestly, I’ve served this for a quick morning boost and as a late-night treat—no one complains either way.
- Pantry Staples: Between us, I always have these ingredients on hand, so I can make this whenever the craving hits without a grocery run.
Step-by-Step Instructions for Peanut Butter Milkshake No Ice Cream
This method delivers the thickest, creamiest texture without a single scoop of ice cream.
Step 1: Freeze and Slice the Bananas
Begin by peeling the 2 whole Ripe Bananas and slicing them into ½-inch thick coins. Arrange the slices in a single layer on a parchment-lined tray—this prevents them from sticking together during freezing.
Place the tray in the freezer for at least 2 hours or until the banana slices are completely solid. Frozen bananas are the secret to achieving that thick, milkshake-like consistency without ice cream. The colder they are, the creamier your final result will be.
Step 2: Blend the Liquid Base
In a blender, combine the 1 cup Whole Milk, 0.5 cup Creamy Peanut Butter, 1 tsp Vanilla Extract, 2 tbsp Honey, 0.125 tsp Salt, and 0.25 tsp Ground Cinnamon. Pulse a few times to break up the peanut butter, then blend on high for 20-30 seconds until smooth.
Watch for the mixture to turn pale and creamy—this means the peanut butter is fully incorporated. If it looks too thick at this stage, don’t worry; the frozen bananas and ice will balance it out. Taste and adjust the honey if you prefer it sweeter.
Step 3: Add Frozen Bananas and Ice
Add the frozen banana slices and 1 cup Ice Cubes to the blender. Start blending on low speed, then gradually increase to high. Use a tamper (if your blender has one) to push the ingredients toward the blades.
Blend for 30-45 seconds until the mixture is completely smooth and thick. You’ll know it’s ready when it looks like soft-serve ice cream and no chunks remain. If it’s too thin, add a few more ice cubes and blend again. If it’s too thick, add a splash of milk to loosen it.
Step 4: Check Consistency and Adjust
Pause the blender and use a spatula to check the texture. It should be thick enough to hold its shape when scooped but still pourable. If it’s grainy, blend for another 10-15 seconds until silky smooth.
Here’s the thing—if your blender struggles, stop and scrape down the sides before continuing. Overworking the motor can burn it out, and the heat from prolonged blending can thin the milkshake. The goal is a chilled, velvety consistency that coats the glass.
Step 5: Serve Immediately
Pour the milkshake into chilled glasses. The cold glasses will help maintain the thickness longer. For an extra touch, drizzle a little extra honey on top or sprinkle a pinch of cinnamon for warmth.
Serve right away with a straw or spoon—this shake is so thick, you might need both! The flavor deepens as it sits, but the texture is best fresh from the blender. Enjoy the rich, peanut buttery goodness with every sip.
Pro Tips For Making Peanut Butter Milkshake Recipe No Ice Cream
- Chill the Bananas: Freeze your ripe bananas for at least 2 hours before blending—they add the creamy thickness you’d normally get from ice cream.
- Warm the Honey: Microwave the honey for 10-15 seconds to loosen it up, so it blends smoothly instead of sticking to the bottom.
- Skip the Chunks: Measure your peanut butter after stirring the jar well—otherwise, you’ll end up with oily swirls or dry clumps in your shake.
- Blend Milk First: Pour the milk in first, then add the rest—this keeps the blades moving freely and prevents a thick, stuck mess at the start.
Essential Equipment for This Recipe
Blender Selection
This recipe works best with a high-powered blender. I use my Vitamix 5200 for ultra-smooth results, but a Ninja Professional or Blendtec also handles frozen bananas beautifully. 💡
Tamper Tool
A tamper is essential for pushing thick mixtures toward the blades. Most high-end blenders include one, but if yours doesn’t, use a long wooden spoon carefully. Never use metal utensils in a running blender.
Cold Glassware
Serve in chilled 16-ounce mason jars or milkshake glasses. Pop them in the freezer for 10 minutes before pouring to help maintain that perfect thick texture longer.
Measuring Tools
Accurate measurements matter here. Use liquid measuring cups for milk and dry measuring spoons for peanut butter and honey. A kitchen scale ensures perfect banana portions if you’re particular.
Prep Aids
Parchement paper and a baking sheet are crucial for freezing banana slices without sticking. A sharp chef’s knife makes quick work of slicing. These small tools make the process seamless.
Cleanup Help
Have warm soapy water ready immediately after blending. Peanut butter residue hardens quickly. I keep a blender brush by the sink for easy scrubbing of blades and jar. 🔥
Nutrition Facts
Frequently Asked Questions
Can I use almond milk instead of whole milk?
Yes, but use unsweetened almond milk for best results. The shake may be slightly less creamy, so add 1-2 extra frozen banana slices to compensate.
Why do I need frozen bananas?
Frozen bananas create the thick, creamy texture that replaces ice cream. Fresh bananas won’t give you the same milkshake consistency, even with ice. The colder they are, the better the result.
What if my blender can’t handle frozen bananas?
Let the bananas thaw for 10-15 minutes first. Add ¼ cup more milk and blend in batches if needed. Avoid overfilling the blender to prevent straining the motor.
Can I make this ahead of time?
It’s best served immediately, but you can store it in the fridge for up to 1 day. Stir well before serving as it will separate. For best texture, add 5-6 ice cubes and re-blend briefly.

- Pina Colada Dip Recipe Red Lobster: Tropical Creaminess With Toasted Coconut - October 12, 2026
- Pickled Sweet Cherry Peppers Recipe Canning: Tangy Heat for Pantry Staples - October 12, 2026
- Peppercorn Sauce Recipe Vegan: Rich Umami Depth Without Cream - October 12, 2026