
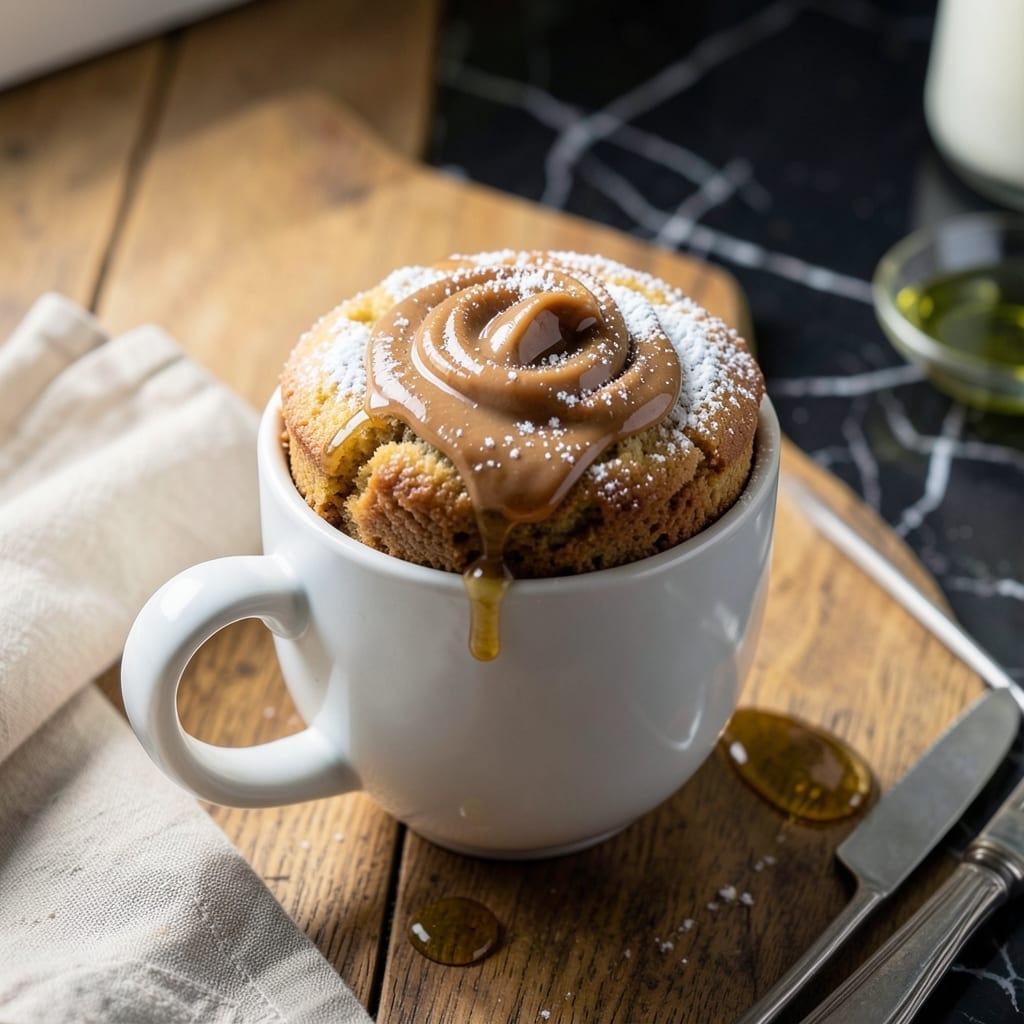
When you need a warm, comforting dessert but don’t want to bake a whole cake, this single-serving solution is the answer. It comes together in 5 minutes with basic pantry staples and no oven required.
The beauty of this method lies in its simplicity. A mug, a microwave, and a handful of ingredients create a moist, rich cake with that classic peanut butter flavor. No eggs means it’s vegan-friendly without sacrificing texture.
What emerges is a tender, fluffy cake with a slightly crisp top edge, packed with peanut butter goodness. The aroma alone makes it worth the minimal effort.
Perfect for satisfying sudden cravings or when you want a treat for one. This delivers every time.
Ingredients for Peanut Butter Mug Cake Recipe No Egg
Nine pantry staples create this quick single-serving dessert with rich peanut butter flavor.
| Ingredient | Amount | Notes |
|---|---|---|
| All-Purpose Flour 🌾 | 4 tbsp | Sifted for light texture |
| Granulated Sugar 🍚 | 3 tbsp | White or brown works |
| Peanut Butter 🥜 | 3 tbsp | Creamy or crunchy preferred |
| Vegetable Oil 🫒 | 2 tbsp | Melted coconut oil too |
| Baking Powder 🧂 | ½ tsp | For rise and fluffiness |
| Vanilla Extract 🌿 | ½ tsp | Pure extract recommended |
| Salt 🧂 | ¼ tsp | Enhances peanut flavor |
| Non-Dairy Milk 🥛 | 3 tbsp | Almond or oat milk ideal |
| Chocolate Chips 🍫 | 1 tbsp | Optional vegan chips |
The peanut butter is the star here. Jif or Skippy work perfectly—just make sure it’s well-stirred before measuring. For oil, any neutral oil (vegetable, canola) keeps the peanut flavor clean. I always reach for Bob’s Red Mill baking powder when I’m restocking my pantry—consistent results every time.
No all-purpose flour? Whole wheat pastry flour works in a pinch (slightly denser result). Out of non-dairy milk? Water plus a splash of oil can substitute, but the milk adds richness. For extra peanut flavor, add chopped peanuts on top before microwaving. The chocolate chips are totally optional but highly recommended.
Best eaten fresh from the microwave while still warm. Leftovers (if there are any) keep 2-3 days covered at room temperature. The batter can be mixed ahead and stored in the fridge for 24 hours—just stir well before microwaving.
Why You’ll Love This Recipe
- 5-Minute Treat: I mix the flour, sugar, peanut butter, oil, and baking powder right in the mug—no extra bowls, no fuss.
- Rich PB Flavor: The peanut butter melts into every bite, giving it that warm, nutty sweetness I crave.
- Late-Night Fix: Honestly, it’s my go-to when the sweet tooth hits at 10 p.m. and I don’t want to dirty a whole kitchen.
- Pantry Staples: I always have these ingredients on hand, so it’s a reliable, budget-friendly dessert in a pinch.
Step-by-Step Instructions for Peanut Butter Mug Cake
This method delivers a moist, perfectly risen mug cake with minimal effort and maximum flavor.
Step 1: Combine Dry Ingredients in the Mug
In a microwave-safe mug, add the 4 tbsp All-Purpose Flour, 3 tbsp Granulated Sugar, 0.5 tsp Baking Powder, and 0.25 tsp Salt. I use a fork to whisk these together until no streaks of flour remain visible. This ensures even distribution of the leavening agent for consistent rise.
The baking powder is what gives this no-egg cake its lift, so make sure it’s fresh and fully incorporated. The sugar will begin to dissolve slightly as you mix, which helps create a tender crumb in the final cake.
Step 2: Mix Wet Ingredients Thoroughly
To the same mug, add the 3 tbsp Peanut Butter, 2 tbsp Vegetable Oil, 0.5 tsp Vanilla Extract, and 3 tbsp Non-Dairy Milk. Stir with the fork until the batter is completely smooth and no lumps of peanut butter remain.
If the peanut butter is thick, the warmth from stirring will help loosen it. The vegetable oil adds moisture since there’s no egg, while the non-dairy milk binds everything together. The vanilla extract enhances the peanut butter flavor, so use pure extract for the best results.
Step 3: Fold in Chocolate Chips and Prep for Microwave
Gently fold in the 1 tbsp Chocolate Chips, reserving a few for topping if desired. I like to press a couple of extra chips into the center of the batter for a gooey surprise in every bite. The chips will soften and melt slightly during cooking, creating pockets of rich chocolate.
Smooth the top of the batter with the back of a spoon to ensure even cooking. The mug should be no more than two-thirds full to allow room for the cake to rise without overflowing. This step prevents messy microwave cleanups.
Step 4: Microwave to Perfection
Microwave on high for 60-90 seconds, depending on your microwave’s power. I start checking at 60 seconds—the cake is done when the top looks set and a toothpick inserted into the center comes out clean or with a few moist crumbs. The edges should pull away slightly from the mug.
If the center still looks wet, continue microwaving in 10-second bursts until fully cooked. Overcooking will result in a dry texture, so err on the side of slightly underdone. The cake will continue setting as it cools slightly in the mug.
Step 5: Rest and Serve Warm
Let the mug cake rest for 1-2 minutes before serving. This brief rest allows the structure to set, making it easier to eat without crumbling. The residual heat will also finish melting any remaining chocolate chips for a gooey texture.
Serve warm, straight from the mug, with a drizzle of extra peanut butter or a sprinkle of flaky salt if desired. The cake should be moist with a tender crumb, and the chocolate chips should be soft and melty. Enjoy immediately for the best texture.
Pro Tips For Making Peanut Butter Mug Cake Recipe No Egg
- Microwave in Bursts: Cook in 20-30 second bursts instead of all at once—I learned this the hard way after pulling out a rubbery hockey puck from overdoing it.
- Use Creamy Peanut Butter: Skip the natural or chunky stuff; creamy peanut butter blends smoother and keeps the cake tender, especially without eggs.
- Don’t Overmix: Stir just until the flour disappears; overmixing makes it dense, and nobody wants a sad, tough mug cake.
- Add a Pinch of Salt: Sounds weird, but it works: a tiny pinch of salt cuts the sweetness and makes the peanut butter flavor pop.
Pro Cooking Tips for peanut butter mug cake recipe no egg
Mug Selection Matters
Use a 12-16 oz microwave-safe mug—this size gives the batter room to rise without spilling over. I prefer wide-mouthed mugs for easier mixing. Avoid ceramic mugs with metallic accents, as they can spark in the microwave. 💡
Peanut Butter Prep
Measure your 3 tbsp peanut butter first and let it sit at room temperature for 5 minutes if it’s cold. Stirring cold peanut butter directly from the jar can create lumps that are hard to smooth out. Jif or Skippy work best for consistent texture.
Mixing Technique
Add dry ingredients first and mix thoroughly before adding wet ingredients. This prevents overmixing once the liquid is added, which can make your cake dense. Use a fork—it’s the perfect tool for whisking in a mug.
Microwave Power Check
If your microwave runs hot, start with 60 seconds and check early. For lower-wattage microwaves, you may need the full 90 seconds. The cake continues cooking slightly after removal, so pull it out when it looks just set. ⚡
Doneness Test
Insert a toothpick into the center—it should come out with a few moist crumbs, not wet batter. If the top looks done but the center is still wet, cover with a damp paper towel and microwave for 10-second intervals until fully cooked.
Resting Time
Let it rest for 1-2 minutes before eating. This allows the structure to set and prevents a crumbly mess. The residual heat melts the chocolate chips completely, creating that perfect gooey texture.
Nutrition Facts
Frequently Asked Questions
Can I use crunchy peanut butter instead of creamy?
Crunchy peanut butter adds a nice texture contrast. Just stir it well before measuring to ensure even distribution in the batter.
What can I substitute for non-dairy milk?
Water works in a pinch, but adds less richness. For best results, use any milk you have on hand—dairy or plant-based. The 3 tbsp measurement stays the same.
Why did my cake turn out dense?
Overmixing the batter or using expired baking powder are common culprits. Mix just until combined and ensure your leavening agent is fresh for a fluffy texture.
Can I make this with gluten-free flour?
Yes, a 1:1 gluten-free baking blend works well. Add 1/4 tsp xanthan gum if your blend doesn’t include it to help with structure.

- Potato Candy Recipe 1933: Vintage Peanut Butter Roll Delight - October 30, 2026
- Potato Chip Cookie Recipe With Pecans: Buttery Crunch Meets Nutty Richness - October 30, 2026
- Potato Patty Recipe No Egg: Crispy Edges Without the Binder - October 30, 2026