
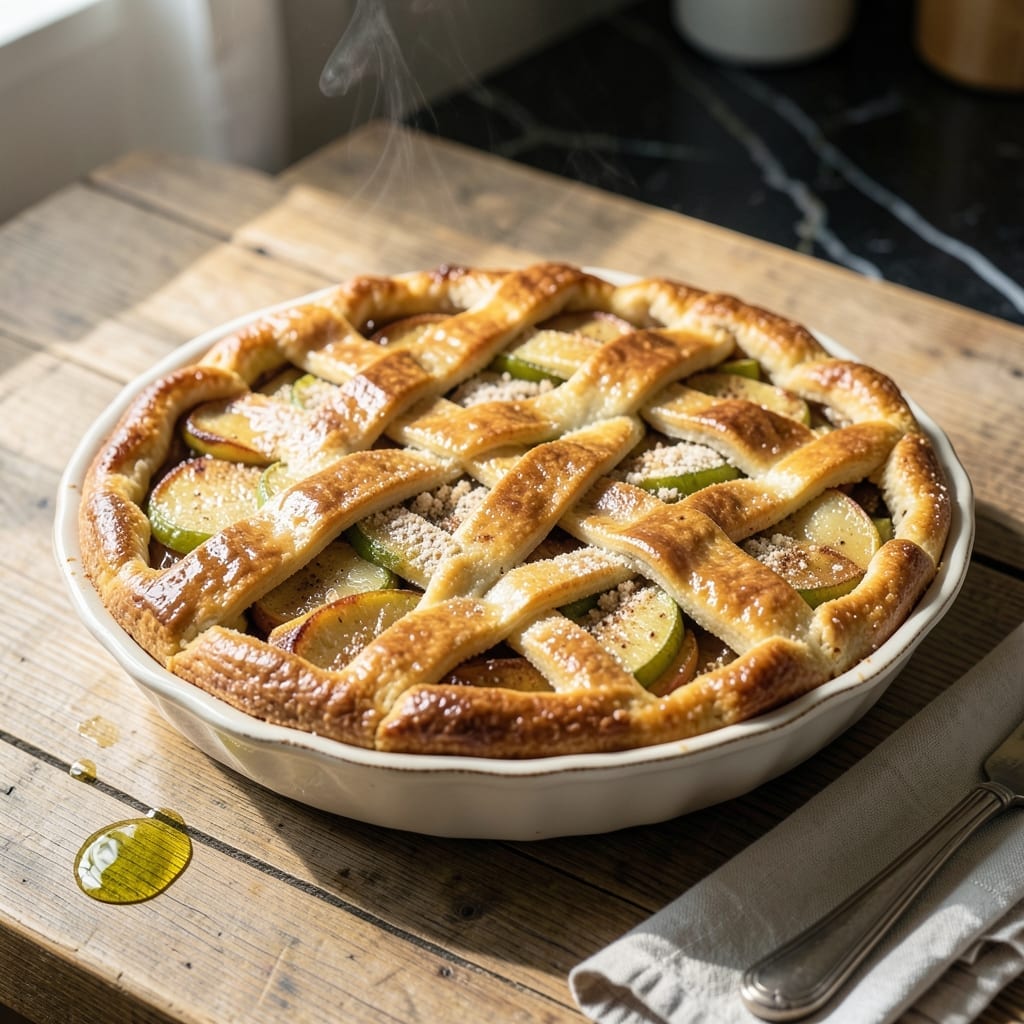
There’s a reason this classic apple pie remains a family favorite—it delivers that nostalgic, homemade taste with minimal effort.
The Pillsbury crust provides a flaky, buttery base, while the spiced apple filling offers just the right balance of sweetness and warmth. It’s a foolproof way to achieve bakery-level results without the fuss.
What makes this version special is its simplicity. The filling comes together quickly with fresh apples, sugar, and cinnamon, ensuring every bite bursts with classic flavor.
Serve it warm with a scoop of vanilla ice cream for the ultimate comfort dessert.
Ingredients for Pillsbury Apple Pie Recipe on Box
Pre-made crust plus fresh apples and spices. Warm, nostalgic dessert in no time.
| Ingredient | Amount | Notes |
|---|---|---|
| Pillsbury Refrigerated Pie Crusts 🥧 | 2 sheets | Thawed 15 minutes at room temperature |
| Granny Smith Apples 🍏 | 6 whole | Peeled, cored, thinly sliced |
| Granulated Sugar 🍚 | ¾ cup | Divided for filling and topping |
| All-Purpose Flour 🌾 | 2 tbsp | For thickening filling |
| Ground Cinnamon 🌿 | 2 tsp | For warm spice flavor |
| Unsalted Butter 🧈 | 2 tbsp | Cubed for dotting filling |
| Lemon Juice 🍋 | 1 tbsp | Freshly squeezed preferred |
| Vanilla Extract 🌿 | 1 tsp | Pure for best flavor |
| Salt 🧂 | ¼ tsp | For balancing sweetness |
| Large Egg 🥚 | 1 whole | For egg wash topping |
| Coarse Sugar 🍚 | 1 tbsp | For sprinkling on crust |
The crust is the shortcut here—Pillsbury refrigerated pie crusts (the kind in the red box) are the way to go. Most grocery stores stock them near the butter and cream cheese. Thaw them at room temperature for exactly 15 minutes (don’t microwave, it makes them soggy). For the apples, Granny Smith gives you that perfect tart-sweet balance, but Honeycrisp or Braeburn work too if you prefer a sweeter bite.
No Granny Smiths? Mix half tart, half sweet apples—like Fuji and Granny Smith for complexity. Out of cinnamon? Apple pie spice in equal measure works great. The butter can be salted if that’s what you’ve got (just skip the added salt). For a richer flavor, brown the butter before cubing it. And yes, you can use pre-sliced apples from the produce section (saves time, same result).
The pie bakes best the day it’s made, but leftovers keep 2-3 days at room temperature (covered). For longer storage, freeze individual slices for up to 2 months. Reheat in a 350°F oven for 10-15 minutes to crisp the crust back up.
Why You’ll Love This Recipe
- No-Fuss Crust: I just unroll the Pillsbury crust and press it in—no mixing, no resting, no stress.
- Sweet-Tart Magic: Granny Smith apples and cinnamon give that bright, tangy bite with just enough warmth.
- Crowd Pleaser: Between us, this pie disappears at potlucks, and no one guesses it started with a box.
- Budget Binder: Honestly, it costs less than a bakery slice and feeds my whole family with one crust left for mini pies later.
Step-by-Step Instructions for Pillsbury Apple Pie
This method delivers that nostalgic apple pie taste with minimal fuss and maximum flavor.
Step 1: Prepare the Pie Crust and Apple Filling
First, let the 2 sheets Pillsbury Refrigerated Pie Crusts thaw at room temperature for 15 minutes. While they soften, peel, core, and thinly slice the 6 whole Granny Smith Apples—aim for slices about ⅛-inch thick so they soften evenly without turning mushy.
In a large bowl, toss the apple slices with ½ cup of the Granulated Sugar, the 2 tbsp All-Purpose Flour, 2 tsp Ground Cinnamon, 1 tbsp Lemon Juice, 1 tsp Vanilla Extract, and 0.25 tsp Salt. The flour thickens the juices, while the lemon juice keeps the apples from browning.
Step 2: Assemble the Pie with a Flaky Top Crust
Unfold 1 sheet of the Pillsbury Refrigerated Pie Crusts and press it gently into a 9-inch pie dish, letting the edges overhang slightly. Spoon the apple mixture into the crust, mounding it slightly in the center. Dot the top with cubed 2 tbsp Unsalted Butter—this melts into the filling, adding richness.
Unfold the second sheet of crust and place it over the filling. Trim and crimp the edges to seal, then cut 4-5 slits in the top crust to allow steam to escape. This prevents a soggy bottom and ensures the crust bakes evenly.
Step 3: Add the Egg Wash and Bake to Golden Perfection
In a small bowl, beat the 1 whole Large Egg lightly, then brush it evenly over the top crust. Sprinkle with the 1 tbsp Coarse Sugar—this adds a delightful crunch and a professional bakery finish.
Place the pie on a baking sheet (to catch any drips) and bake in a preheated 425°F oven for 40-45 minutes. The crust should turn a deep golden brown, and the filling should bubble through the slits. If the edges brown too quickly, cover them with foil.
Step 4: Cool and Serve for the Best Texture
Let the pie cool on a wire rack for at least 2 hours before slicing. I know it’s tempting to dive in, but this waiting period allows the filling to set properly. Cutting too soon will give you a runny slice instead of that perfect, sliceable consistency.
Serve warm or at room temperature. The apples should be tender but still hold their shape, and the crust should be flaky and buttery. Each bite delivers that classic apple-cinnamon warmth with just the right amount of sweetness.
Pro Tips For Making Pillsbury Apple Pie Recipe On Box
- Chill the Crust: Let the Pillsbury pie crust sit in the fridge for 15 minutes after unrolling—it prevents shrinking and keeps that flaky texture. I learned this the hard way after my first few pies looked like they’d been deflated.
- Slice Apples Thin: Cut those Granny Smiths into ¼-inch slices, not chunks. They soften more evenly and pack better into the crust—no one wants a pie with crunchy bits hiding in the middle.
- Vent the Top: Skip the fancy lattice and just cut 4-5 small slits in the top crust. Sounds simple, but it actually changes the outcome—steam escapes, and you avoid a soggy bottom.
- Pre-Bake the Bottom: Blind-bake the bottom crust for 8 minutes before adding the filling. My grandmother swore by this, and she was right: it guarantees a crisp crust, not a gummy one.
Health Benefits of These Flavors
Fiber-Rich Apples
Apples are packed with soluble fiber, particularly pectin, which supports digestive health and helps regulate blood sugar levels. One Granny Smith apple provides about 4 grams of fiber, making this pie a surprisingly good source. I love that dessert can double as a nutrient boost. 💪
Vitamin C Boost
Fresh apples contribute a healthy dose of vitamin C, an antioxidant that supports immune function and skin health. The lemon juice in the filling adds even more, ensuring you get about 20% of your daily vitamin C per serving. It’s a sweet way to sneak in essential nutrients.
Low-Fat Indulgence
This pie keeps the fat content reasonable thanks to unsalted butter used sparingly—just 2 tablespoons for the entire filling. The Pillsbury crust adds minimal fat compared to homemade versions, making it a lighter option for a classic treat. You can enjoy it without the guilt.
Natural Energy Source
The granulated sugar provides quick energy, while the apples offer natural sugars for sustained fuel. Together, they create a balanced energy source that’s perfect for an afternoon pick-me-up. I notice it keeps me satisfied longer than store-bought pastries.
Antioxidant Spices
Ground cinnamon isn’t just for flavor—it’s loaded with antioxidants that fight inflammation. The 2 teaspoons in this recipe contribute to your daily intake while adding that cozy, warm taste. It’s a small ingredient with big health benefits. ✨
Comfort Without Compromise
This pie proves you can enjoy a classic dessert while still getting nutritional perks. The apples, spices, and minimal added fats make it a smarter choice for satisfying your sweet tooth. Honestly, it’s one of my favorite ways to treat myself.
Nutrition Facts
Frequently Asked Questions
Can I use a different type of apple?
While Granny Smith is classic, Honeycrisp or Braeburn work well too. For best results, use a mix of tart and sweet apples for balanced flavor.
How do I prevent a soggy bottom crust?
Place your pie dish on a preheated baking sheet and cut steam vents in the top crust. This ensures even baking and crispness.
Can I make this pie ahead of time?
Yes! Bake it up to 1 day ahead and store at room temperature. Reheat slices in a 350°F oven for 10 minutes to restore crispness.
What if my filling is too runny?
Let it cool completely before slicing. If still loose, next time add an extra 1 tbsp flour to the filling mixture before baking.

- Potato Candy Recipe 1933: Vintage Peanut Butter Roll Delight - October 30, 2026
- Potato Chip Cookie Recipe With Pecans: Buttery Crunch Meets Nutty Richness - October 30, 2026
- Potato Patty Recipe No Egg: Crispy Edges Without the Binder - October 30, 2026